
Rikku Cosplay Tutorial | Final Fantasy X
This content may contain affiliate links. This means that if you make a purchase through one of the links, I may receive a commission. This commission comes at no additional cost to you, and I only recommend products that I personally love. Thank you for supporting my creative work!
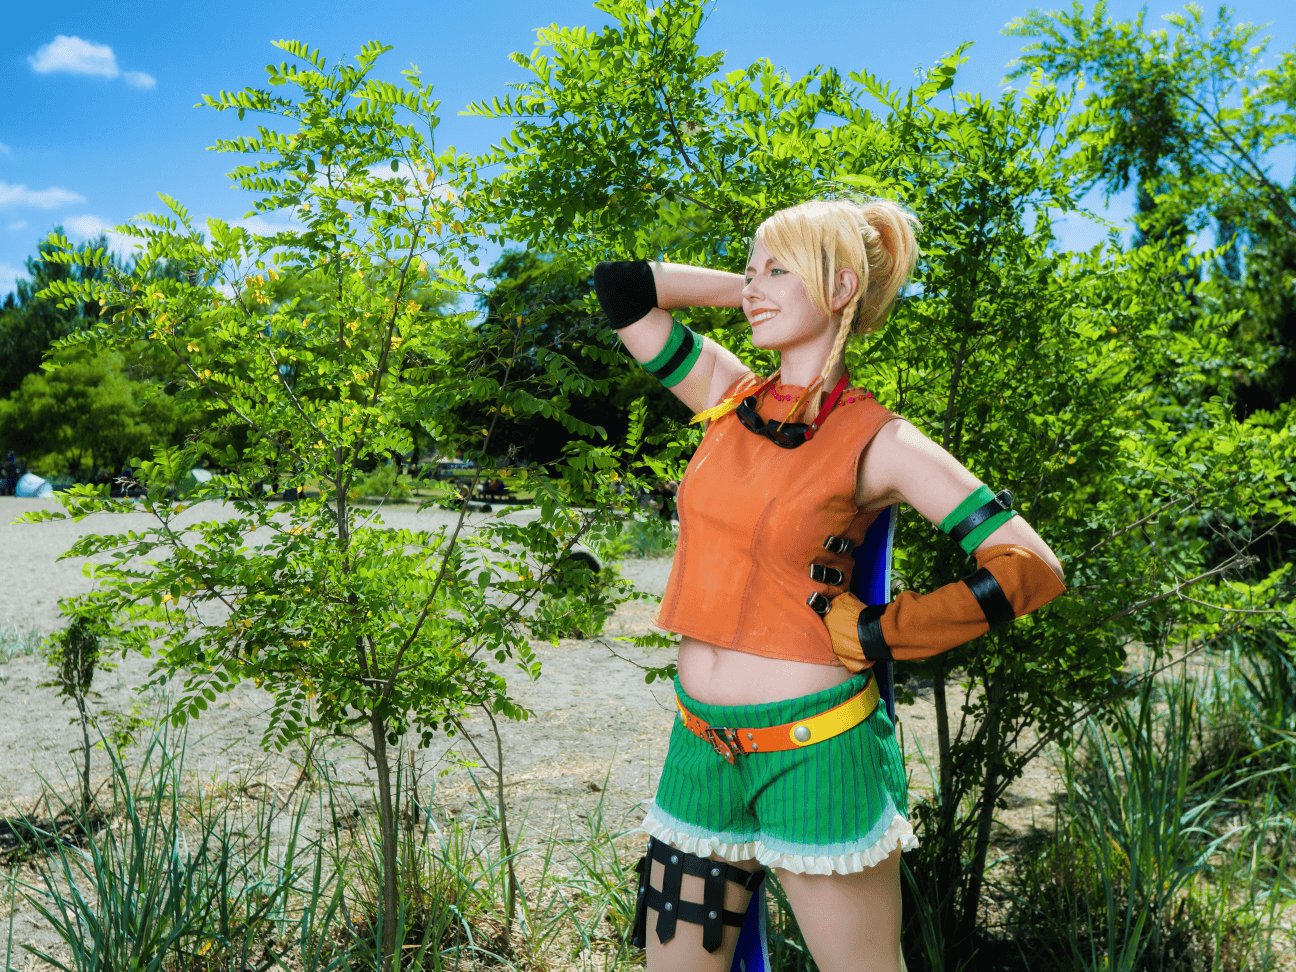
Cosplayer: Queen Amy Dala & Photographer: Dale L Photography
Hey there, cosplay fanatic! Looking to rock a Rikku look from the OG Final Fantasy X? You've come to the right place. Today we'll be going through all the steps you need to take in order to achieve an epic Rikku costume. We'll be covering reference images for inspo, creating a shopping list and budget, gathering your items list, and of course... alllllllll the tutorials broken down step-by-step!
Ready Freddy? Here we goooo!…🌟🍄✊
INSPIRATION
To get started, make sure you have a good idea of what Rikku looks like. Check out some images online, watch the game cutscenes on YouTube, or even better - play through the game yourself (I recently re-played the remastered edition on PS4 and it was just as good as I remembered)! It'll give you a good feel for her vibe and help you to create a more authentic costume.
Good news is, I actually made this step easy for you. Below you’ll see my inspiration board, plus here’s the link to my Rikku FFX Pinterest Board where you can get lots of inspo (you’re welcome 😘… be sure to follow my Pinterest account).

COSTUME ITEMS LIST
Once you've got an idea of how Rikku looks like, it's time to put together your costume items list. You can either buy ready-made versions of the items or DIY them yourself, depending on your budget and skill level. This is what I needed to do:
COSTUME ITEMS I MADE:
Blue Wings
Green & Black Armbands
COSTUME ITEMS I ALTERED:
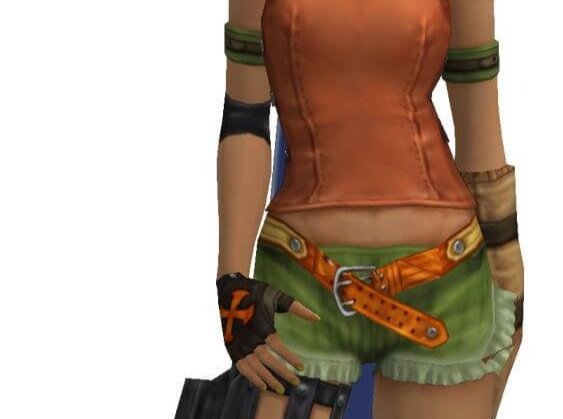
Goggles
Boots
Wig
Orange Top
Orange & Yellow Belt
Green Shorts
Black Pouch Garter
Long Brown Glove
Black Fingerless Glove
I detail the specific steps I took to create each item below in this blog post, plus there are some helpful Rikku Tutorial videos on my Instagram account (@QueenAmyDalaCosplay).
Once you’ll made you items like and you know what you need to buy, and what you need to make it’s time to go SHOPPING (and create a budget for yourself).
SHOPPING LIST & BUDGET
Below is a list of all the items I either bought or had to make my Rikku costume (including links!). Plus I added up how much everything cost me, so you have an idea of what you might be spending.
SUPPLIES I BOUGHT:
Boots $17 CAD (thrifted)
Goggles $3 CAD (thrifted)
Green Shorts $16 CAD (Shein)
Buckle Bracelet x8 $24 CAD (Shein)
Double Grommet belt $5 CAD (Shein)
Lettuce trim turtleneck $16 CAD (Shein)
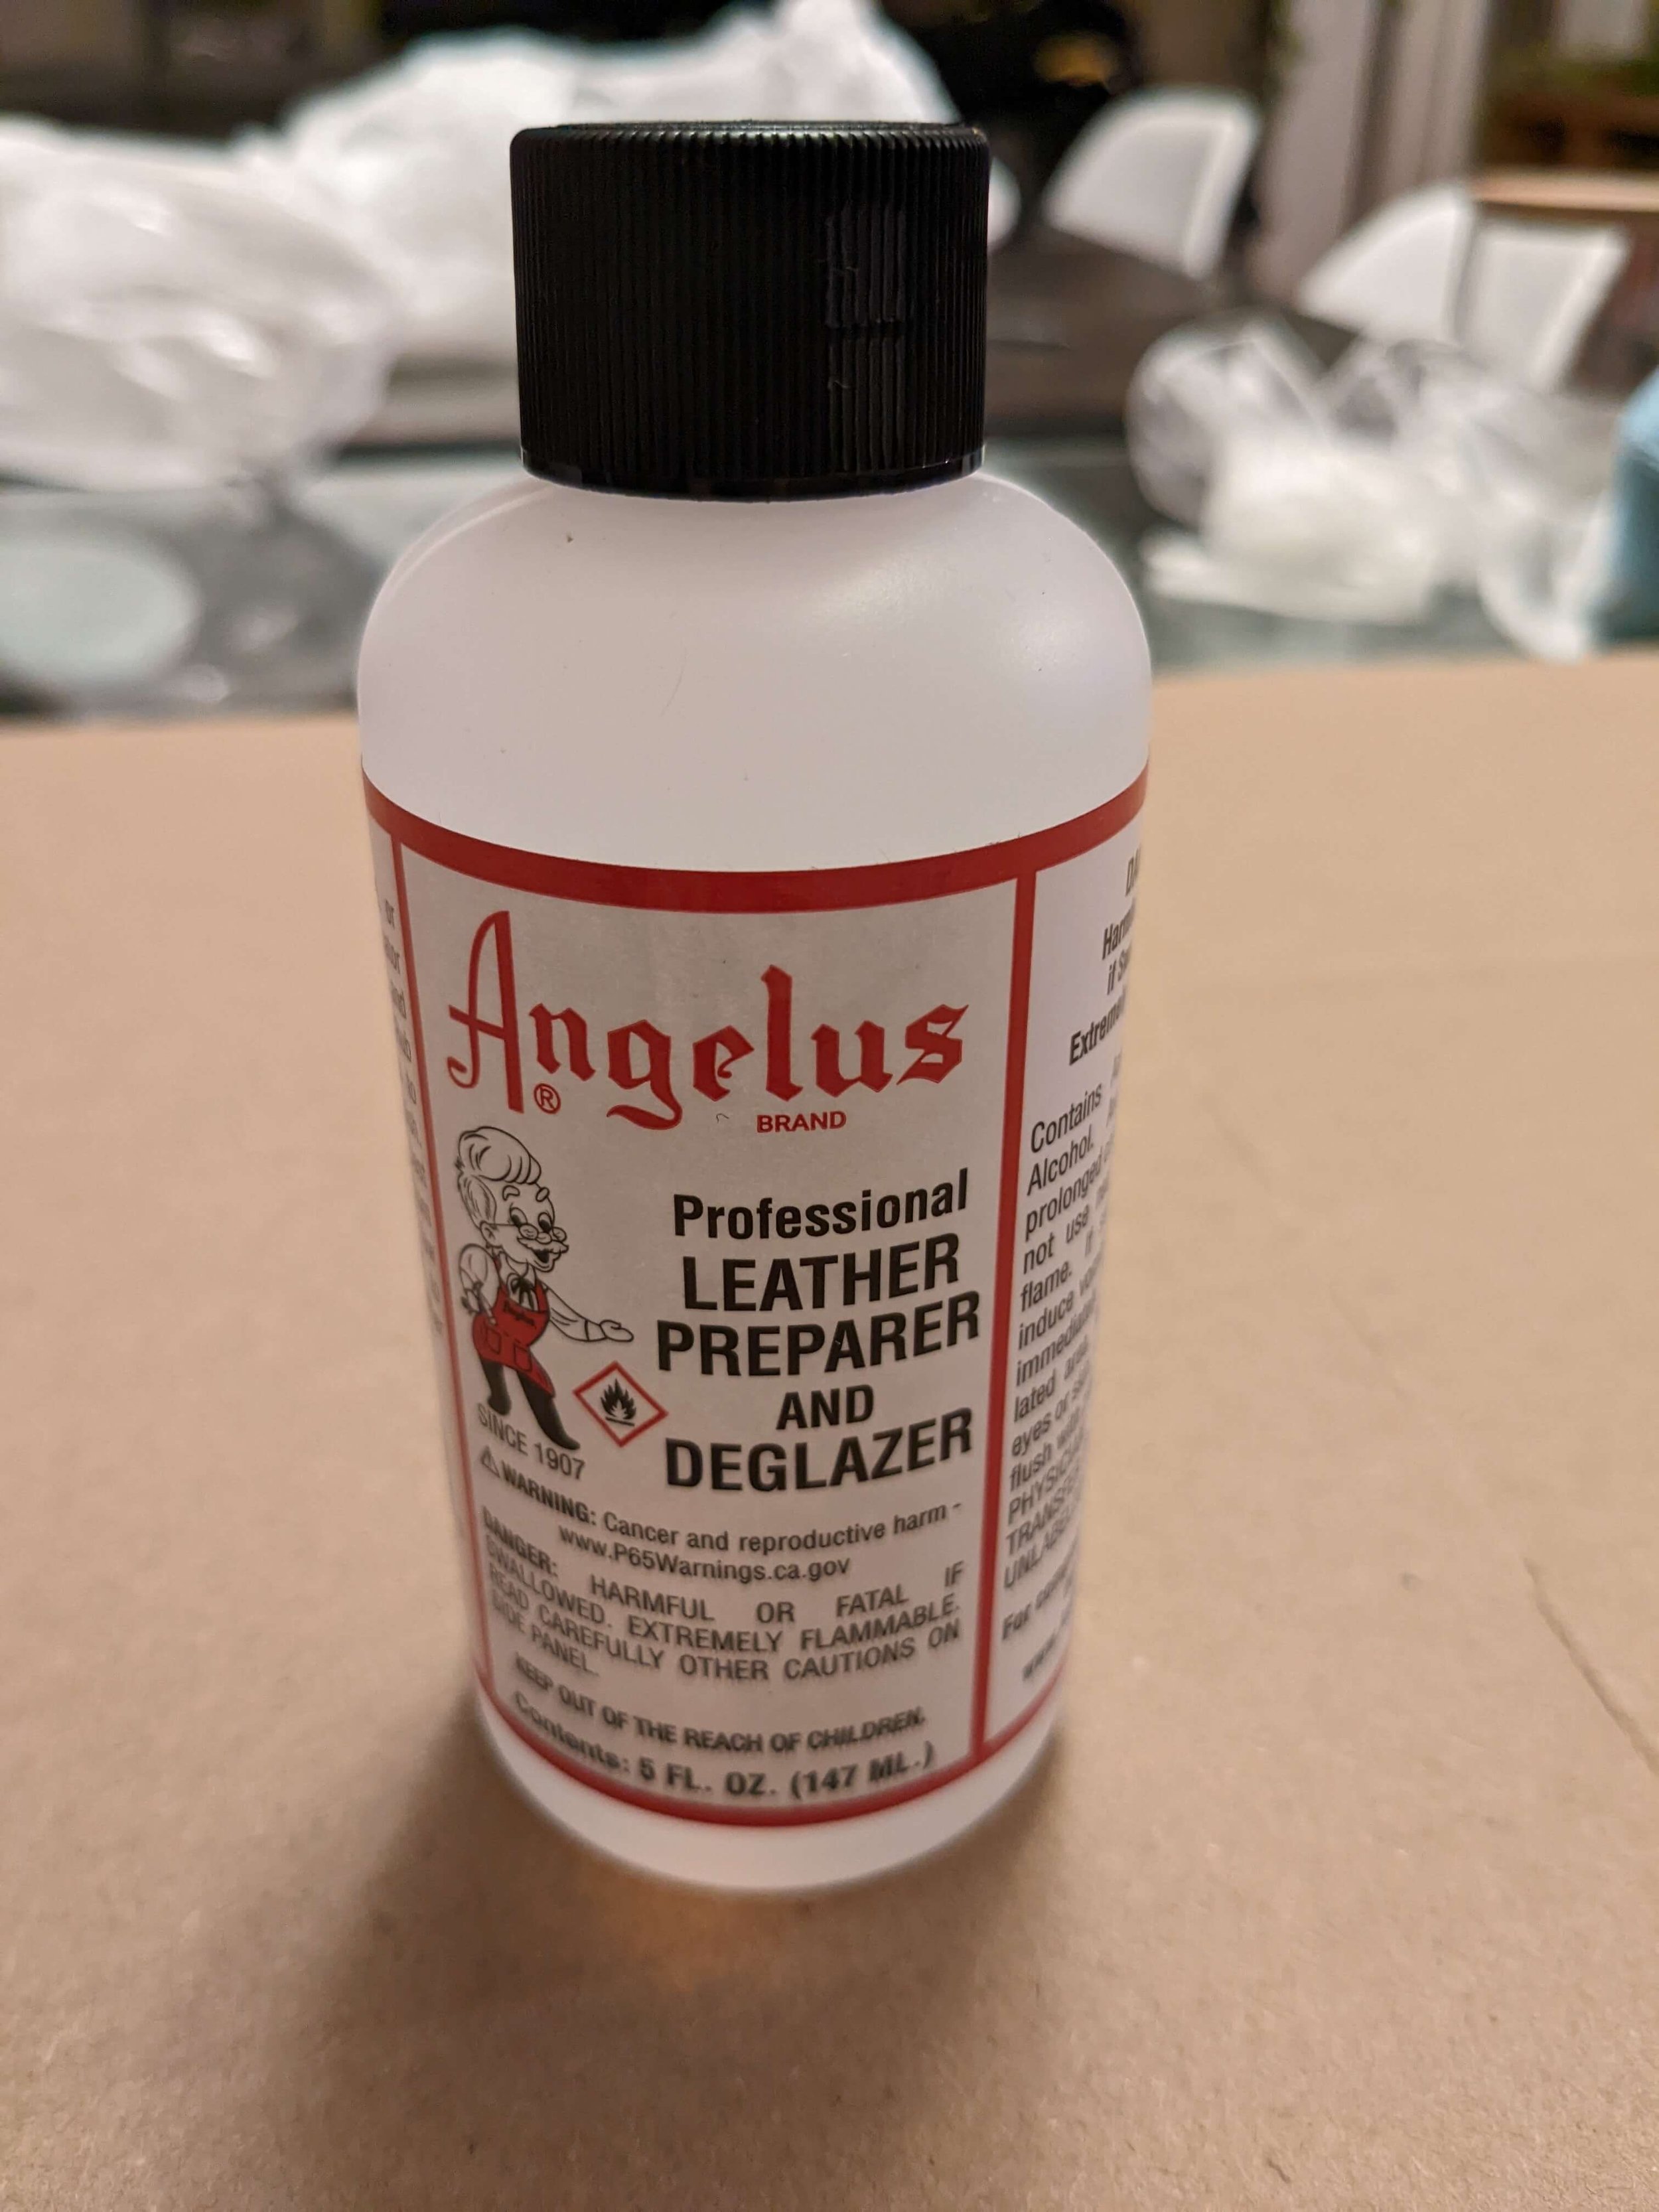
Leather preparer and deglazer $9 CAD (Amazon)
Gardening Gloves $32 CAD (Amazon)
Ruffle Trim $17 CAD (Amazon)
Yellow Ponytail Wig $32 CAD (Amazon)
Yellow & Orange Feathers $6 CAD (Michaels)
Red Elastic $6.50 CAD (Michaels)
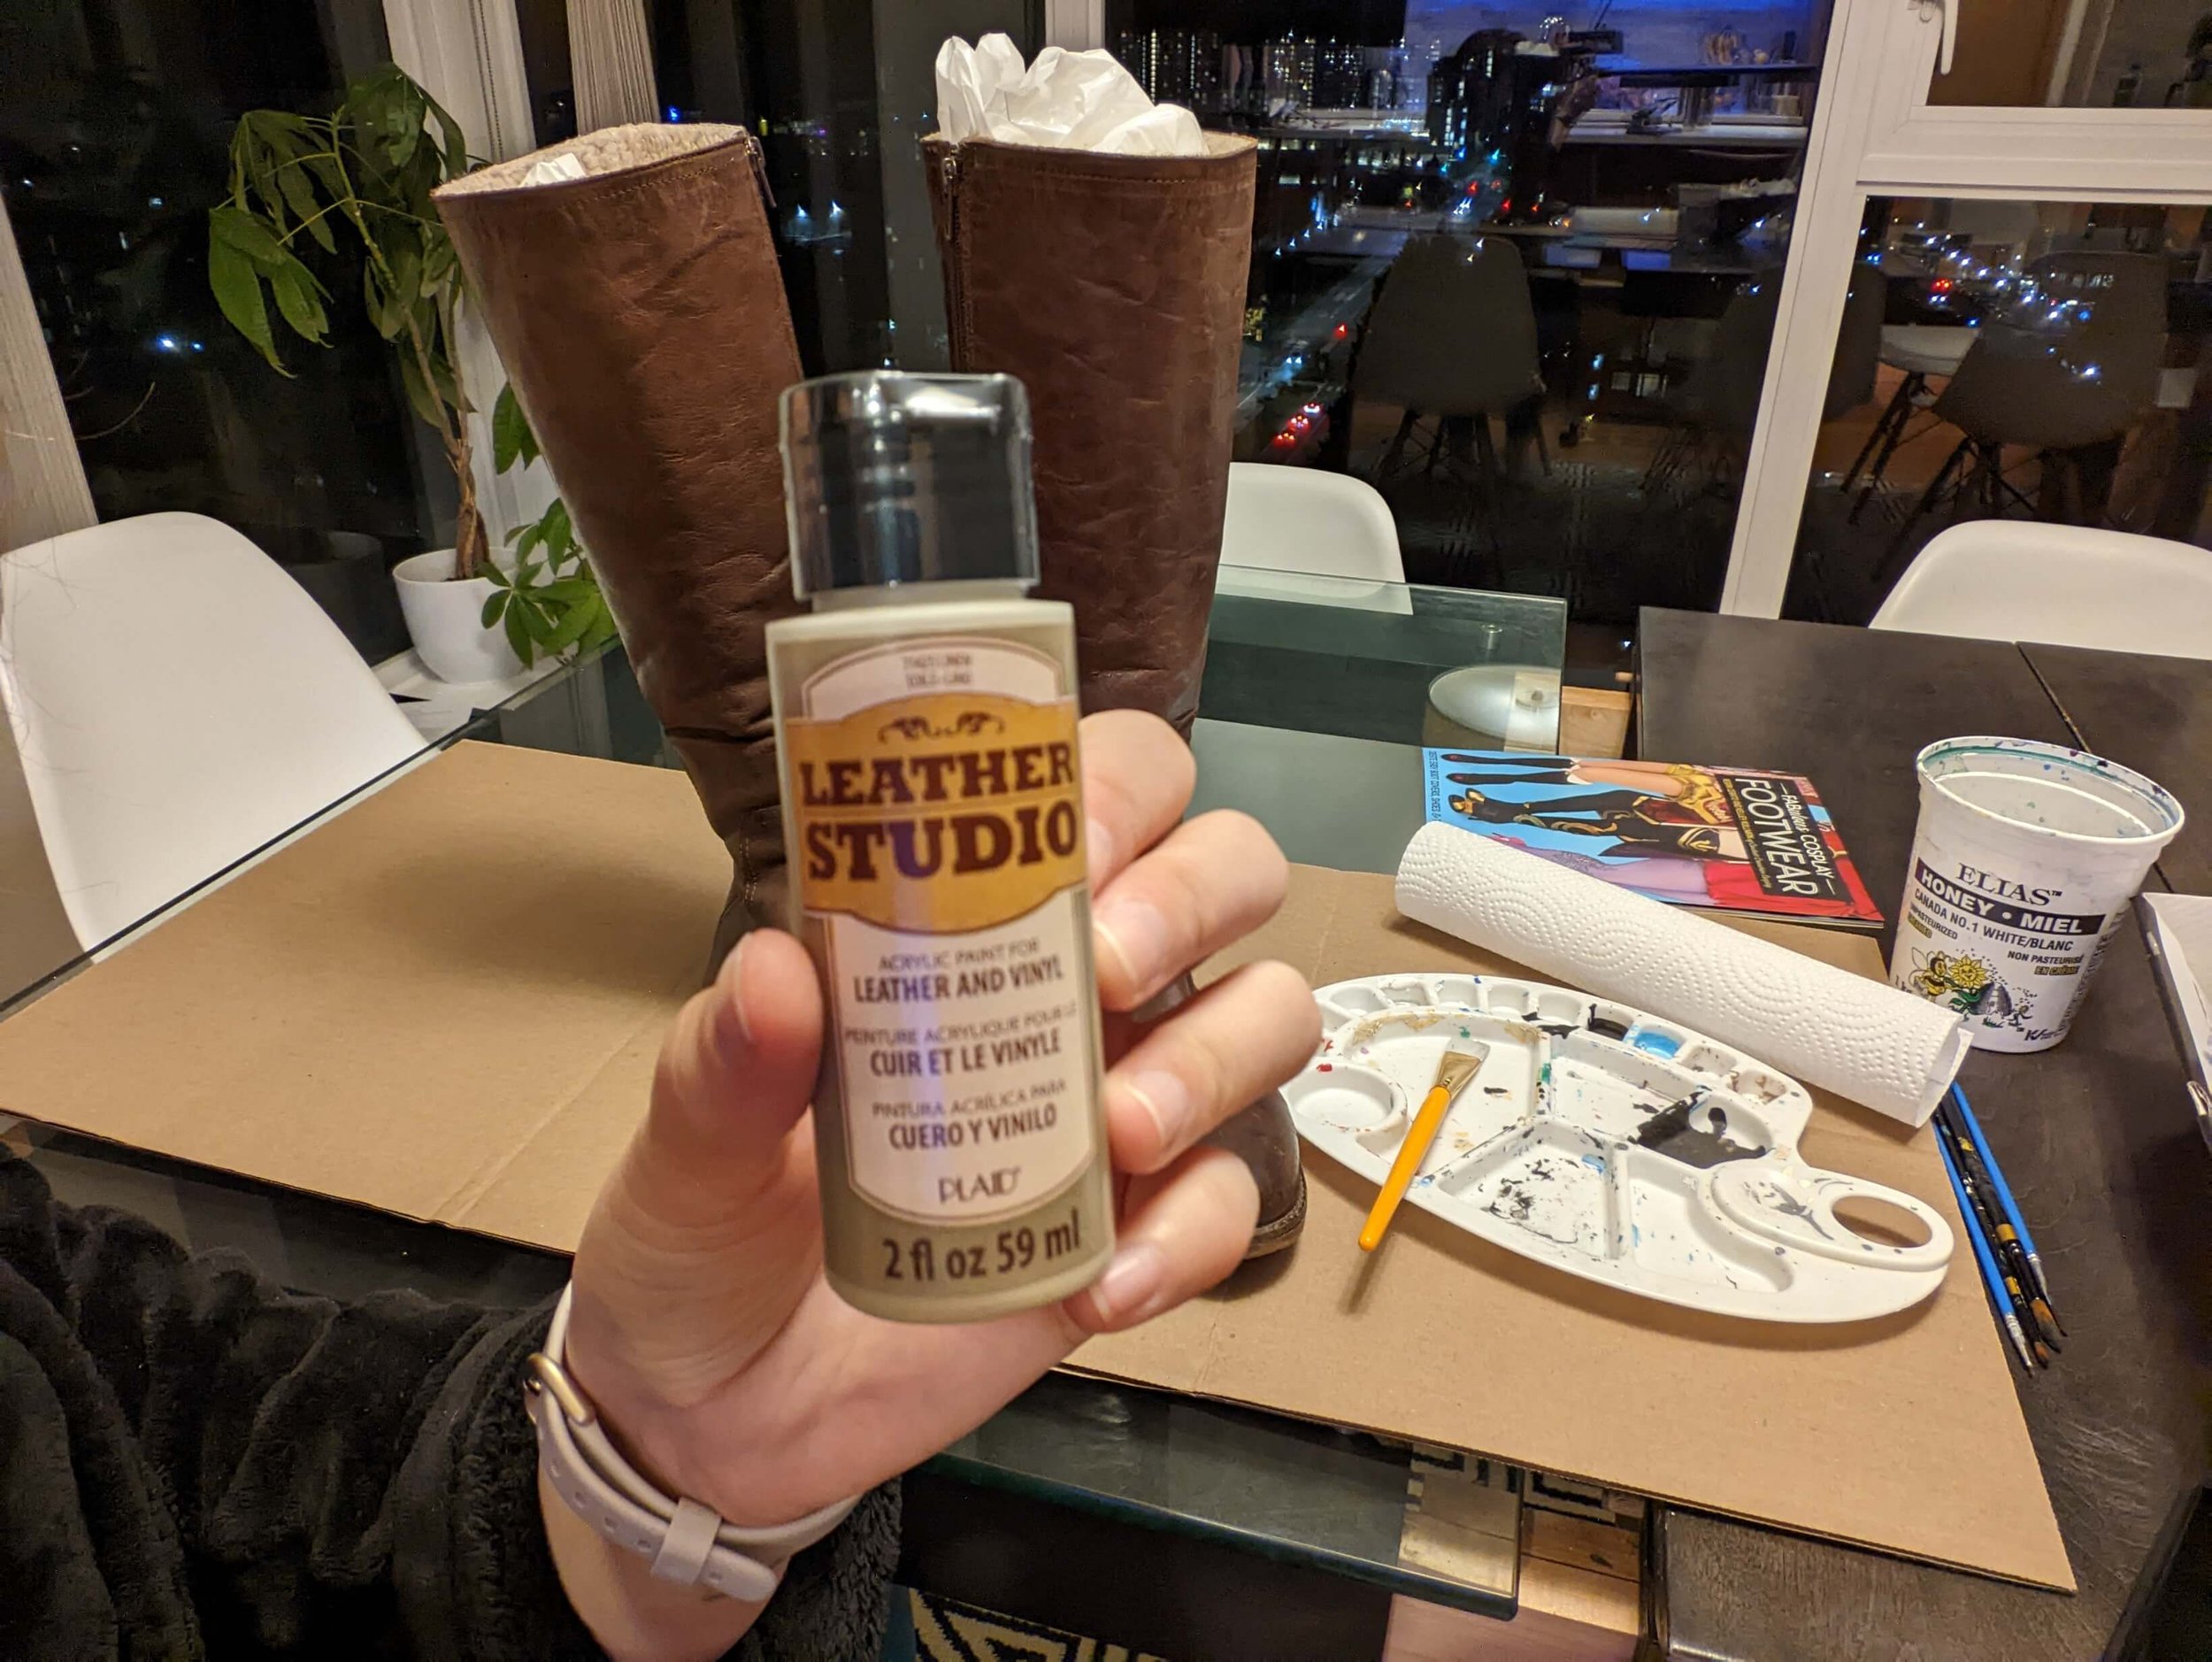
Plaid ® Leather & Vinyl Paint (Linen) $6.50 CAD (Michaels)
Fuchsia Beads $3 CAD (Michaels)
Orange Beads $5 CAD (Michaels)
Googly Eyes $2 CAD (Dollar Store)
Fabric Medium Paint $9 CAD (Amazon)
D-rings & Slide Buckles $18 CAD (Amazon)
PU Leather Leg Pouch $20 CAD (Amazon)
Dark Brown PU Leather Fabric $15 CAD (Amazon)
Faux Leather Strips $26 CAD (Amazon) UPDATE: Don’t use these strips unless you have special glue (maybe contact cement would work?). The hot glue I used didn’t hold at the convention. I remade the garter using black EVA foam, and it looked just as good and held up.
EVA Foam Cosplay - 2mm - White - 14" x 39" Sheet $24 CAD (Amazon)
Green Swirl Contacts - Etia Prism Green $30 CAD (Pudding Lenses)
Black Fingerless Leather Gloves $6 CAD (Shein)
SUPPLIES I ALREADY HAD:
Stretchy jewelry thread
Acrylic paints
Eva Craft Foam Sheets
Pearl Beads & Jewelry Making Supplies
A variety of glues (Hot glue, super glue, multi-purpose glue)
Bobby Pins
Nail Polish
Red Electrical Tape
Scrap Black Fabric
Wig stand
Dress form
COSPLAY BUDGET:
$348 CAD
(Please consider treating me to a $5 coffee by tipping me on Ko-Fi if you get value or inspiration from this tutorial!🙏🥰)
Alrighty then... ready to rock n' roll? Now it's time to get crafting! Scroll down to find the item tutorial you're looking for!
STEP-BY-STEP
FULL FFX RIKKU COSPLAY TUTORIAL
DIFFICULTY LEVEL:
Intermediate
Some basic sewing & crafting involved.
All items altered in some way.
TUTORIAL TABLE OF CONTENTS :
Goggles Tutorial (Click Here)
Boots Tutorial (Click Here)
Garter Pouch Tutorial (Click Here)
Wig Tutorial (Click Here)
Shirt Tutorial (Click Here)
Belt Tutorial (Click Here)
Shorts Tutorial (Click Here)
Blue Wings Tutorial (Click Here)
Gloves & Arm Bands Tutorial (Click Here)
Rikku Goggles Tutorial
Supplies:
Goggles
Red elastic (or any color that you paint red)
Google eyes painted silver
Sewing machine or needle & thread
Glue
Matte black acrylic paint
Reference image:

Starting point…

1. Remove the strap.

2. Paint everything matte black except the lens.
(I used regular acrylic craft paint)

3. Cut the right length & width red elastic.
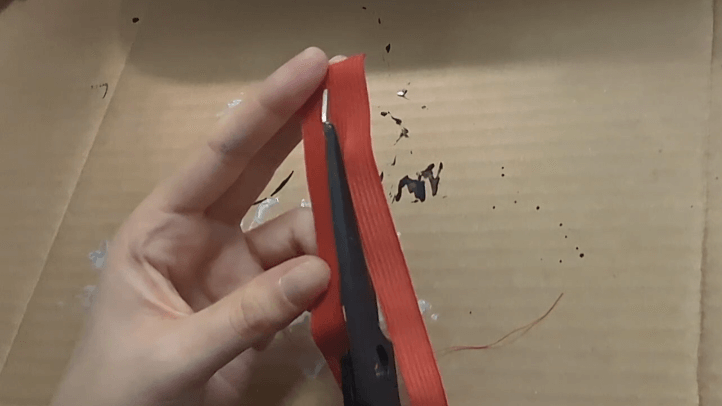
4. Sew elastic to goggles (trim excess elastic).

5. Paint 4 medium googly eyes silver to look like studs.

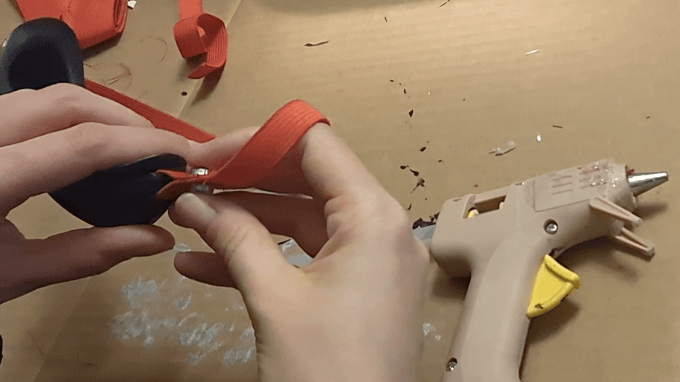
6. Hot glue studs to elastic & glue the elastic together to look like the studs are holding it together.
7. Finished Rikku Goggles!

Click here to go back to the Tutorial Table of Contents.
Rikku Boots Tutorial
Supplies:
Boots
Leather deglazer
Leather paint
Glue (hot glue, crazy glue, multi-purpose flexible glue)
Beading wire
Pearl-like beads (different shapes)
Yellow & orange feathers
Craft foam
Green acrylic paint
Acrylic clear gloss sealer paint
Google eyes painted silver
D-rings & Slide Buckles
Brown leather-like fabric
Jewelry pliers
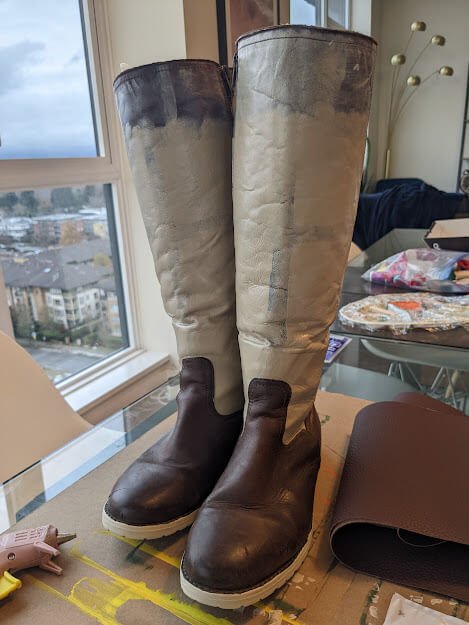
Reference image:
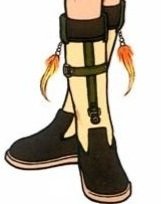
1. Starting point…

2. Deglaze boots and paint two coats of cream (using paint made for leather). Let boots dry in between coats. Also paint the outer edge of the bottom sole white/cream.
3. Cut 1” strips of EVA craft foam.
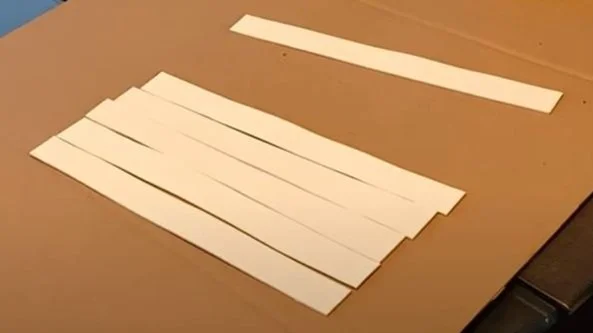
4. Paint foam strips green with acrylic paint (both sides). Let it dry.

5. Seal green foam strips with a clear acrylic gloss medium to make them shiny.

6. Paint googly eyes silver to look like studs (2 x large and 4 x medium).

7. Cut green foam strips to size and attach silver buckles, D-rings, and googly eye studs.

8. Glue green foam strips to boots.
I used Titan all purpose glue for a flexible hold. Which I figured would be needed because I would be walking a lot, and they’d needed to be flexible (but we’ll see if it lasts! This is my first time using it.)

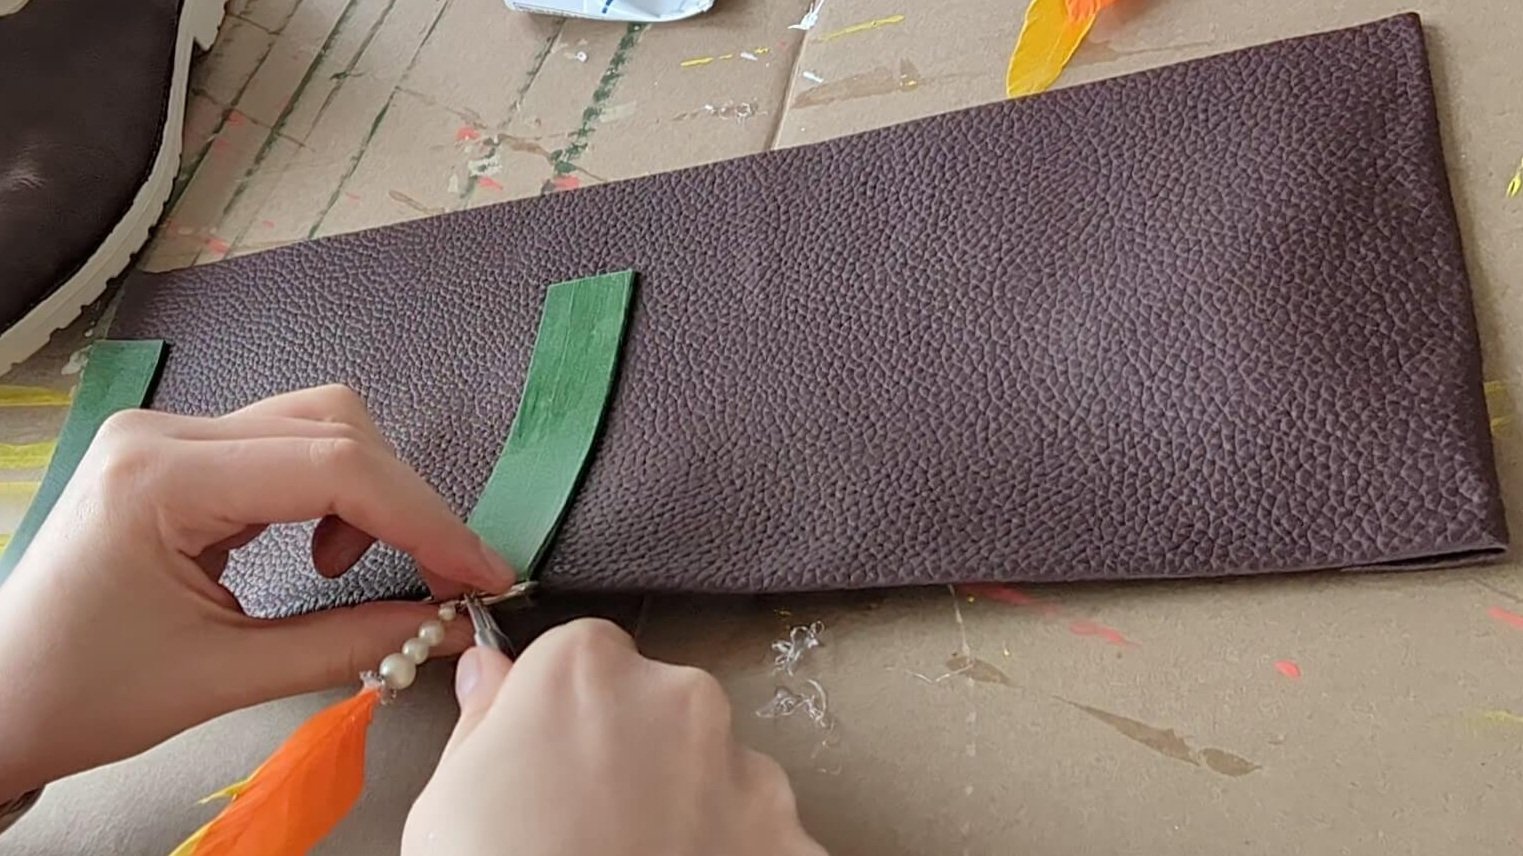
9. Cut brown PU leather fabric to the right shape for the top boot cuffs. Hot glue bottom hem & side hems (leaving the top edge raw).

10. Attach green foam strips to brown top cuff.

11. Make feather boot charm with crazy glue, feathers, pearl beads, and wire.

12. Attach feather charm to green foam strip on the brown top cuff.
13. Glue brown cuff to the top of the boots (I used a combination of hot glue and Titan multi-purpose). Cut notches into fabric so that it lays flat across the top without bunching too much. Then fold it over the top of the boot and secure it with glue.
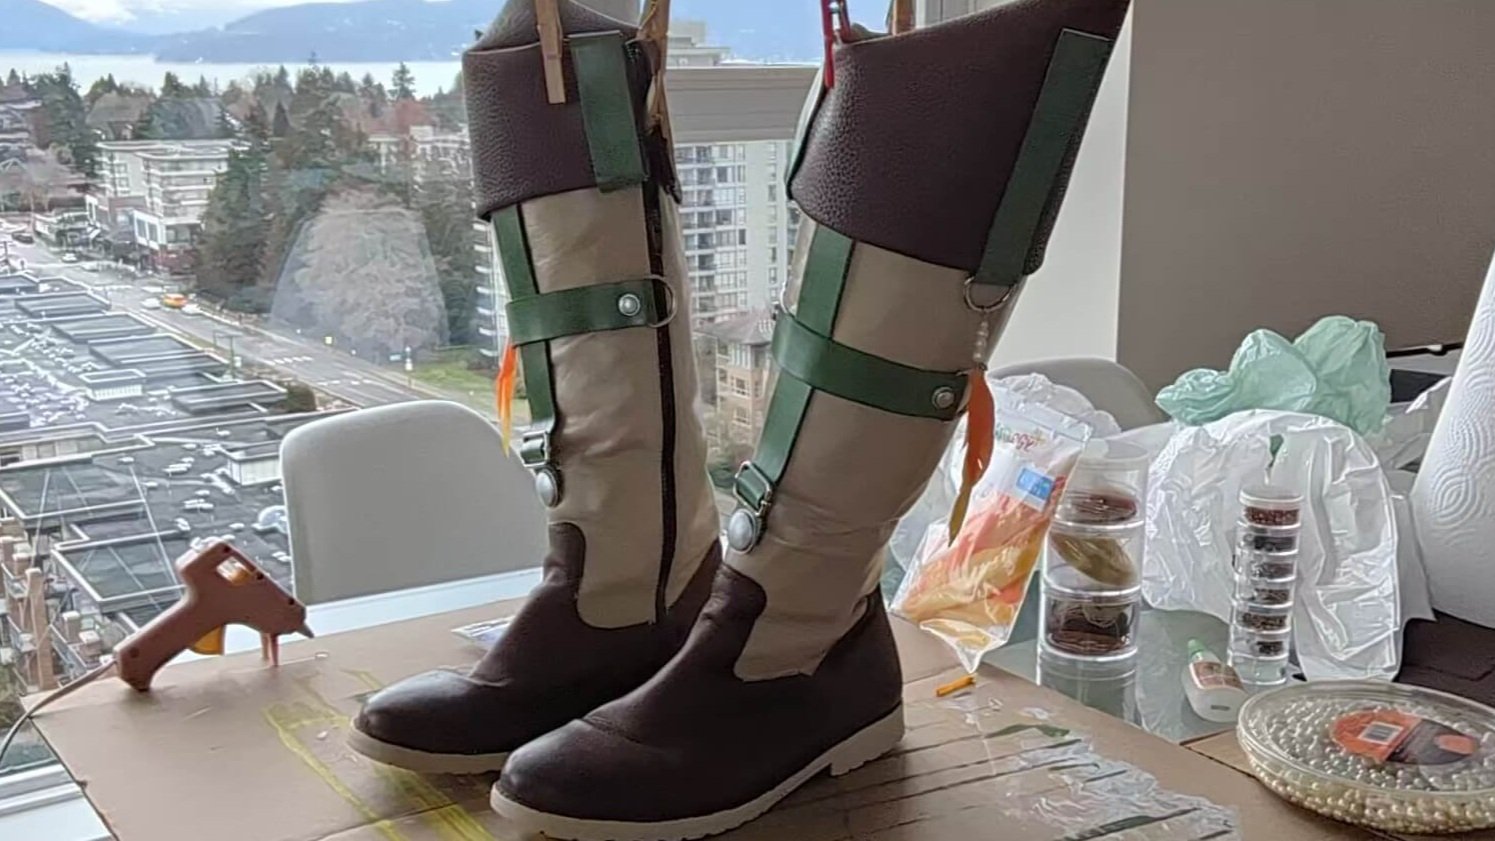
14. Finished Rikku boots!

Click here to go back to the Tutorial Table of Contents.
Rikku Garter Tutorial
Supplies:
Leather Leg Pouch
Faux Leather Strips
Glue
Google eyes painted silver
Reference image:
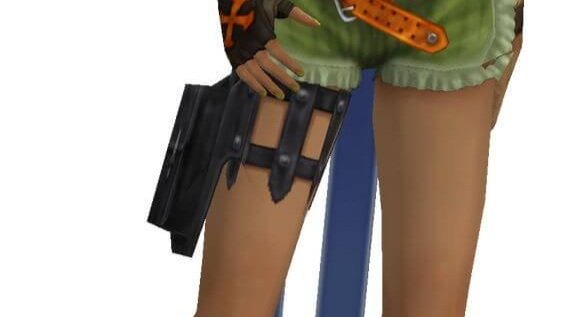
Starting point…

Cut the elastic off the pouch (save it to re-use in an upcoming step).

2. Cut 2 leather strips to fit around your thigh with a couple inches of space to attach elastic for flexibility.
(UPDATE: DON’T USE THE LEATHER STRIPS I USED HERE. They didn’t hold the glue and fell apart at the convention. I remade this garter using black EVA foam strips instead and it looked just as good and held together.)


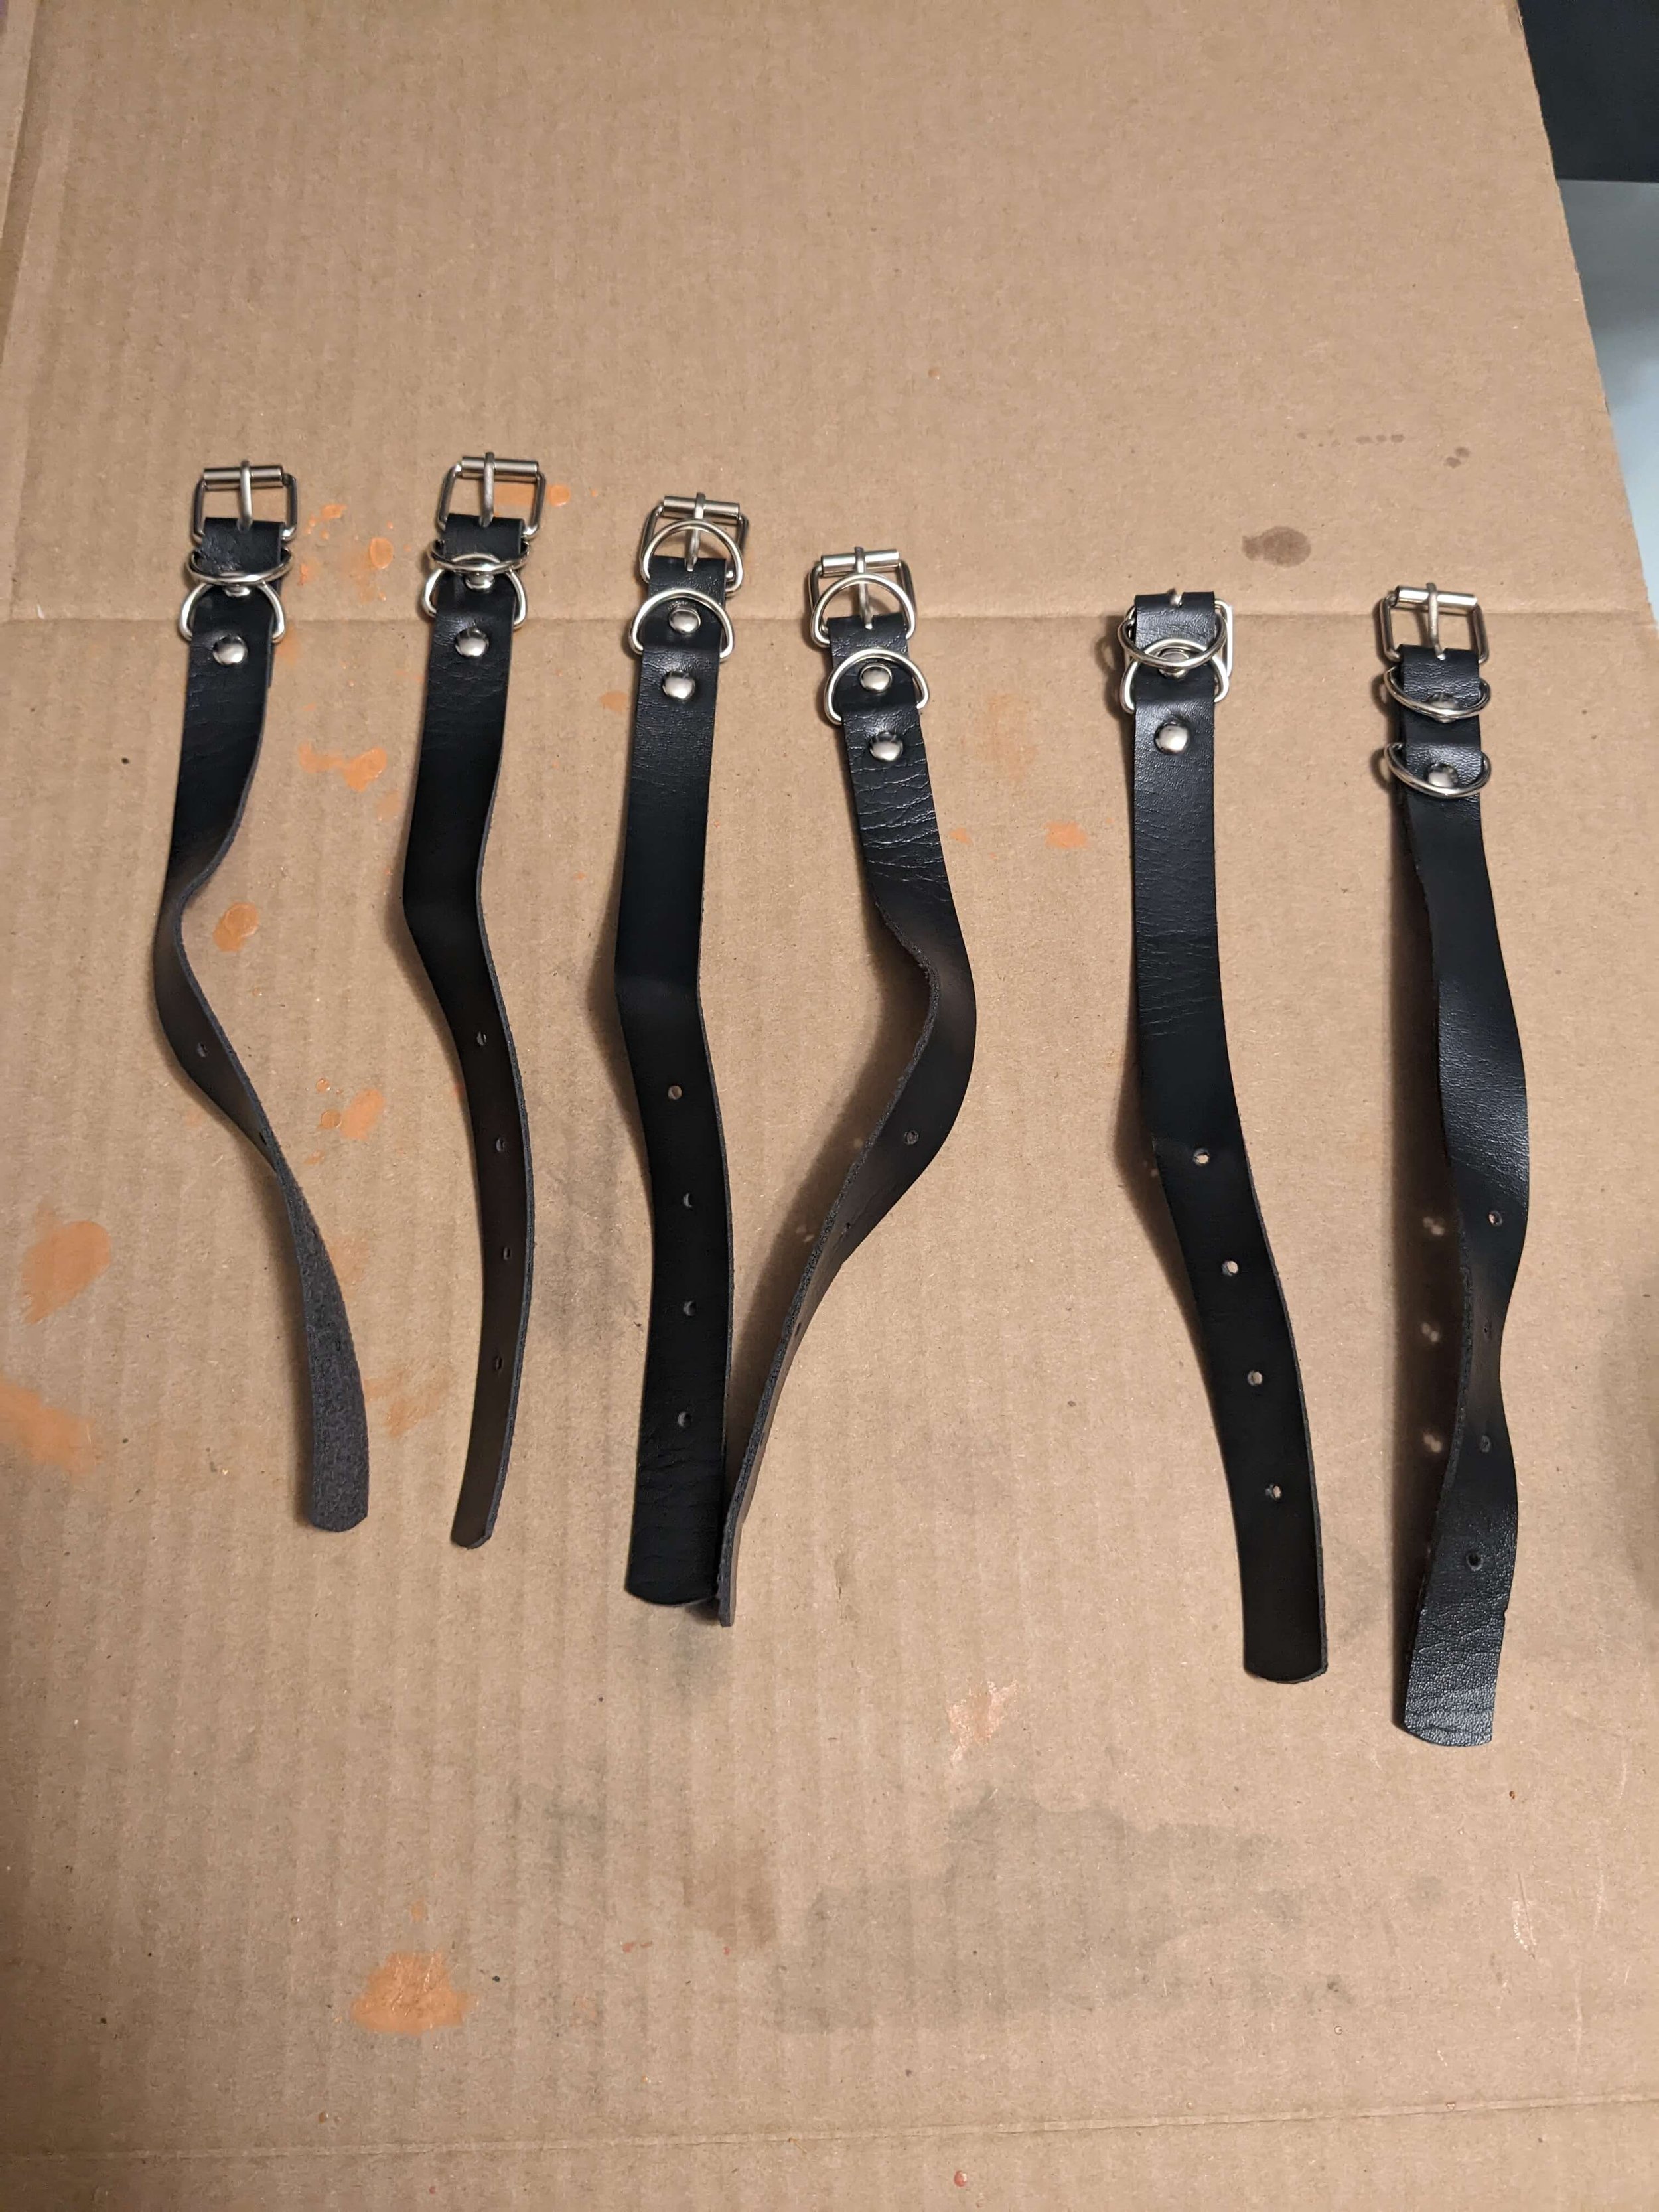
3. Cut 6 straps with pointy ends.

4. Use a small amount of hot glue to temporarily secure straps & pouch to garter belts while it’s on your leg.

5. Paint 12 medium googly eyes silver to look like studs.
6. Use crazy glue to reinforce bond and properly secure straps, garter, and pouch. Also crazy glue studs onto each strap.

7. Finished Rikku garter belt!

Click here to go back to the Tutorial Table of Contents.
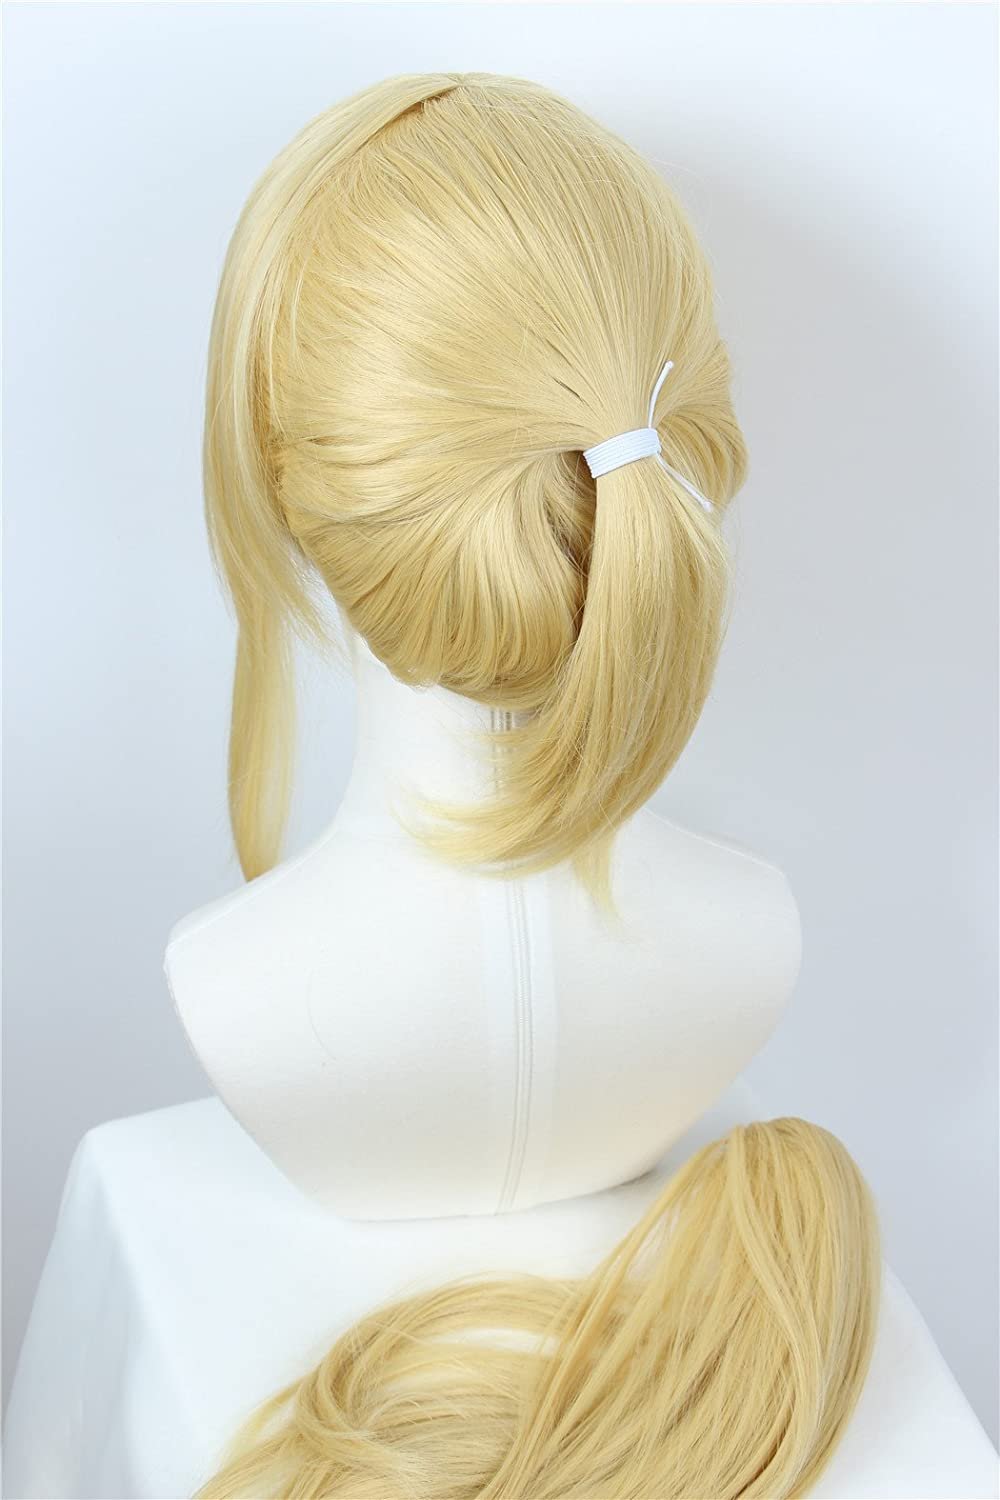
Rikku Wig Tutorial
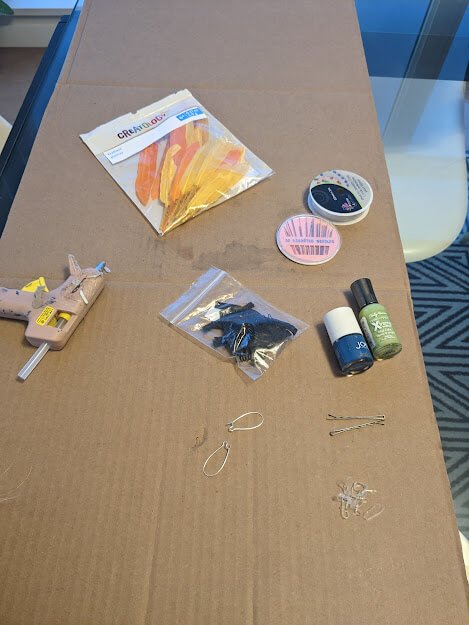
Supplies:
Wig
Clear elastics
Orange & yellow feathers
Earring hooks
Hot glue
Bobby pins
Green & blue nail polish
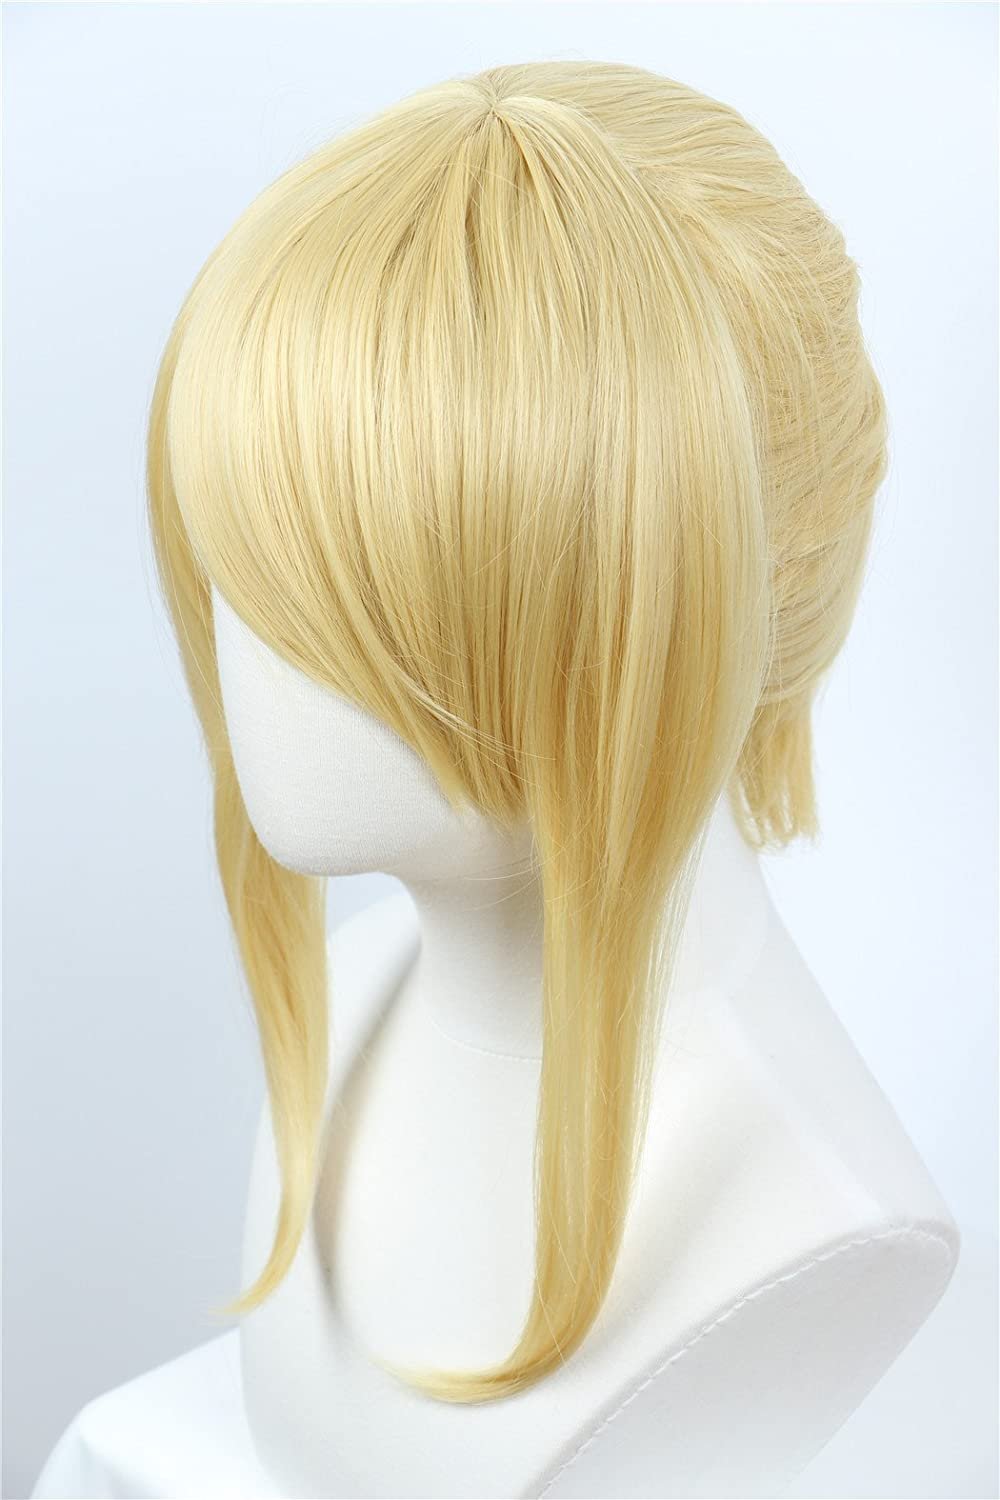
Reference Image:

Starting point…
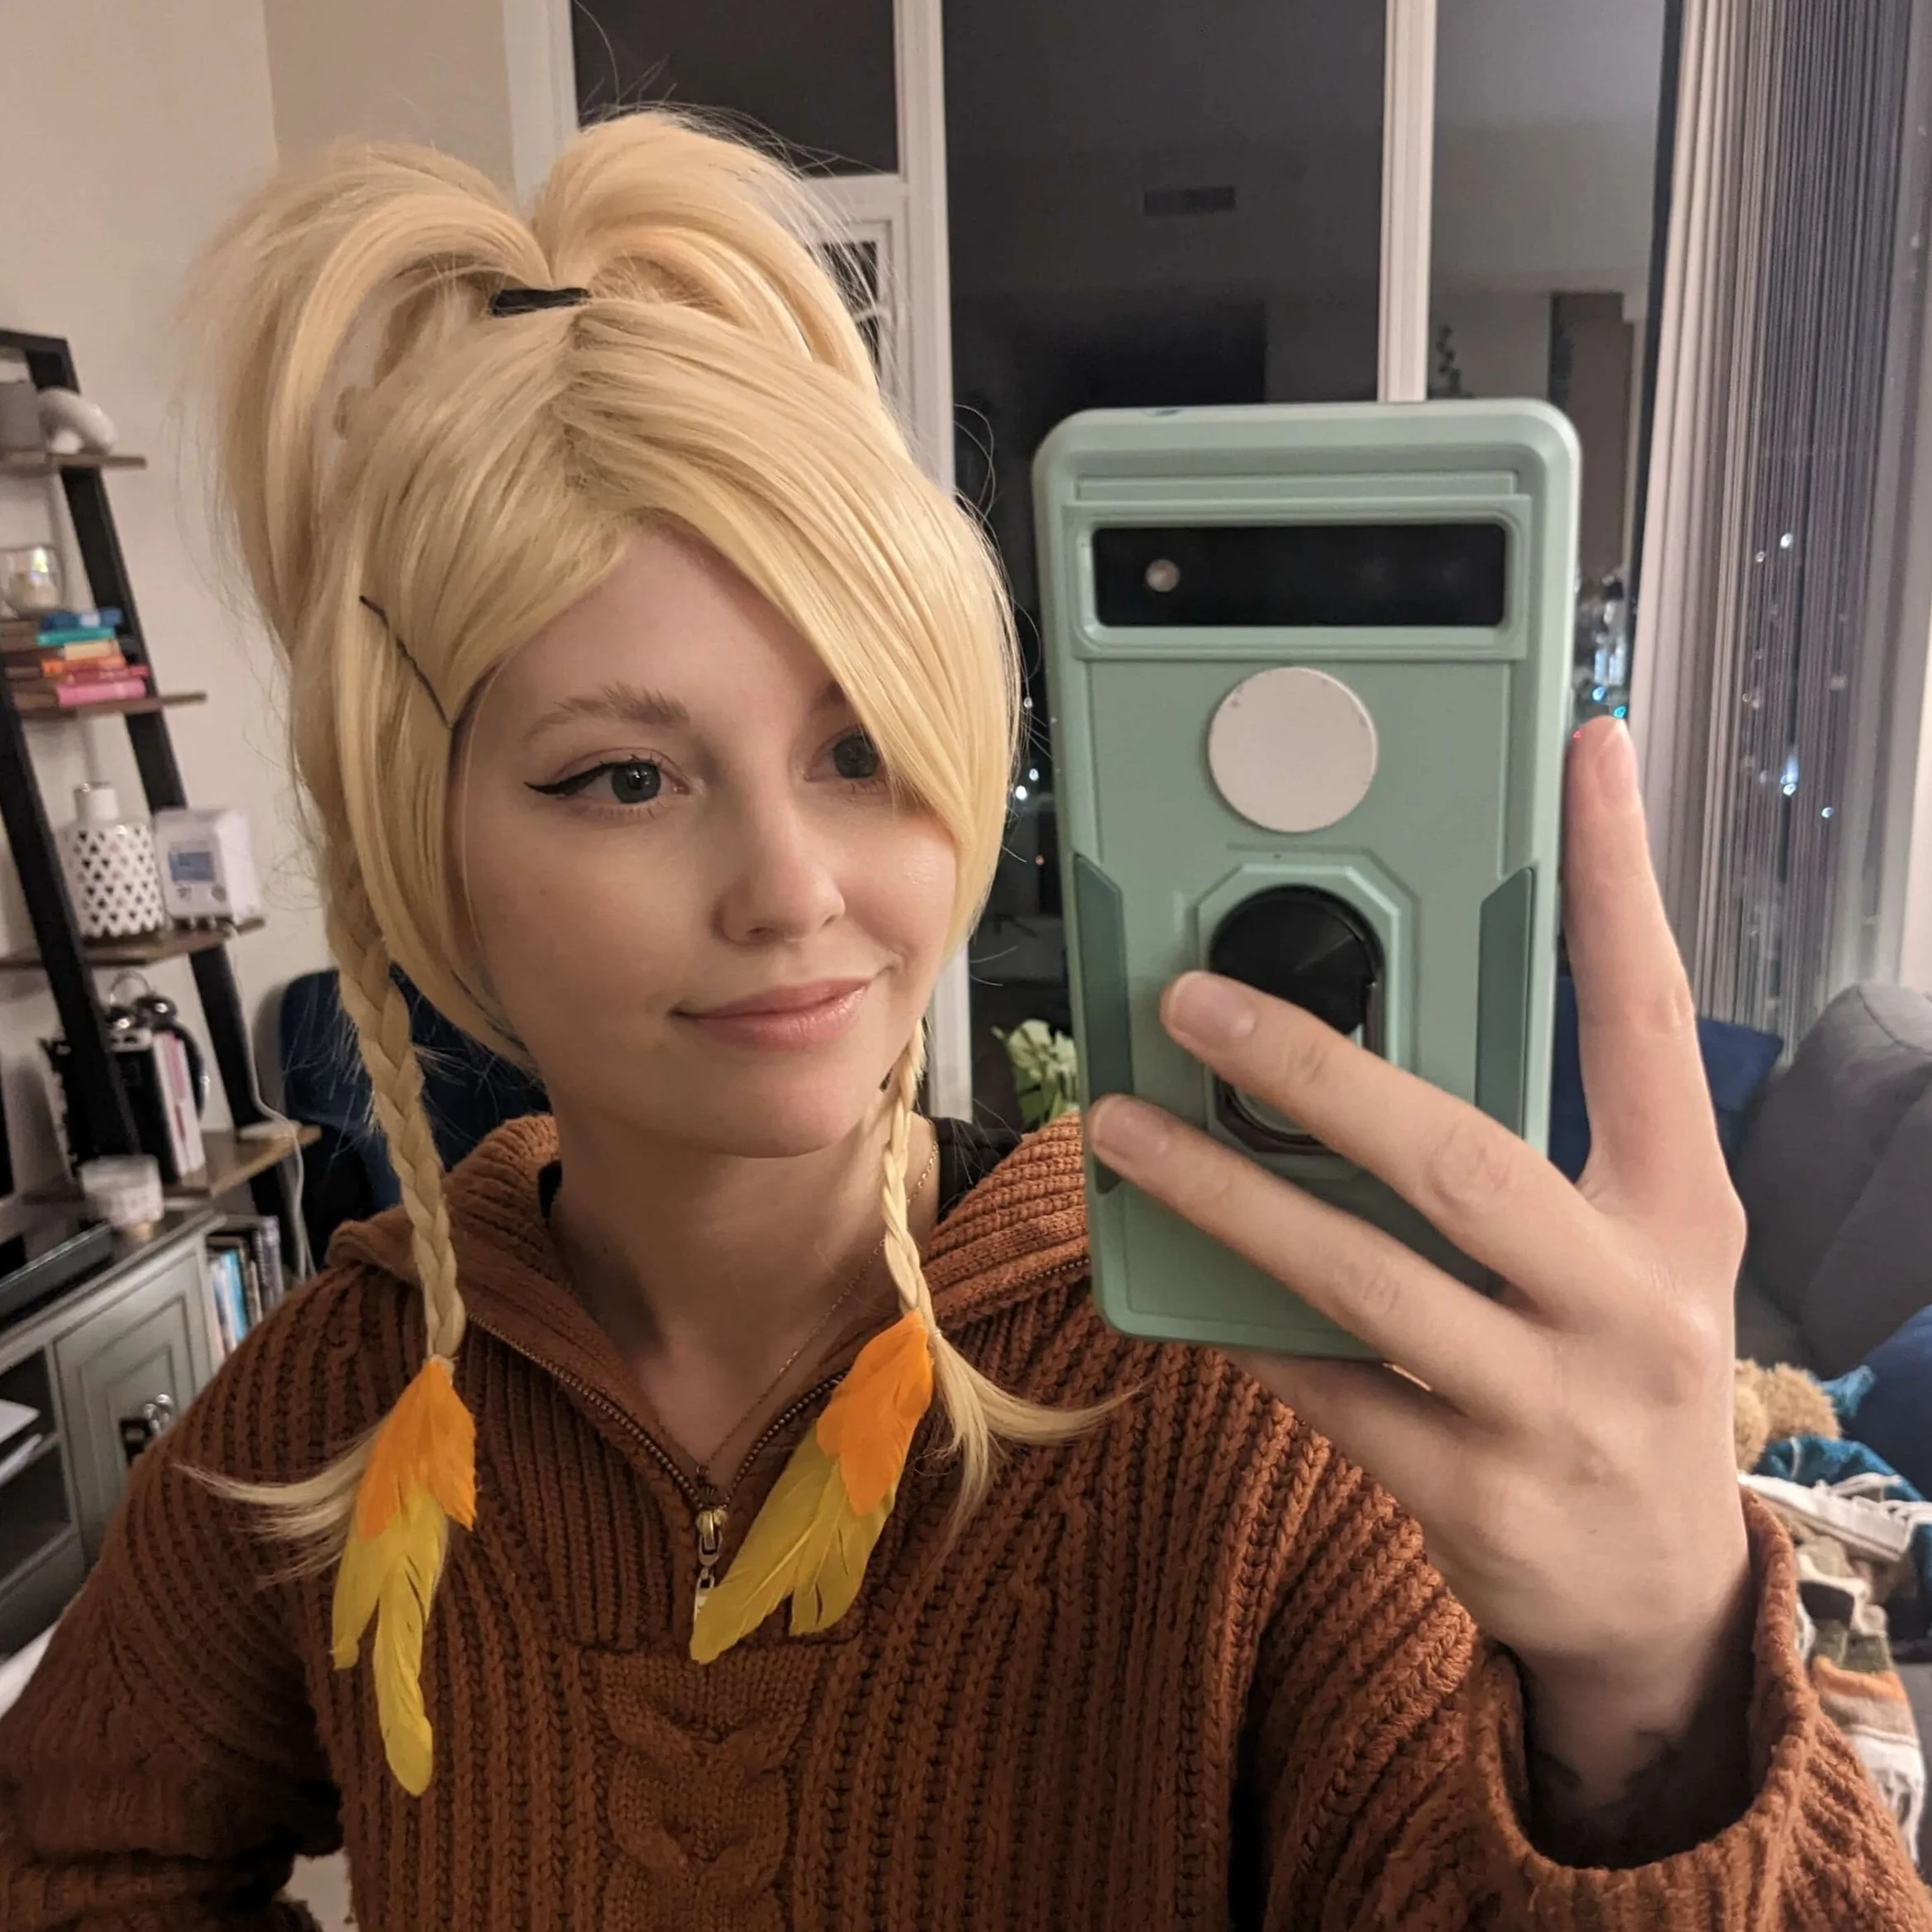
Paint 1 bobby pin lime green, and 1 bobby pin cobalt blue with nail polish.

2. Braid back side pieces. Secure with clear elastic.

3. Adjust the pony to the right height.

4. Hot glue yellow & orange feathers together, then glue them to the hook earring backing.

5. Hook feather “earrings” into the ends of each braid.

6. Finished Rikku Wig!
Click here to go back to the Tutorial Table of Contents.
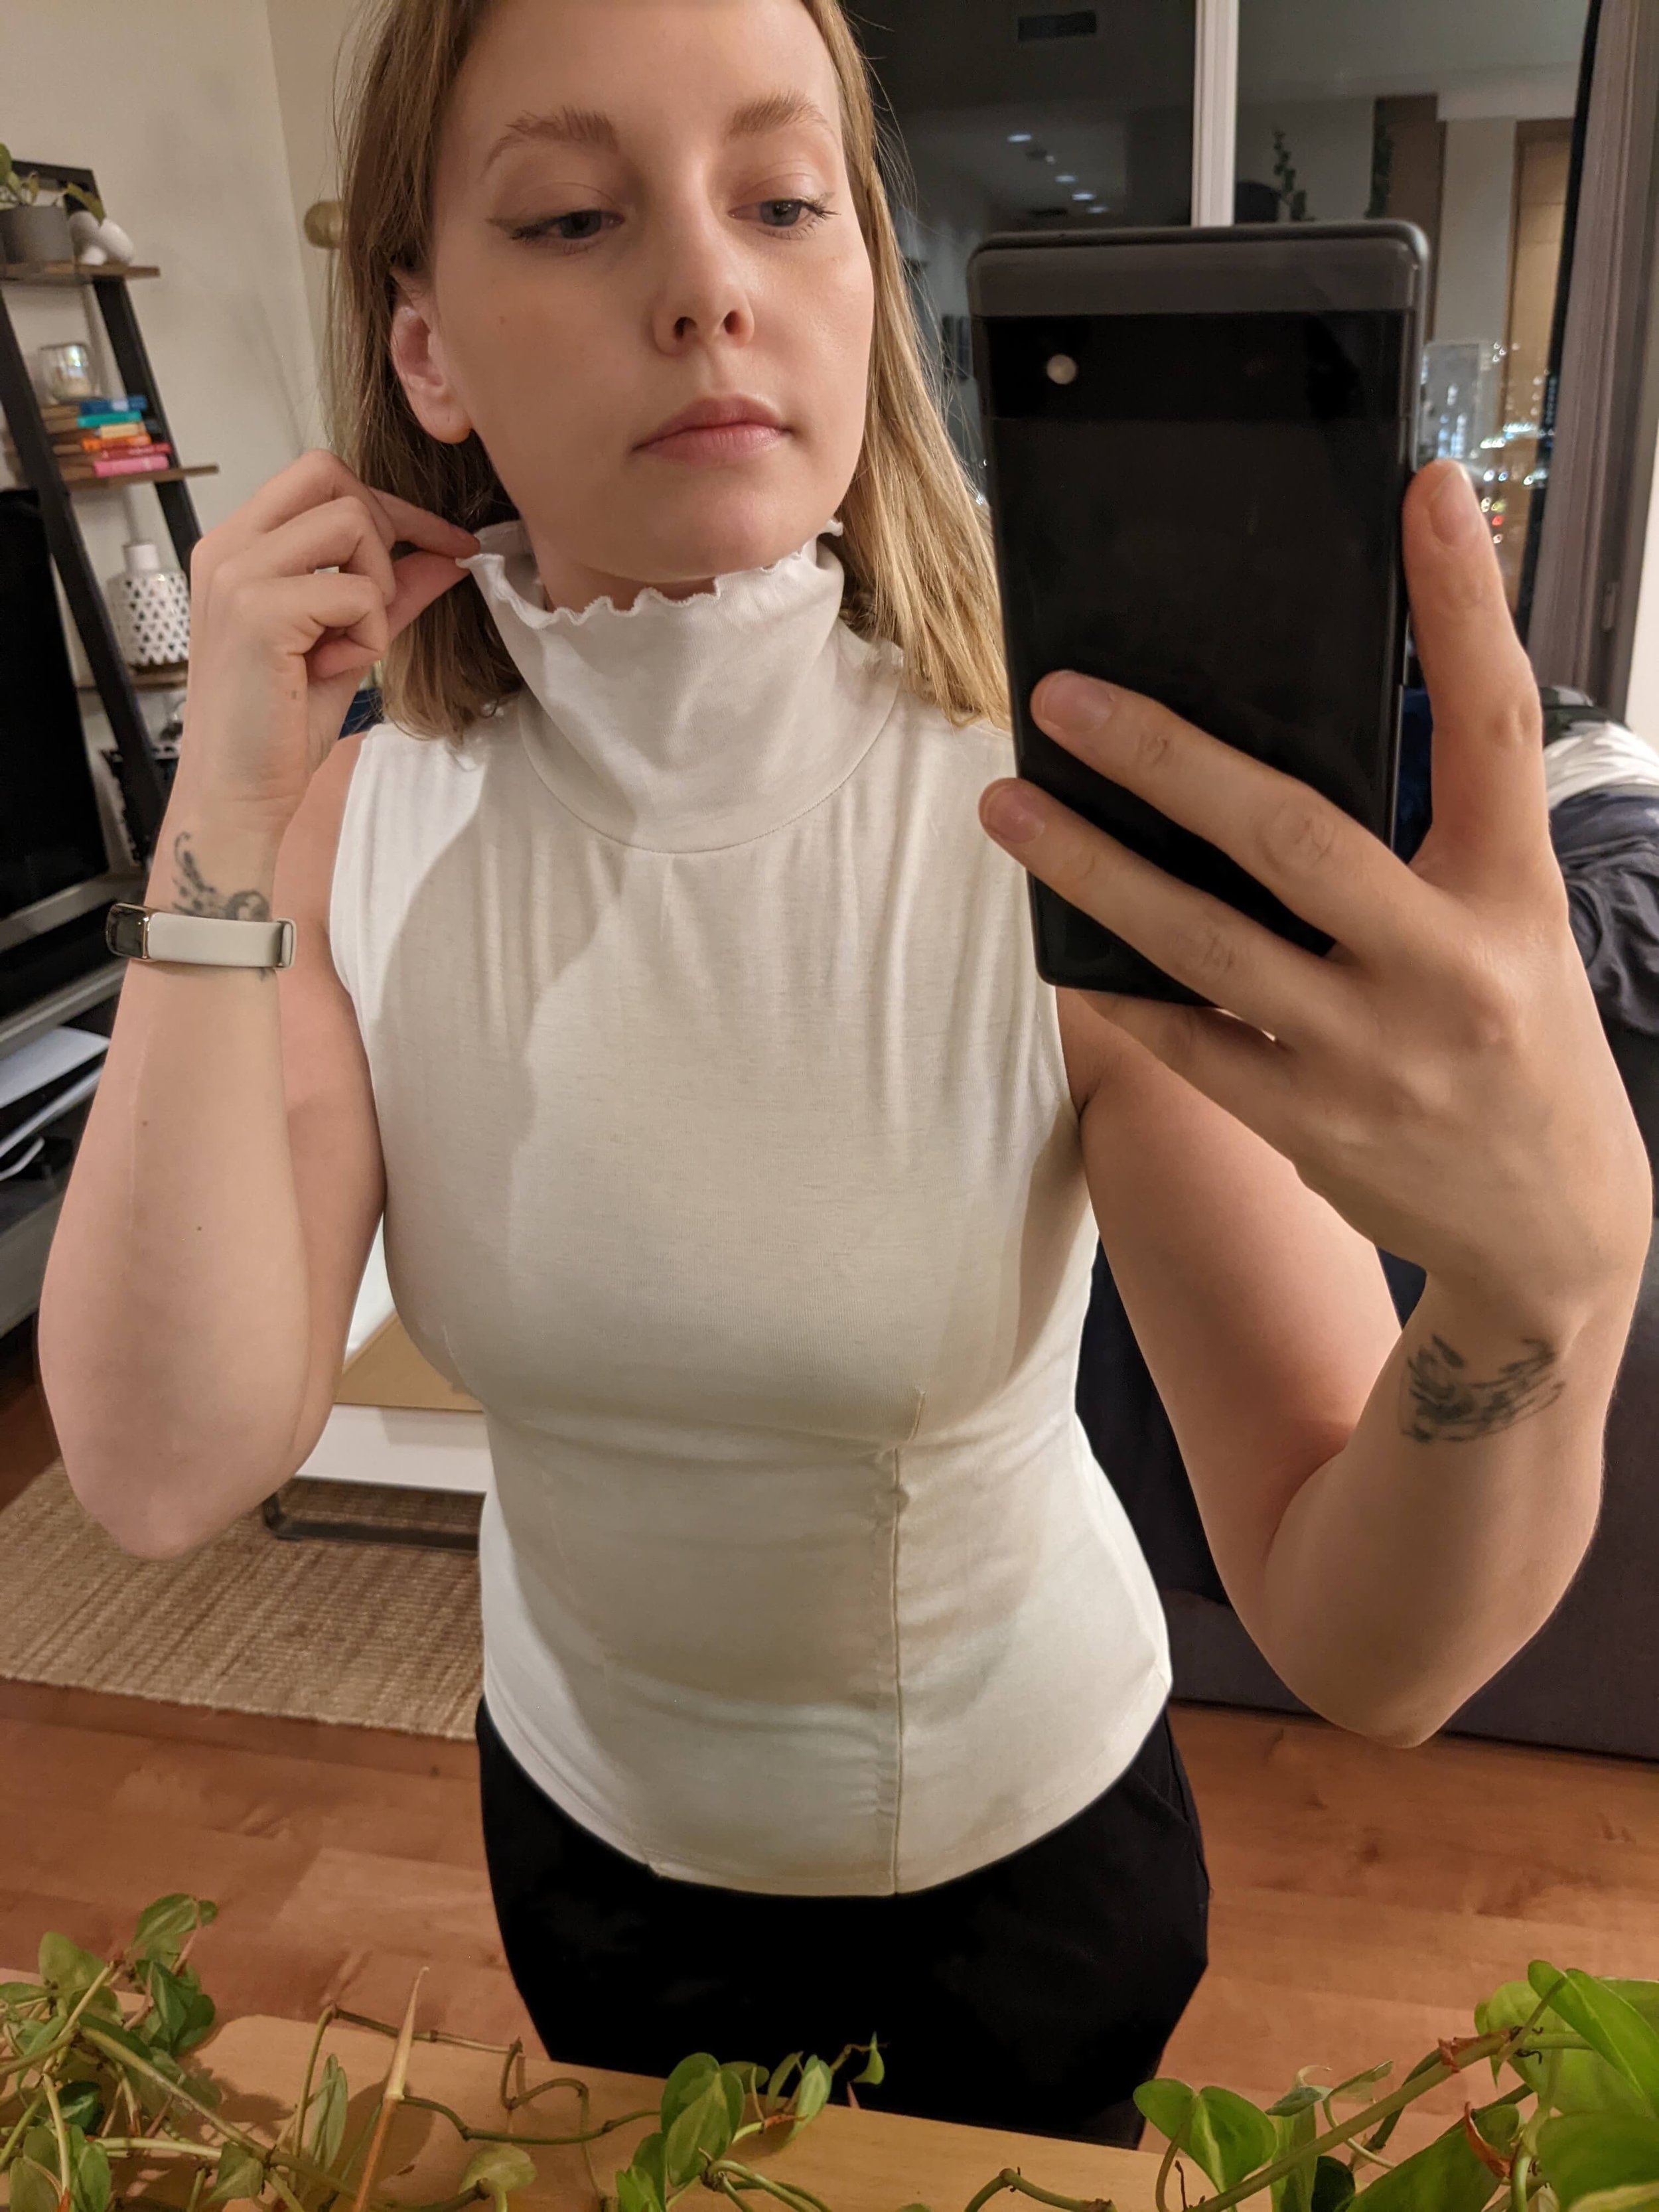
Rikku Shirt Tutorial
Supplies:
Starting shirt
Sewing machine & thread
Acrylic paint
Acrylic fabric medium
Black “belt buckles”
Hot glue
Clear elastic jewelry thread
Hand sewing needle
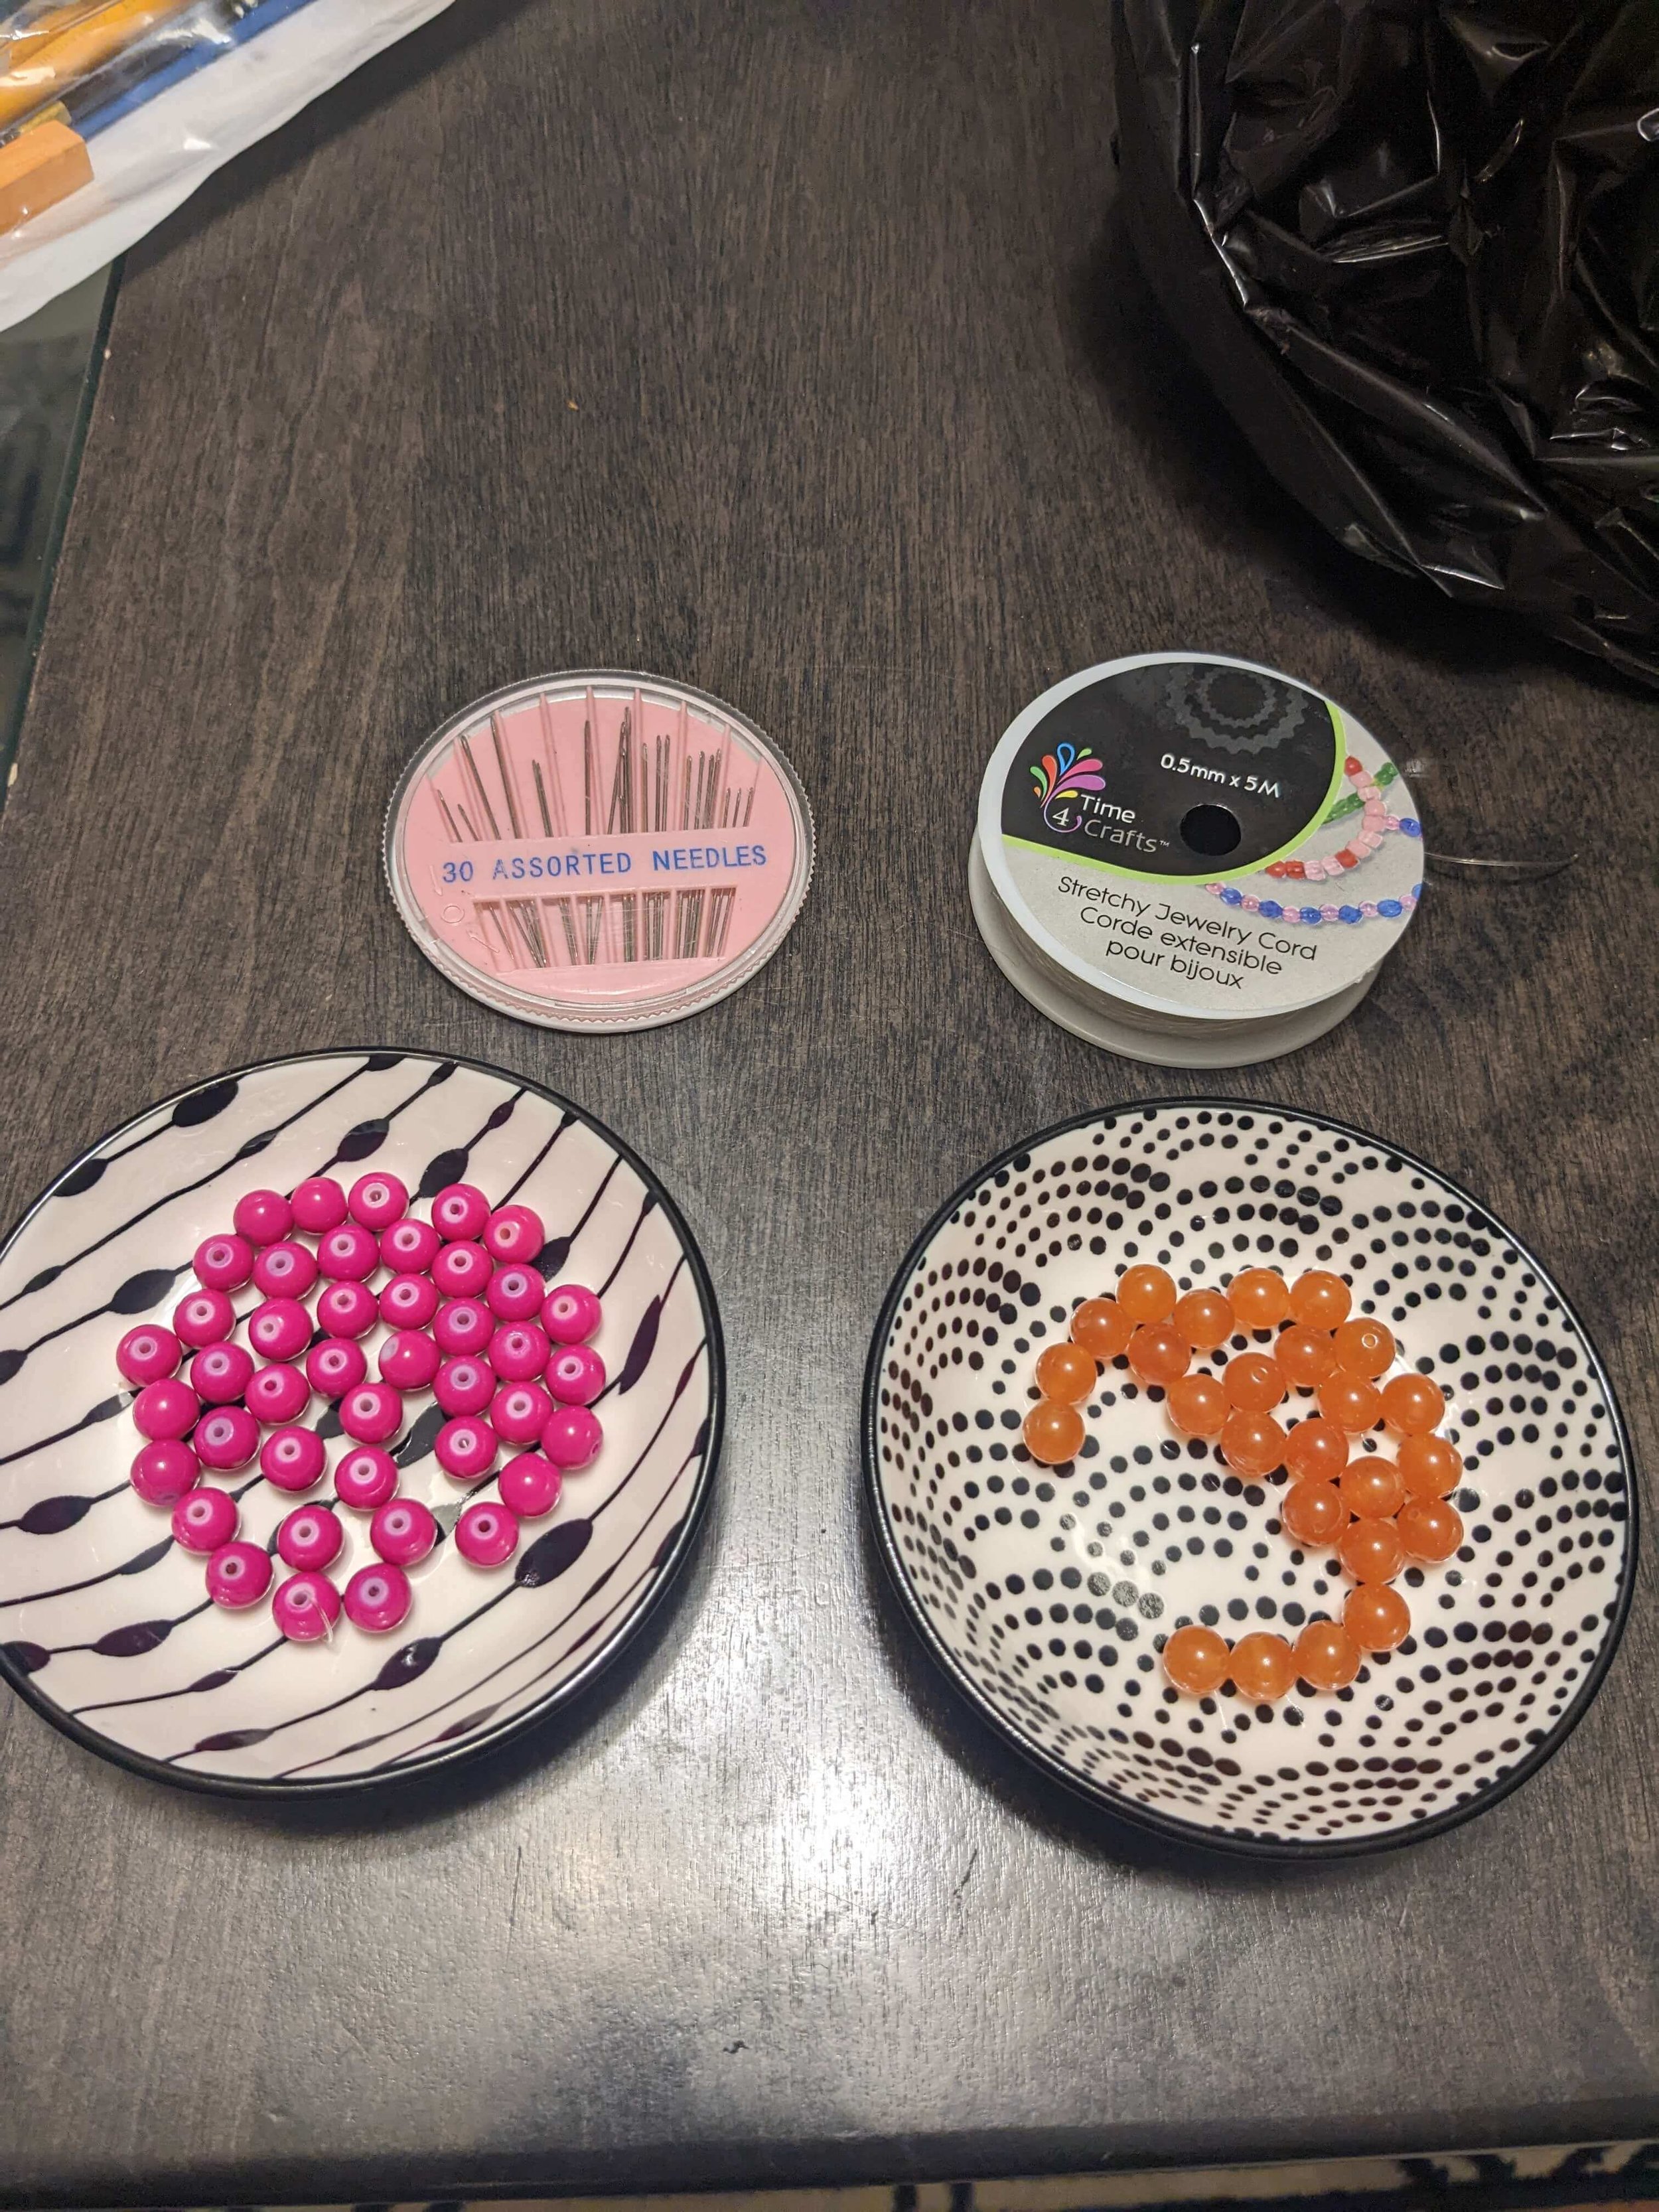
Orange & fuchsia pink round beads
Reference image:

Starting point…

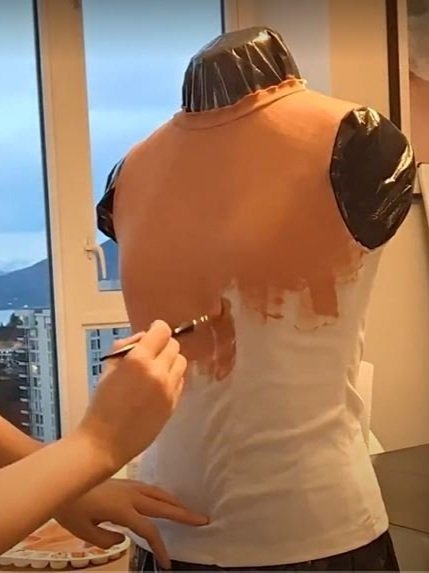
Cut off sleeves (save scrap fabric for arm cuffs later).

2. Mark bodice “darts” from each nipple.

3. Pin and sew darts.

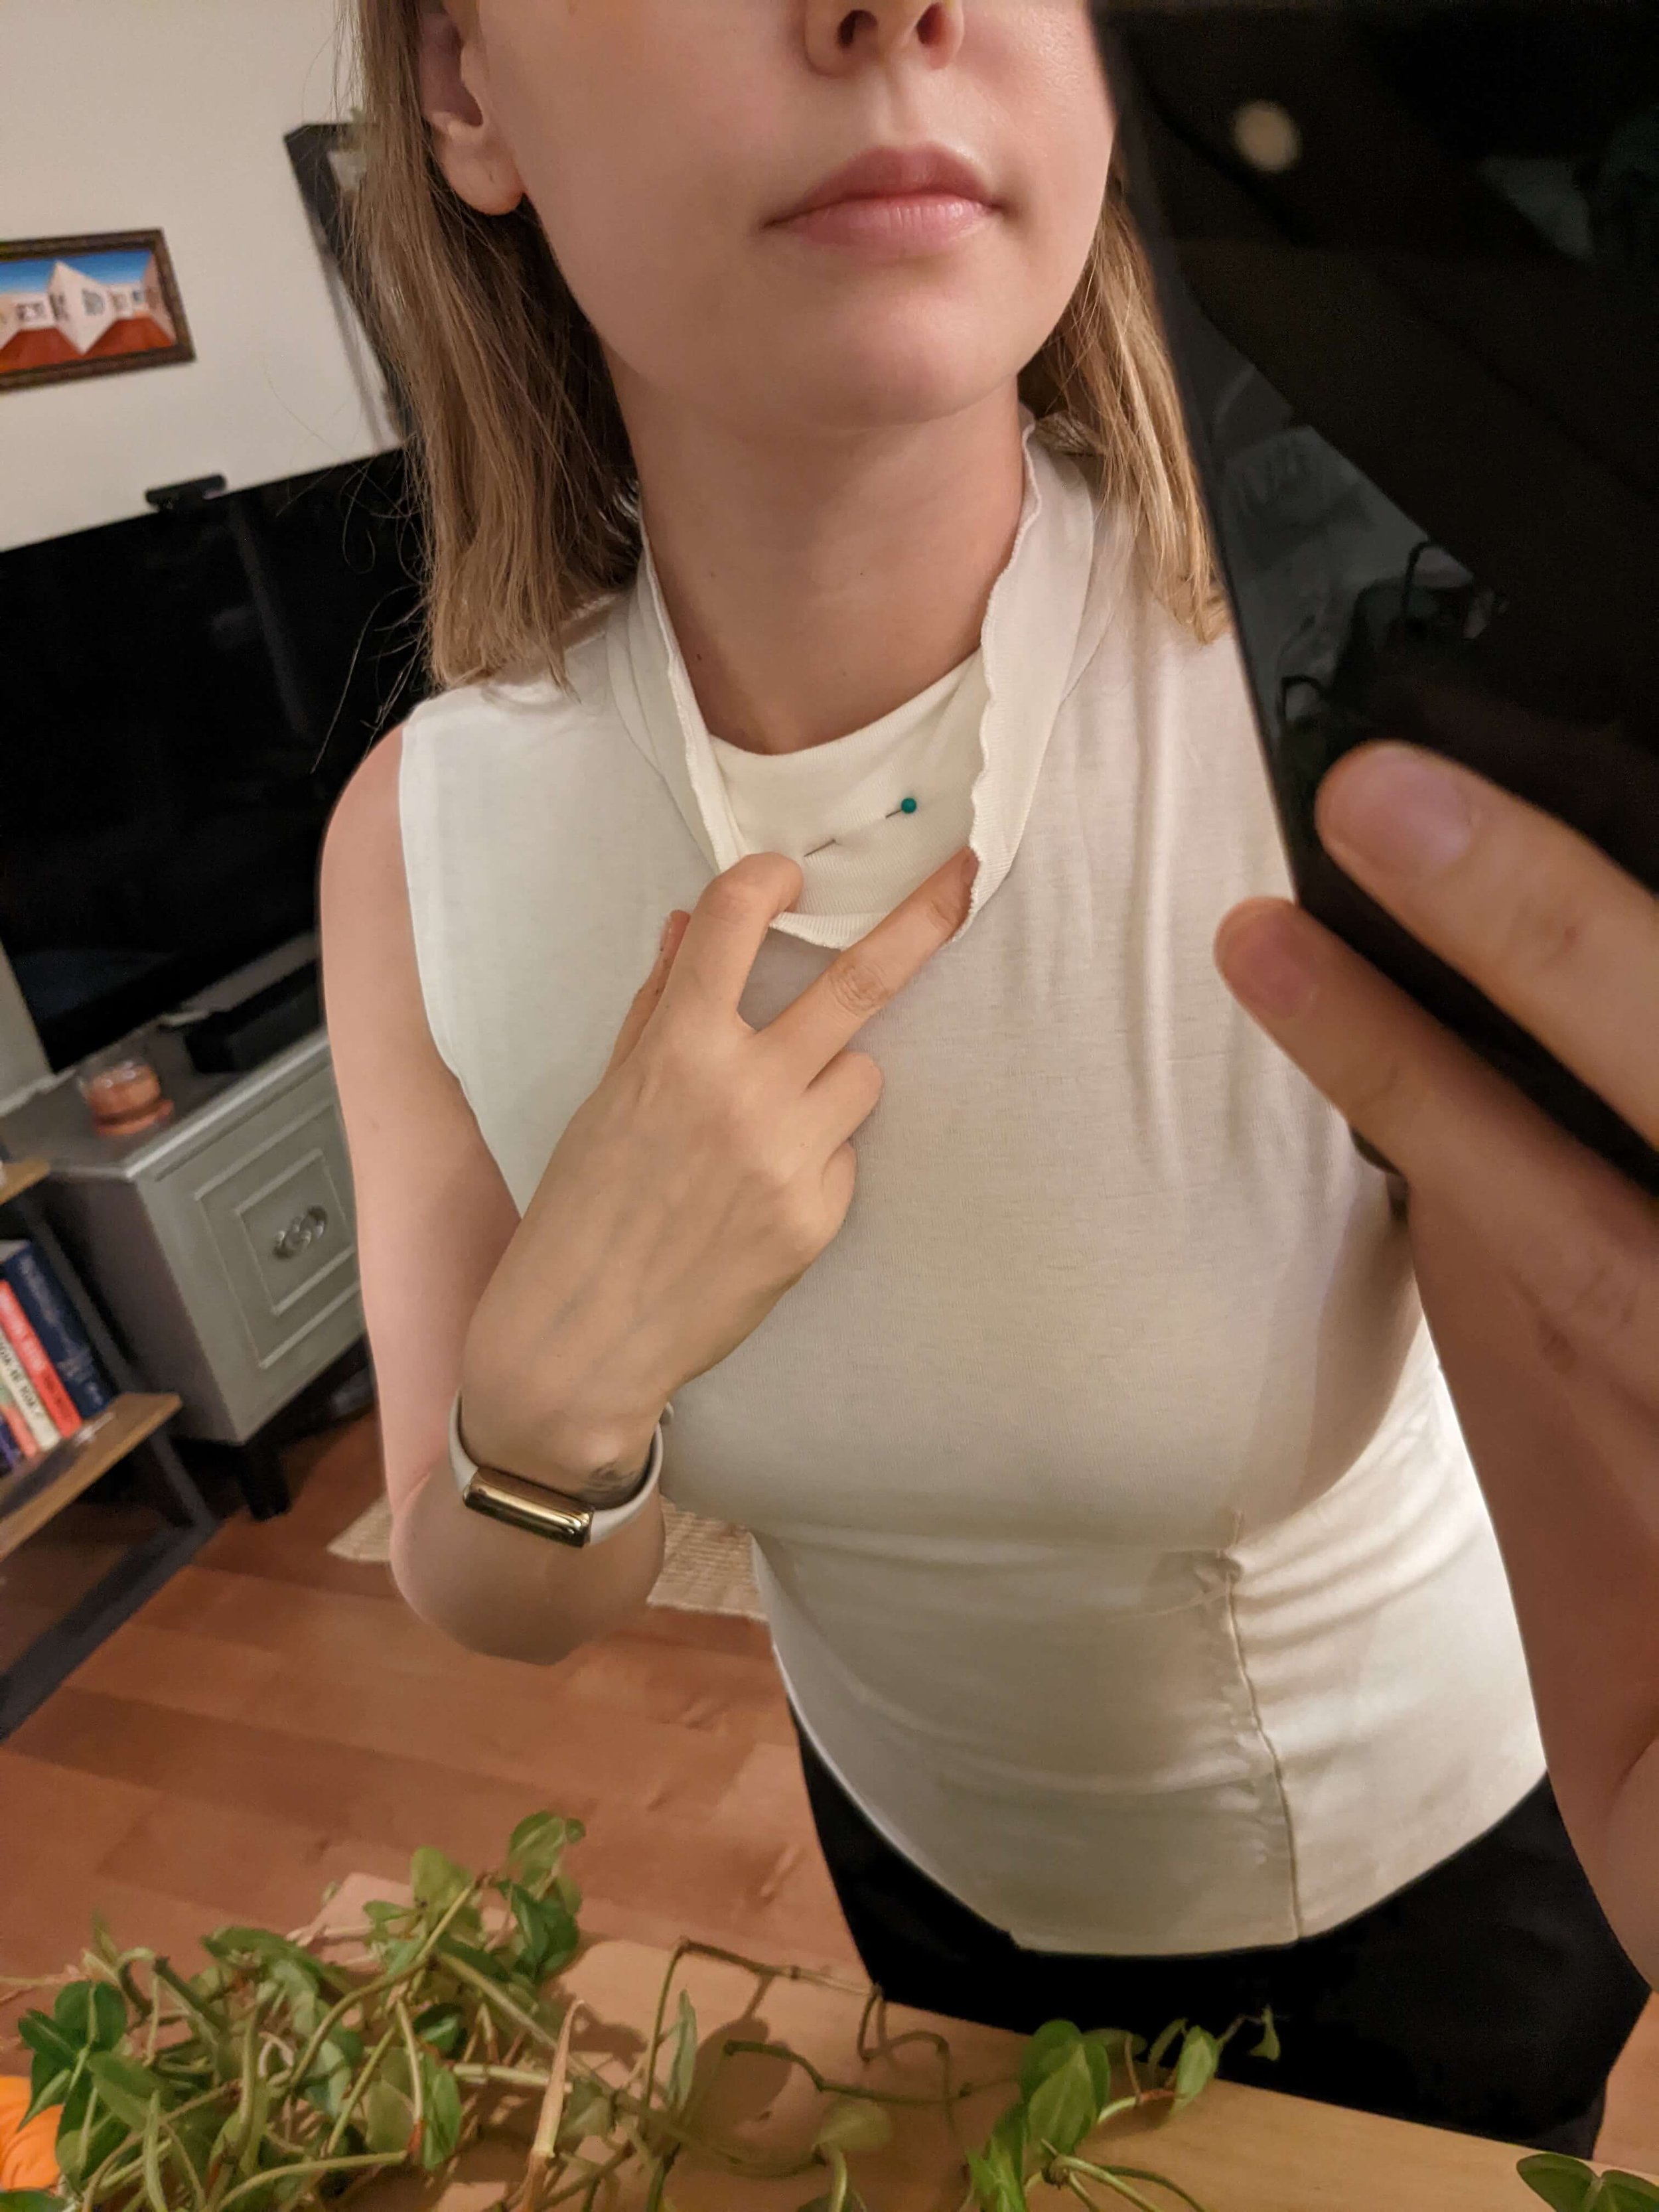
4. Pin and sew collar so it’s a bit shorter in height.

5. Mix orange acrylic paint & fabric medium. Paint top orange and add any shading or details to make it pop & look well-worn.

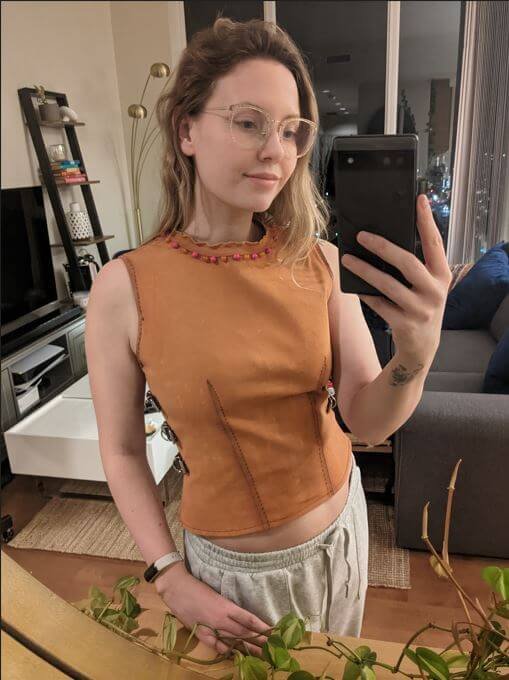
6. After it’s dry, try it on again, and hem it to be the right length to show just a bit of tummy.

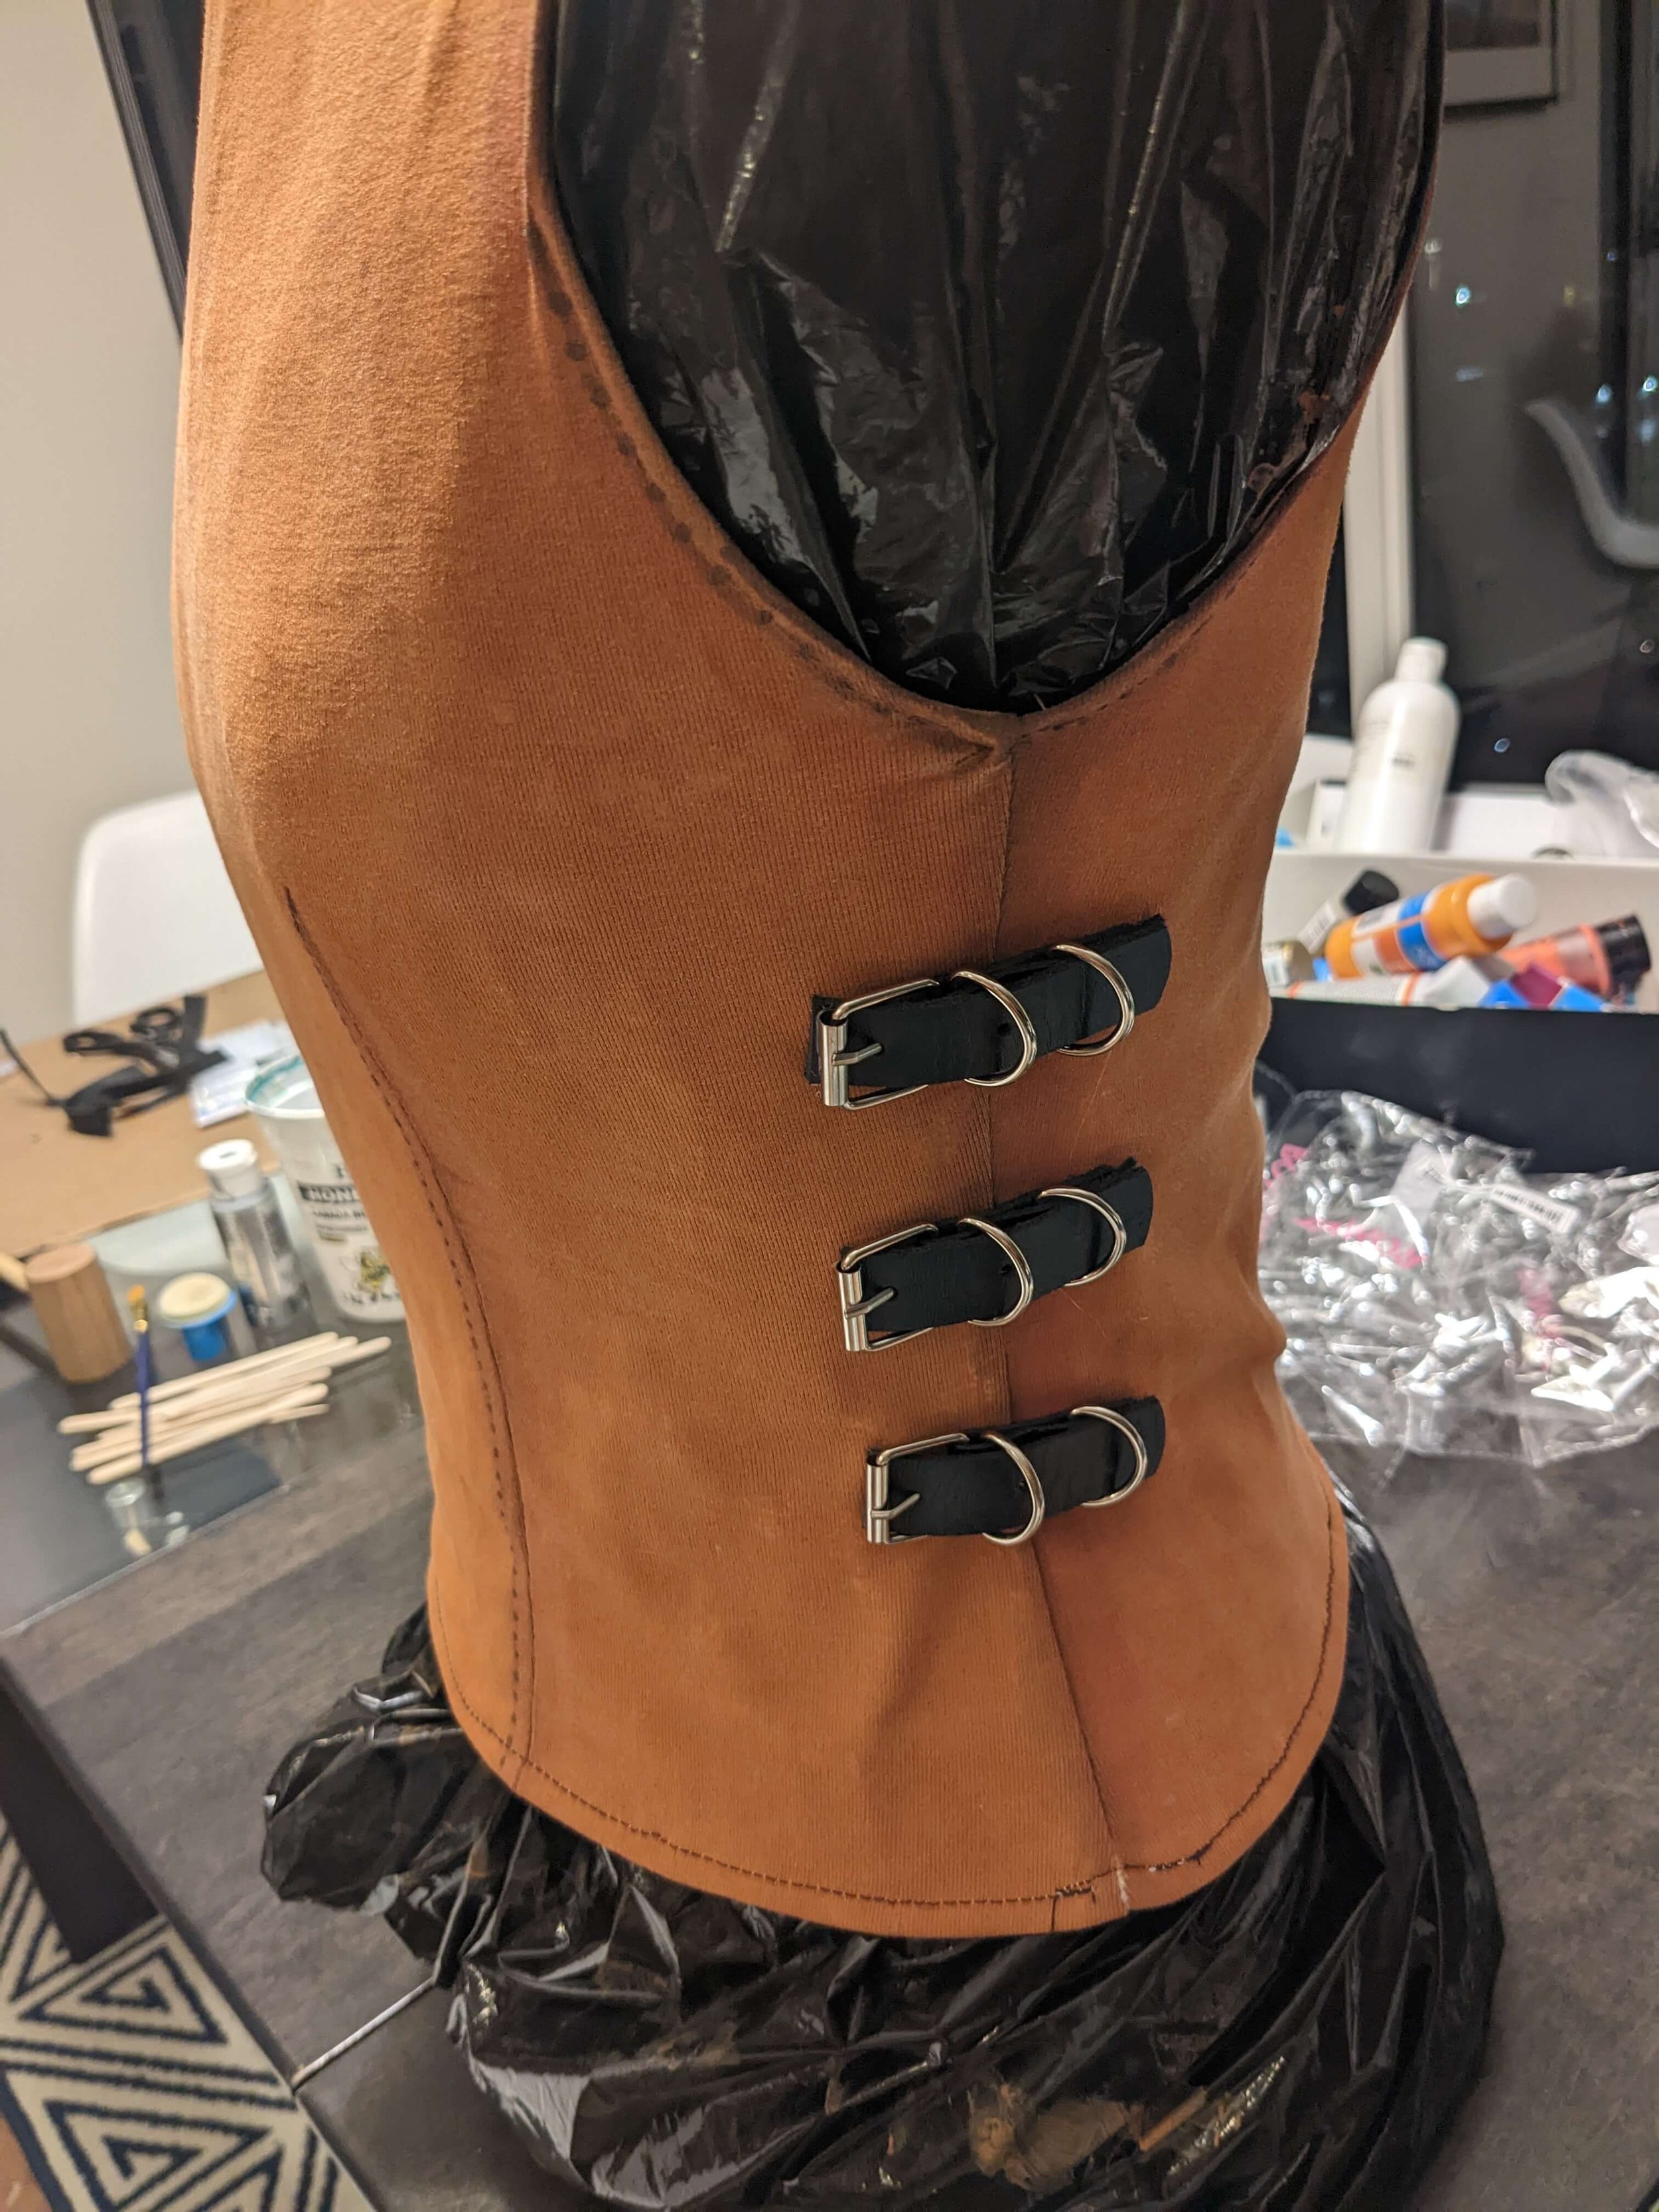
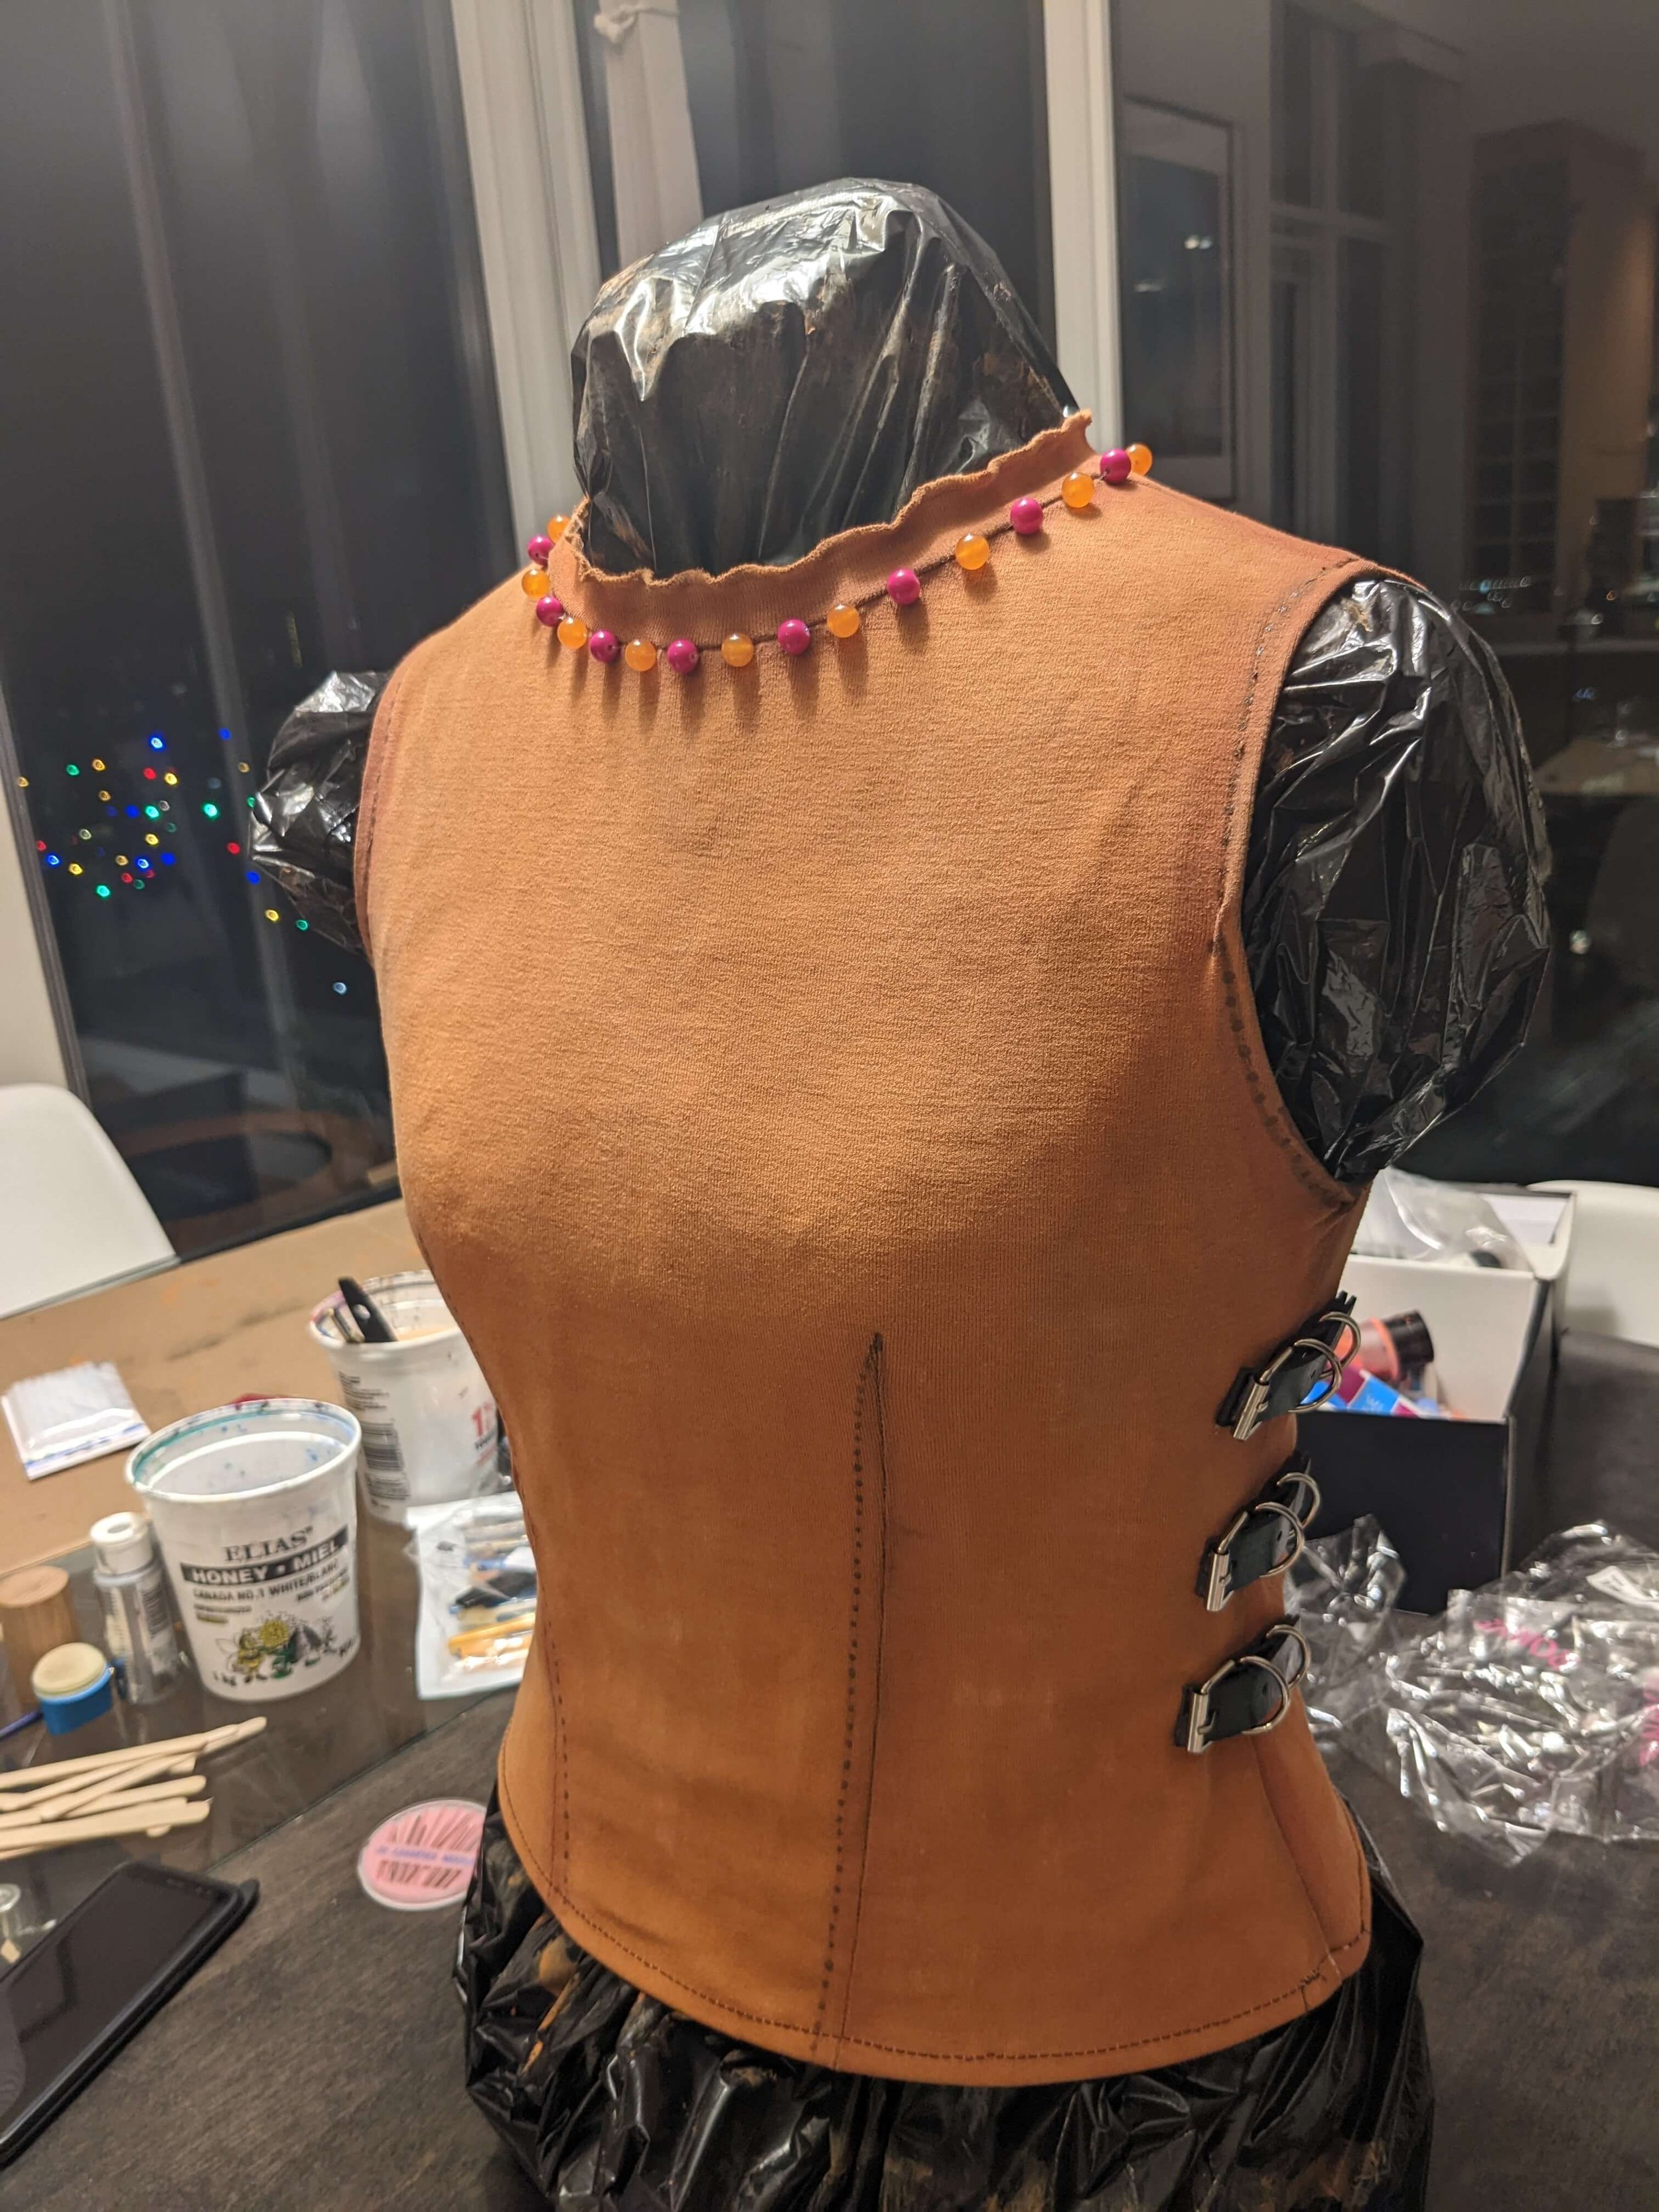
7. Trim black belt buckles & hot glue 3 on each side.
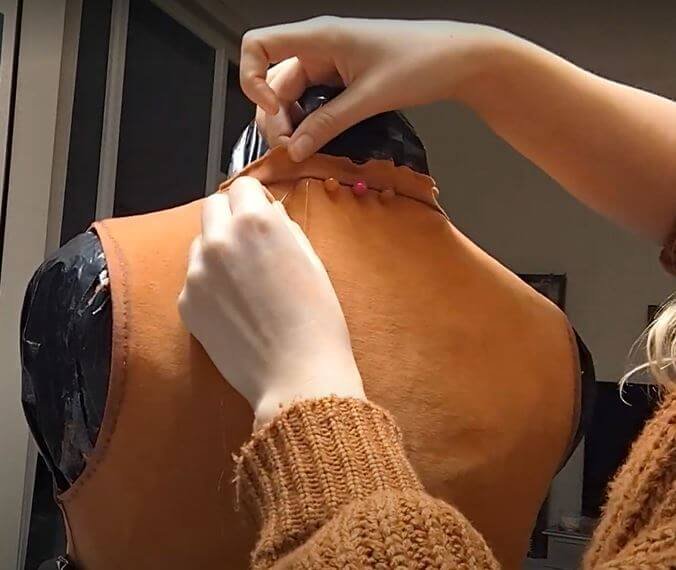
8. Use stretchy elastic jewelry thread to hand sew on orange & fuchsia pink beads around the collar.
9. Finished Rikku top!
Click here to go back to the Tutorial Table of Contents.
Rikku Belt Tutorial
Supplies:
Belt
EVA craft foam
Acrylic paints
Acrylic clear gloss sealer
Flexible hold glue
Large googly eyes painted silver
Reference Image:

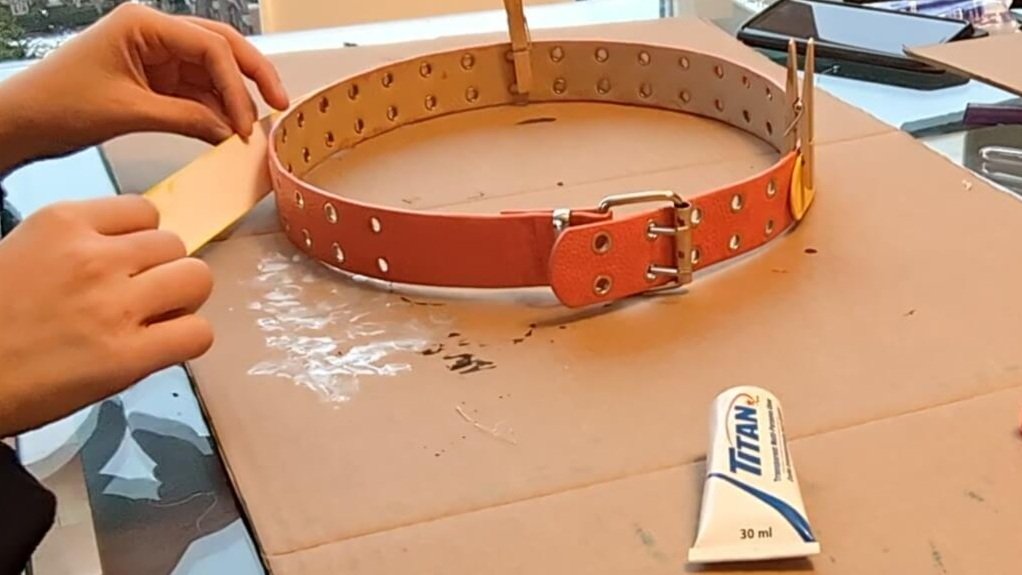
1. Starting Point…

2. Deglaze the belt before painting if needed.

3. Paint the belt orange. Let it dry.

4. Cut a second belt layer out of foam & glue together the pieces if needed (I used crazy glue).

5. Carve debossed details into the belt (I just used a wooden skewer).

6. Paint the top belt layer yellow. Let it dry.

7. Paint googly eyes silver to look like studs (2 x large and 5 x medium). Let it dry.
8. Glue both belts together.
*Note: I used “Titan” glue from the dollar store because it said it was good for leather and some plastics (and a whole lot of other materials!). Plus it said it dried flexible. However, I’ve never used this glue before… so we’ll see! Do you glue research before committing.
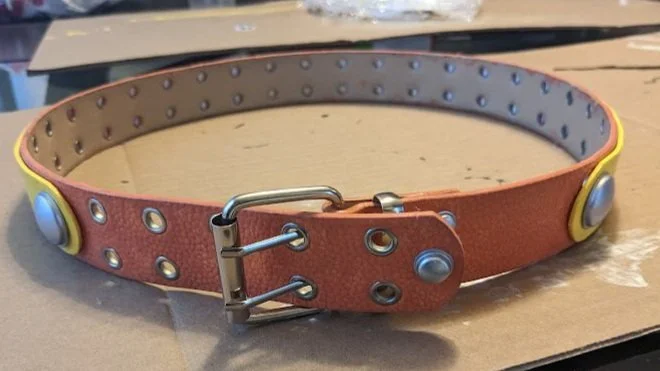
9. Glue on the studs. Let them dry.

10. Seal belt with a clear gloss acrylic medium. Let it dry.
*Note: I did this because I wanted it to look shiny, but learn from my mistake… First, I used a clear fabric medium paint and it didn’t work! It just made my belt sticky. I had to go back and do a coat of clear gloss acrylic medium on top of the fabric medium — which solved the sticky problem.
11. Finished Rikku belt!
Click here to go back to the Tutorial Table of Contents.
Rikku Shorts Tutorial
Supplies:
Base shorts
Acrylic paint
Acrylic fabric medium
Hot glue
Ruffle trim
Reference Image:

1. Starting Point…

2. Optional - Alter shorts to fit you properly (the waistband was too tight for my liking, so I added in an extra panel of elastic).

3. Paint shorts light green with fabric paint (mix acrylic & fabric medium). Let them dry.

4. Paint dark green stripes. Let them dry.

5. Paint bottom hem yellowish-white. Let them dry.

6. Attach ruffles (I just used hot glue… but you can use fabric glue or sewing too).

7. Finished Rikku shorts!

Click here to go back to the Tutorial Table of Contents.
Rikku Blue Wings Tutorial
Supplies:
EVA Foam - 2mm - White - 14" x 39" Sheet
Acrylic paint
Hot Glue
Safety pins
Scrap fabric
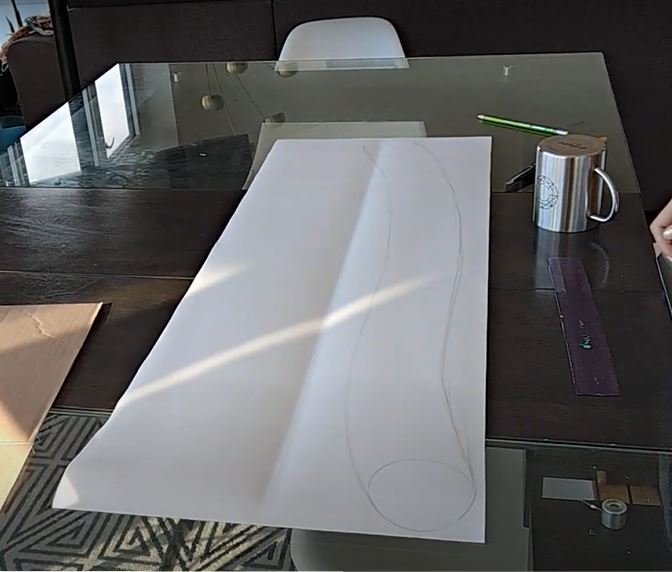
Reference Image:

Starting point…

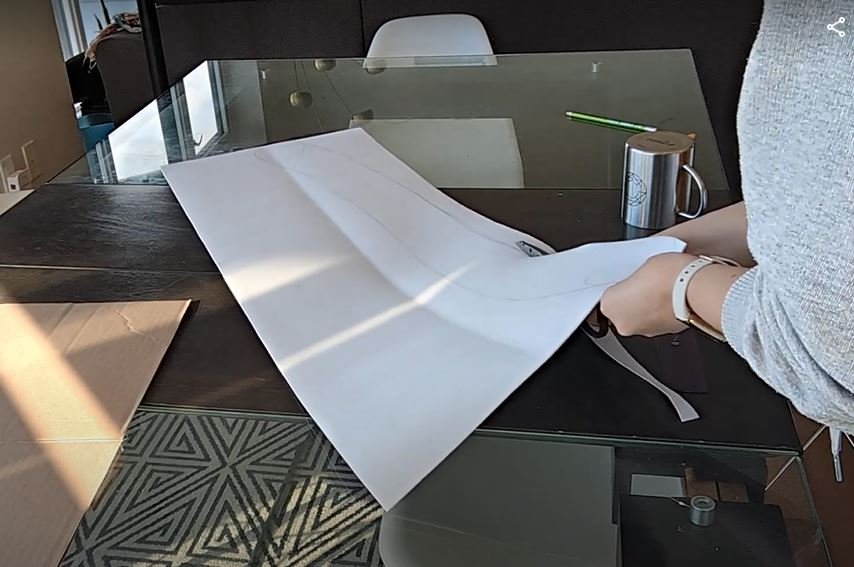
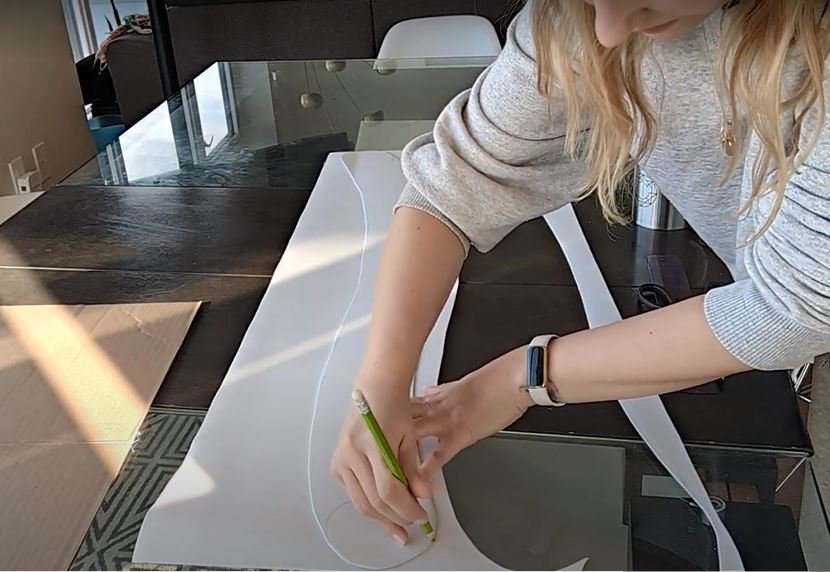
1. Draw one wing shape on foam. Cut it out. Then use it as a stencil to trace the other wing.
2. Paint both sides of each wing blue and do 2 coats. Allow each coat to dry in between.

3. Paint a white flower and stripe around each wing on both sides (do 2 coats of paint - allow each coat to dry in between).

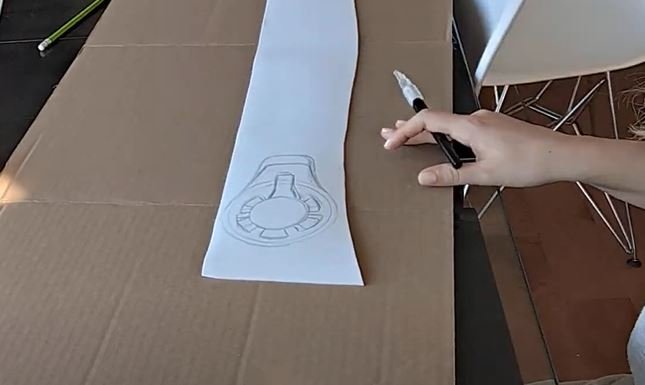
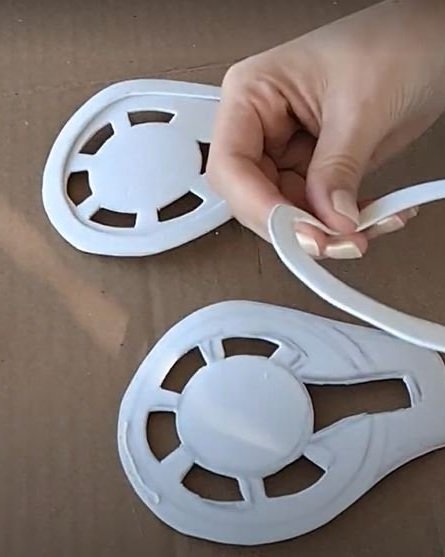
4. Cut out “gear” shape for the top of the wing that connects to Rikku’s shirt. Also cut out an “outline” shape of the “gear” to add texture and depth. The glue them together with hot glue.
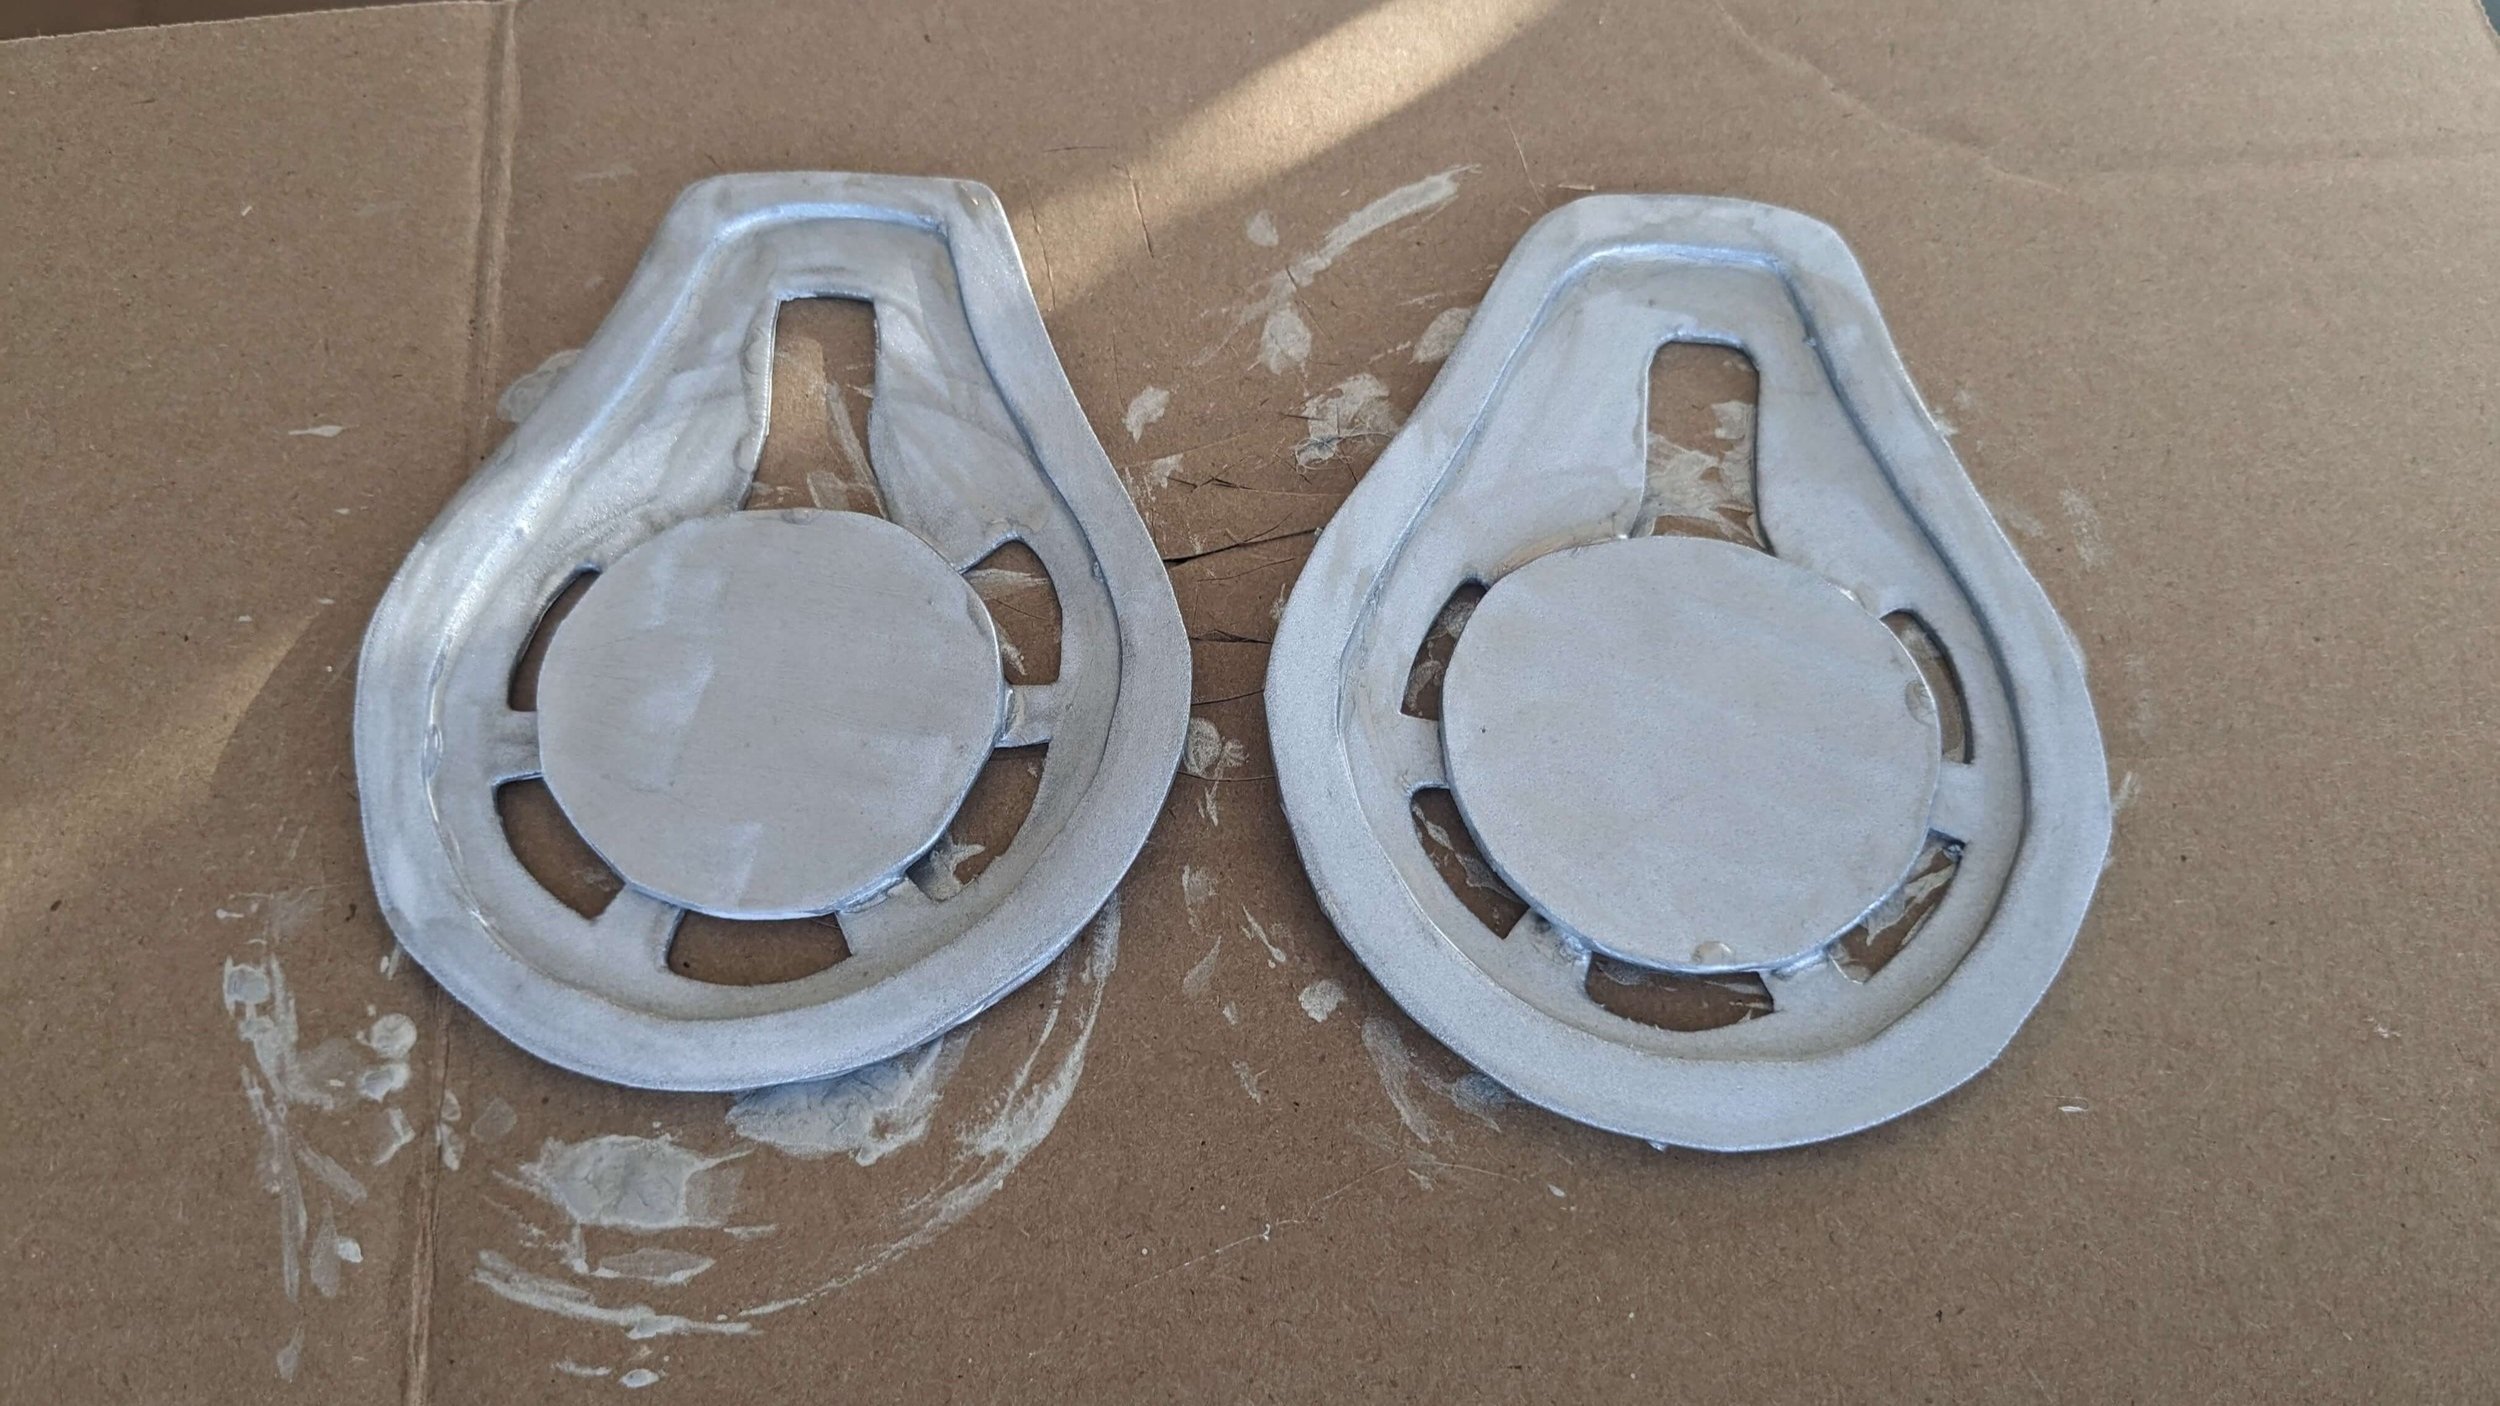
5. Paint “gears” silver.
6. Hot glue “gears” to blue wings.

7. Glue safety pins to the back of the wings and secure them with scrap fabric. Then pin wings onto Rikku’s shirt.

8. Finished Rikku blue wings!

Click here to go back to the Tutorial Table of Contents.
Rikku Gloves & Arm Bands Tutorial
Supplies:
Black Fingerless Leather Gloves
Gardening Gloves
Scrap fabric from cutting off sleeves
Black sock
Red electrical tape
Black belt buckles x 2
Acrylic paint
Acrylic paint fabric medium
Hot glue
Reference Image:
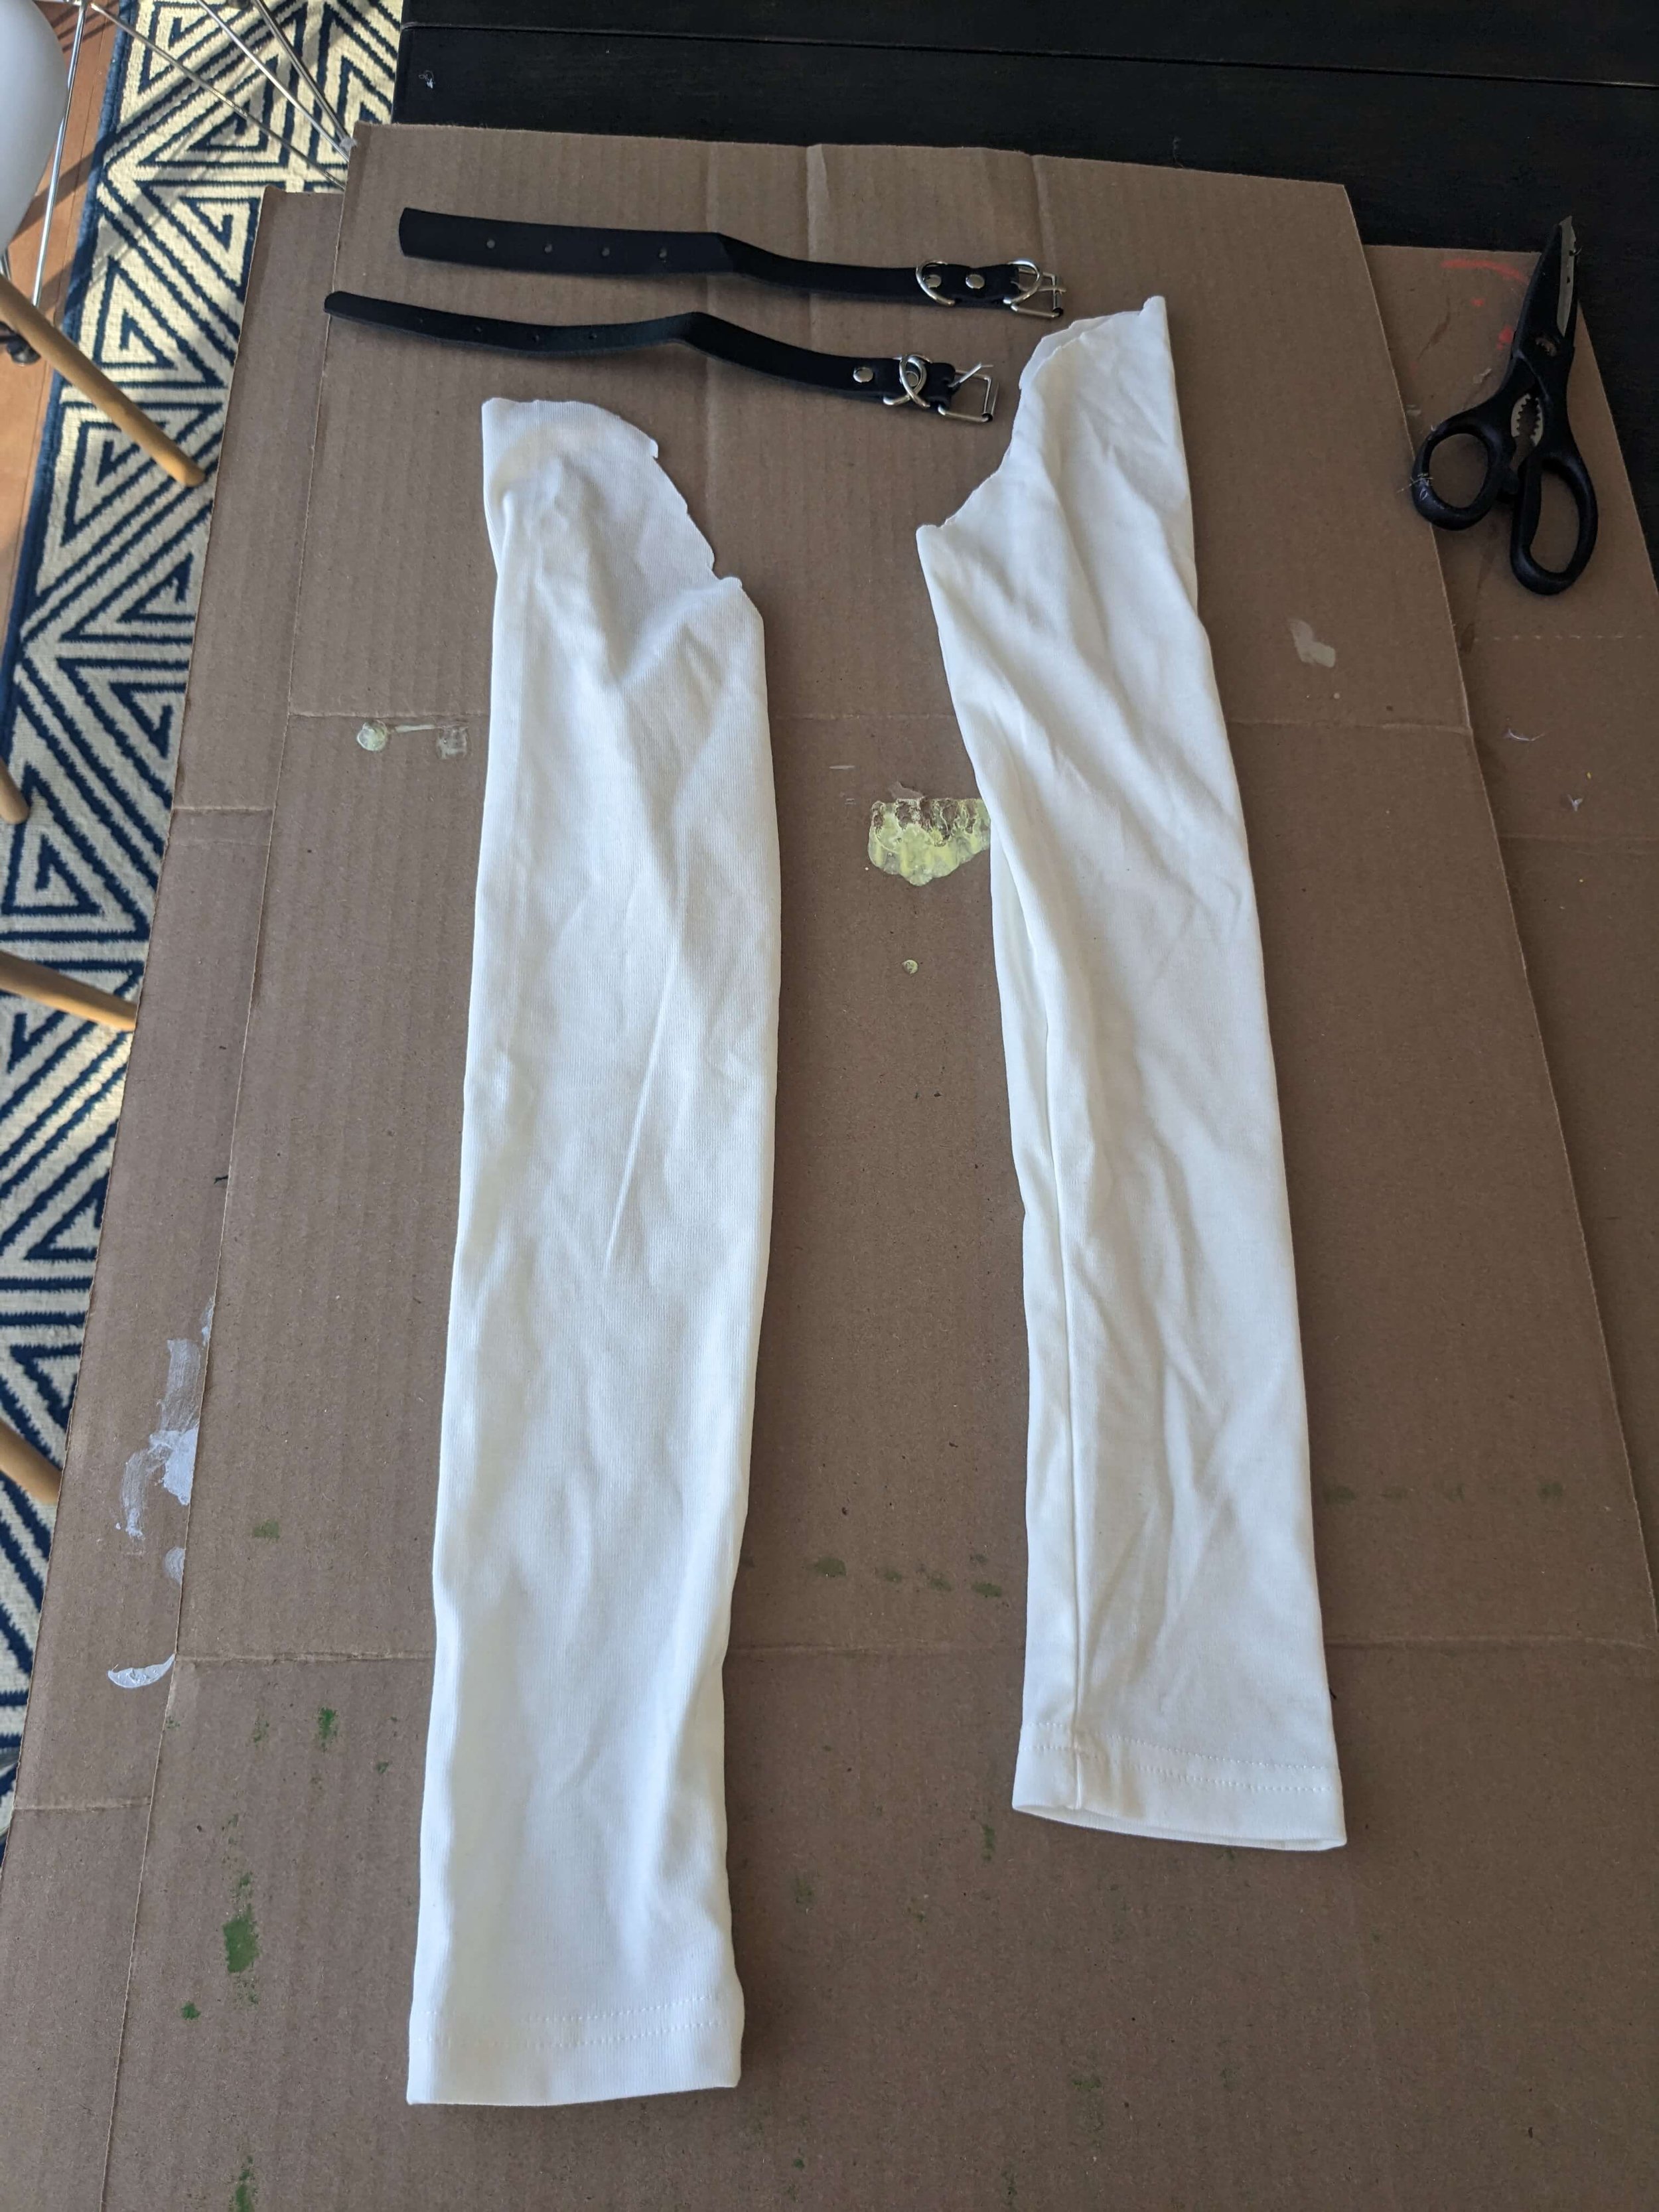
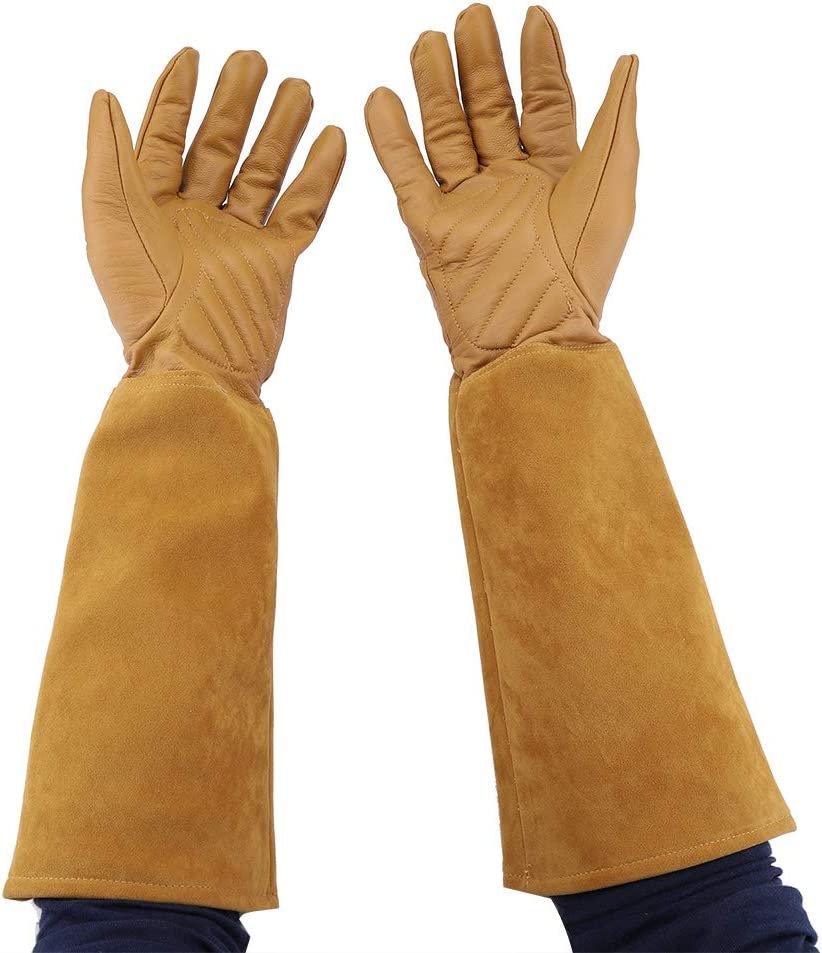
Starting point…
1. Black elbow band:
Cut off the ends of an old black sock (that’s it - done!)

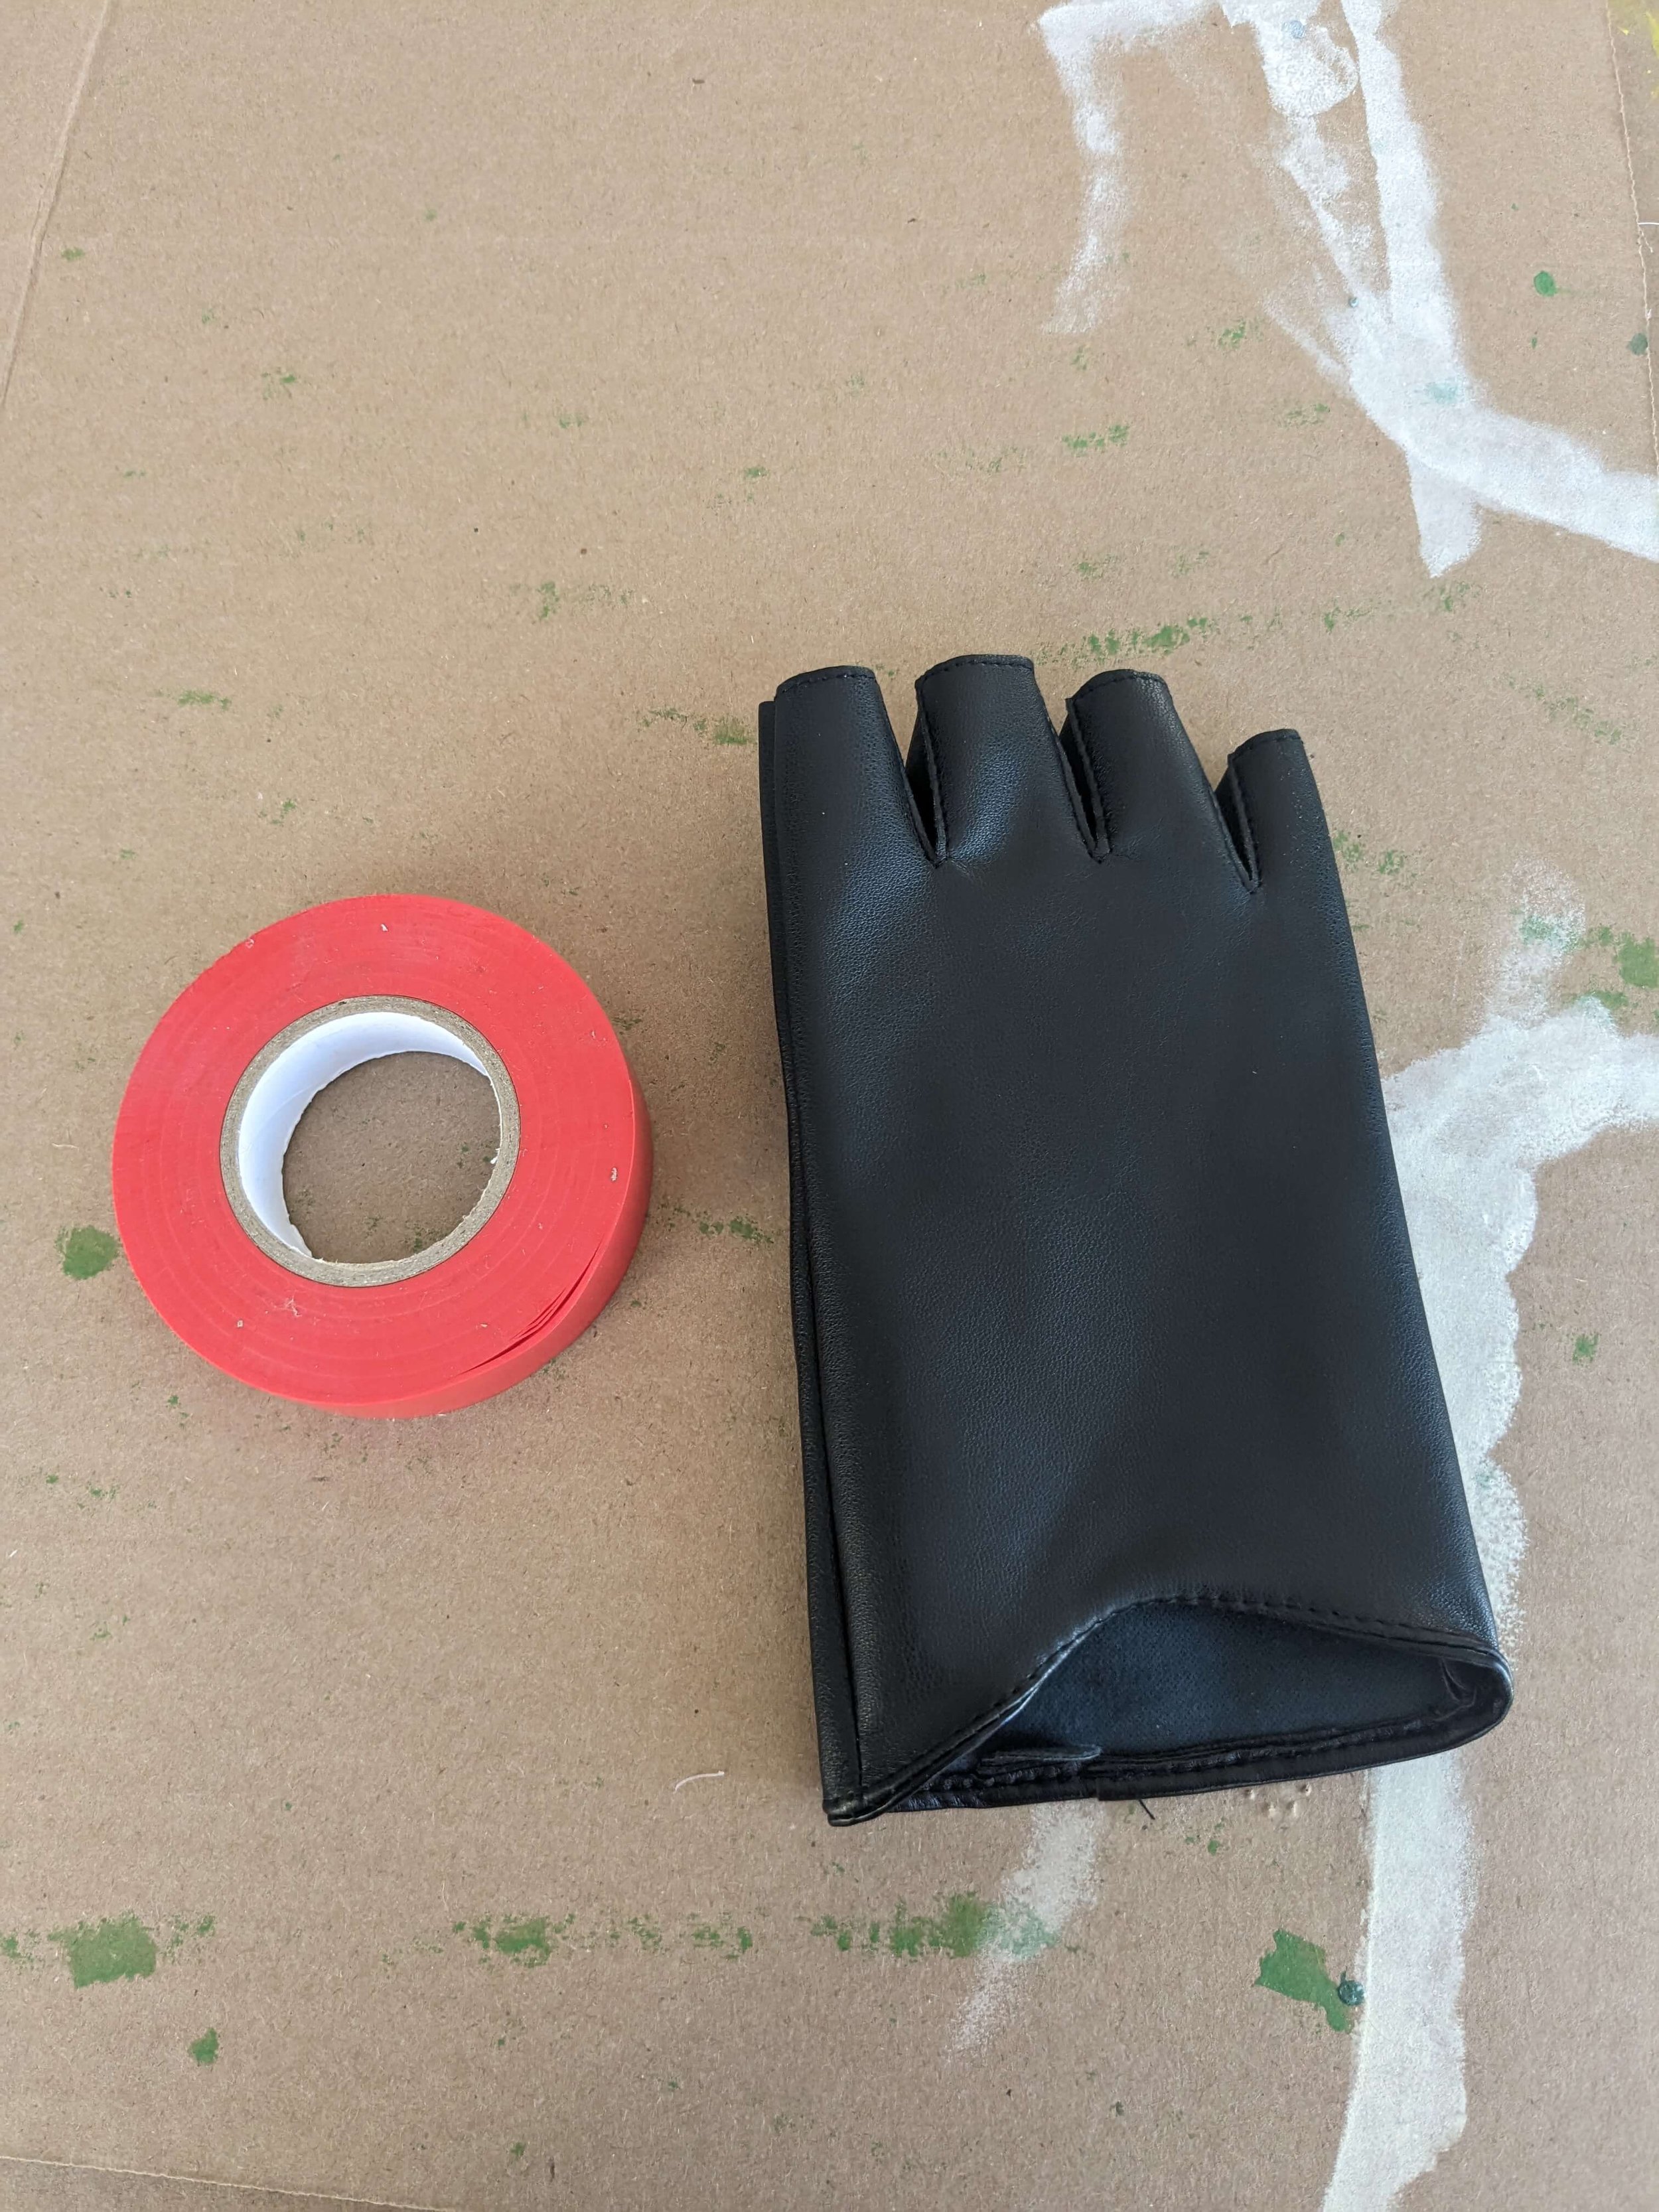
2. Black fingerless glove:
Cut 2 small pieces of red electrical tape and stick it on in an “X” shape.
The reason I chose to use tape instead of something more permanent is because I want to re-use these glove for Rikku’s Final Fantasy X-2 look. Tape makes it easy for me to remove later. :)

3. Brown long glove:
Take some scraps of black fabric, and sew 2 strips around the glove.

5. Green arm bands:
Use the scrap sleeve fabric to cut two arm bands, leaving room for a seam allowance.

6. Paint them green:
Mix green acrylic paint & fabric medium and paint the arm bands.

7. Hem both edges of the arm bands.
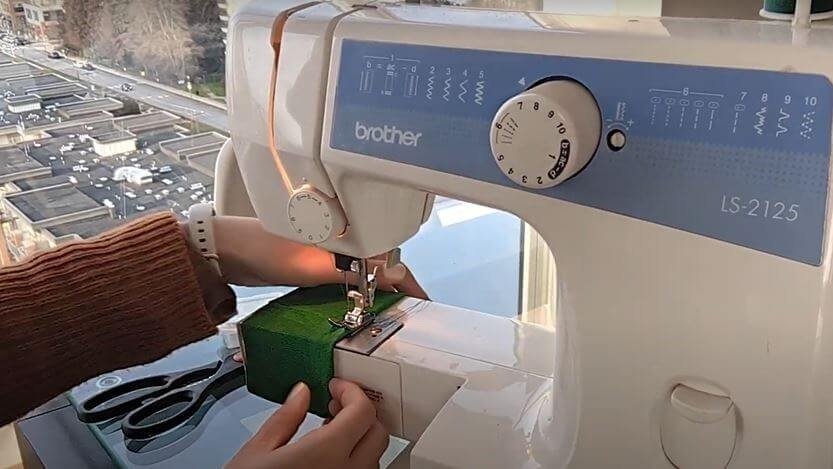
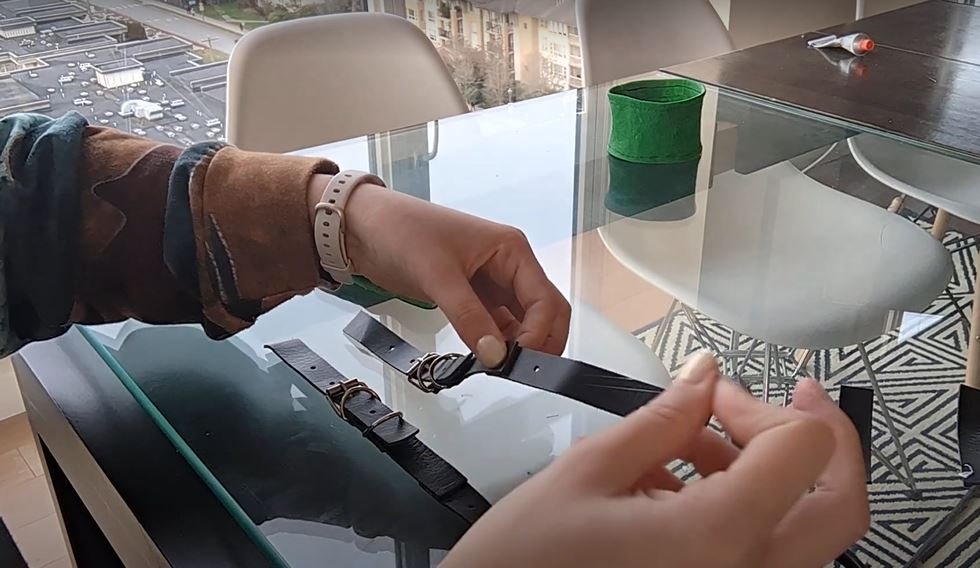
8. Black buckles on arm bands:
Add extra length to buckles if needed with scraps from Rikku’s top. Then measure the buckle strap around your arm, and glue (or sew) it on top of the green arm bands.
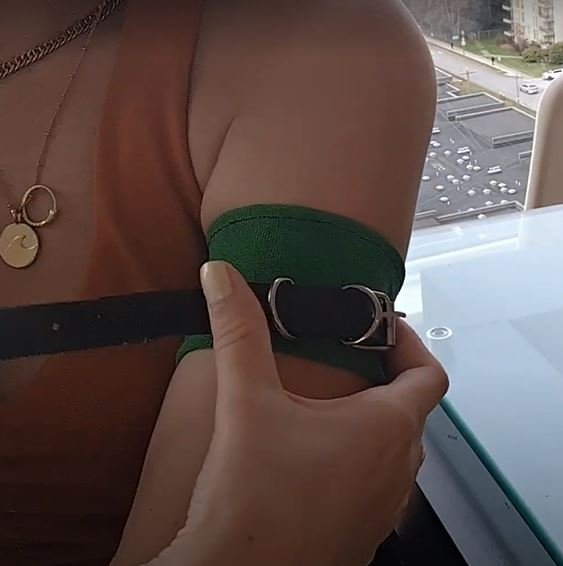
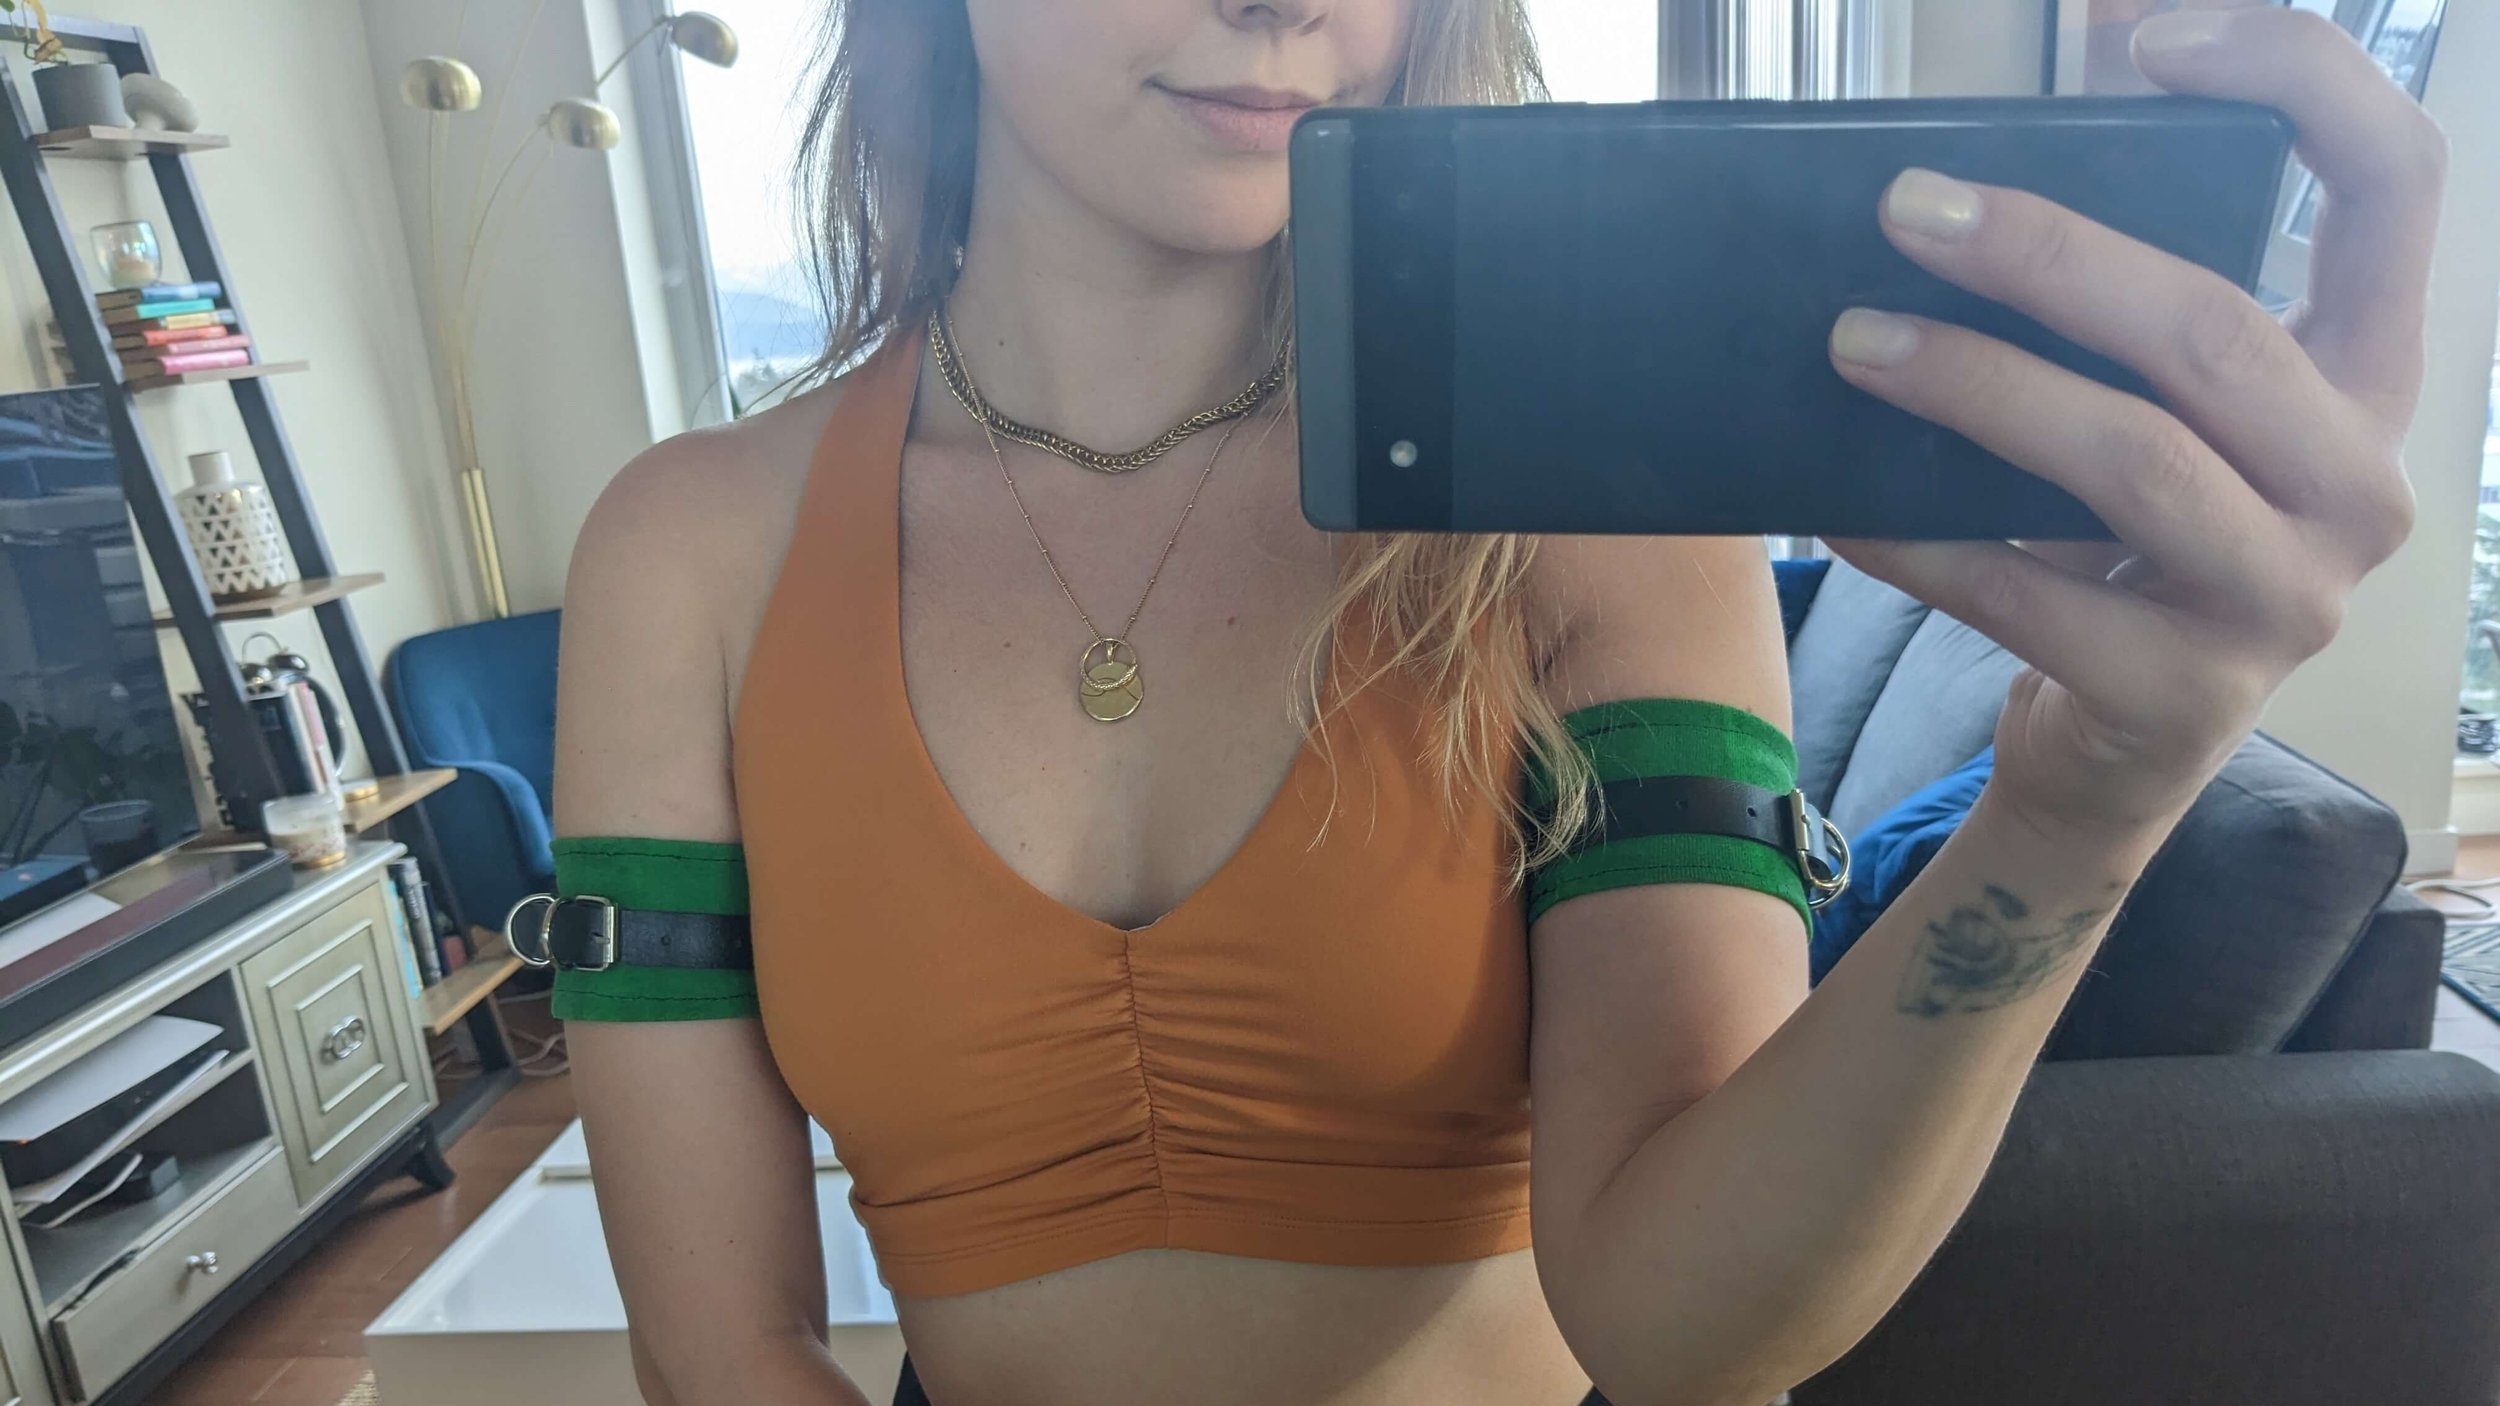
9. Finished Rikku Green Arm Bands!
Click here to go back to the Tutorial Table of Contents.
END RESULT:
FINISHED RIKKU COSTUME
Once you've got all your pieces together, it's time to put it all together and rock the Rikku look! Here's how mine turned out:

I hope you found this guide helpful! Now go show off that Rikku style and have a blast at your next convention or photoshoot! 🚀Don't forget to follow me on social media for all the latest updates and cosplay-related tips!
With love,
Your friendly neighbourhood cosplay geek,

Bonus Rikku costume resources that I found helpful:
Rikku Final Fantasy X Costume Guide - Cosplay Tutorial by Alyson Tabbitha
Rikku Final Fantasy Makeup Transformation - Cosplay Tutorial by Alyson Tabbitha