
How to Make a DIY Princess Peach Costume: A Step-by-Step Tutorial

This content may contain affiliate links. This means that if you make a purchase through one of the links, I may receive a commission. This commission comes at no additional cost to you, and I only recommend products that I personally love. Thank you for supporting my creative work!
Are you a lover of all things Super Mario? 🎮 Are you tired of buying overpriced and poorly made Princess Peach costumes? Look no further, my fellow gamer geek! In this tutorial, I will be showing you how to make your very own DIY Princess Peach costume that will make Bowser swoon even more. 💕
Because, let's face it, sometimes you just need to take matters into your own hands to save the Mushroom Kingdom (and your cosplay). So grab your sewing machine and your power stars, because it's time to get crafty! 🧵💫
In this blog post, I will be walking you through how I created my very own DIY Princess Peach costume, step-by-step. We’ll cover everything from choosing the right materials to constructing the actual costume. By following this tutorial, you can have your own homemade and stylish DIY Princess Peach costume ready for Comic Con in no time! ⚡👑
Disclaimer: I am NOT a professional seamstress and this was my first gown. I just figured it out as I went. I’ll try to make note of all the places I eff-ed up so you don’t make the same mistakes as I did. Don’t be afraid to get creative, experiment and make it your own. 🎨👍
Ready? LET-ZA GOOO!…🌟🍄✊
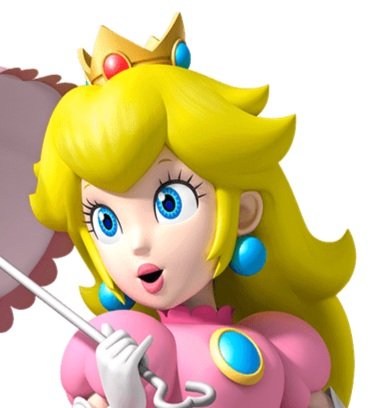
INSPIRATION
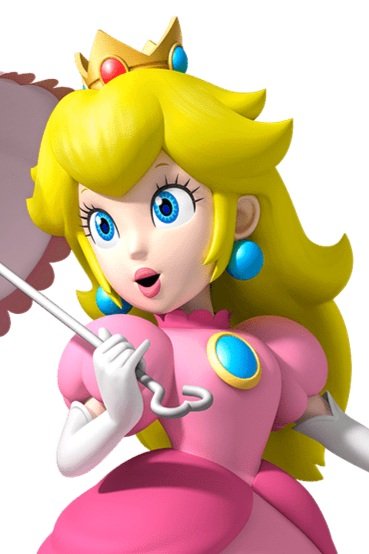
First, determine the style of Peach you want to cosplay as: do you prefer a classic Princess Peach or a more modern take on her?
For my Peach ensemble, I decided to go with her classic look. Truth be told, I wanted to do her new Super Mario Movie look... but once I got into it I realized it was a bit beyond my current skill level (as I mentioned... this was my first gown ever).
Once you have an idea of what kind of look you're going for, it's time to start collecting reference images (check out my inspiration board below to see the vibe, plus here’s a link to my DIY Princess Peach Costume Pinterest Board where you can load up on even more inspo.)

COSTUME ITEMS LIST
Now it's time to put together your costume items list. I bought some items and made them better. Other items I made completely from scratch. There is no “right” way to do this. But here’s what I got so that you can get a sense of what you might need.
COSTUME ITEMS I MADE:
Dress
Earrings
COSTUME ITEMS I ALTERED:
Crown
Broach
Gloves
Wig
COSTUME ITEMS I BOUGHT:
Crinoline petticoat
Bum roll
Hoop skirt (I’m not sure I needed this TBH)
Pink lace parasol
In this blog post, I’m going to walk you through step-by-step how I made my own DIY Princess Peach costume, but if you’re more of a video person, check out the “Princess Peach” Instagram Story Highlight on my profile to see me in action. (@QueenAmyDalaCosplay).
Once you know what you need to create, it’s time to make a budget and go shopping!
SHOPPING LIST & BUDGET
Below you’ll see a breakdown of what I got for my DIY Princess Peach costume and approximately how much everything costs (including links!).
SUPPLIES I BOUGHT:
Bubble gum pink fabric - 4 m x $15 = $60
Hot fuchsia pink fabric - 3 m x $12 = $48 (I probably could have gotten by with 2 meters, but I bought extra)
Thread 5 x $3 = $15
Zipper $3
Bodice pattern $7 (Etsy)
Sleeve pattern FREE (www.moodfabrics.com)
Skirt pattern $15 (Etsy)
Wigs 2 x $19 = $38 (Shein)
Princess Peach accessories pack - gloves, crown, brooch $43 (Amazon)
Nude nylon knee high socks $10 (Shopper’s Drug Mart)
Foam balls $2 (Dollar Store)
Red & blue metallic acrylic paint 2 x $3 = $6 (Dollar Store)
Hoop Skirt $22 (Amazon) - I’m not sure I needed this
Crinoline petticoat $35 (Amazon)
Bum roll $31 (Amazon)
Pink lace parasol $14 (Amazon)
Coloured contacts $21 (Clearly Contacts: Splash of Colour2 - Aqua-tic - Allure)
Pinking shears - optional $13 (Amazon)
Interfacing $15 (Amazon)
Hair scissors $8 (Amazon)
Hair spray: Got2b Freeze Spray $7 (London Drugs)
Hair gel: Got2b $7 (Amazon)
SUPPLIES I ALREADY HAD:
Stretchy jewelry thread
Old bed sheets
Pins
Sewing machine
Fabric scissors
Iron
1 inch elastic
Wig mannequin head
Seam ripper
COSPLAY BUDGET:
$420 CAD
(Please consider tipping if you get value or inspiration from this DIY Princess Peach costume tutorial!🙏🥰)
Okee dokee… ready to jump into the meat of this DIY Princess Peach costume tutorial? Scroll down to find the item tutorial you're looking for!
STEP-BY-STEP
DIY PRINCESS PEACH COSTUME TUTORIAL
DIFFICULTY LEVEL:
Advanced
Intermediate to advanced sewing skills needed.
Wig styling involved.
Most items altered in some way.
TUTORIAL TABLE OF CONTENTS :
Skirt Tutorial (Click Here)
Bodice/Top Tutorial (Click Here)
Crown, Brooch, & Earring Tutorial (Click Here)
Gloves Tutorial (Click Here)
Wig Tutorial (Click Here)
Princess Peach Skirt Tutorial
Supplies:
Old sheets
Thread
Bubblegum pink fabric
Hot fuchsia pink fabric
Skirt pattern
Scissors
Pinking shears
Elastic for waist
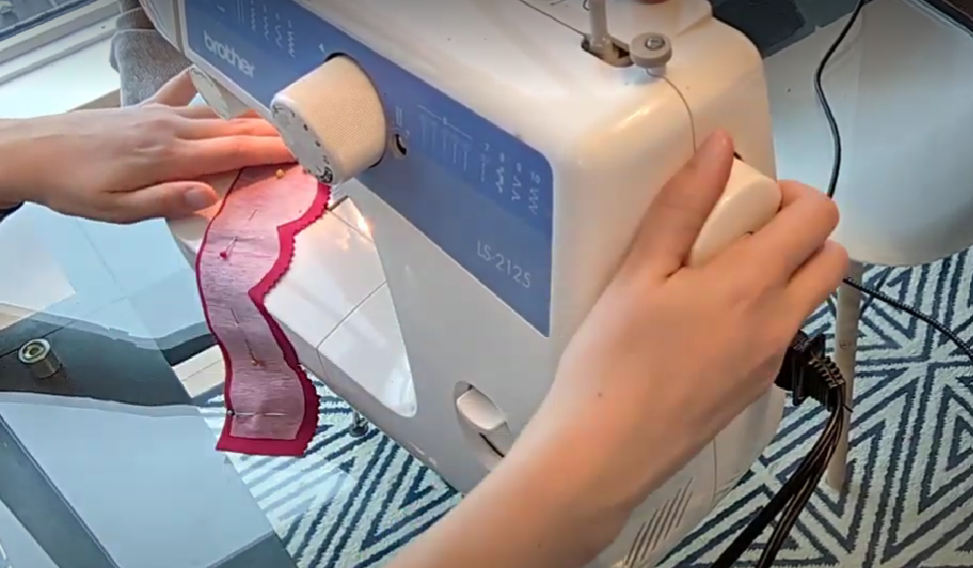
Reference Image:

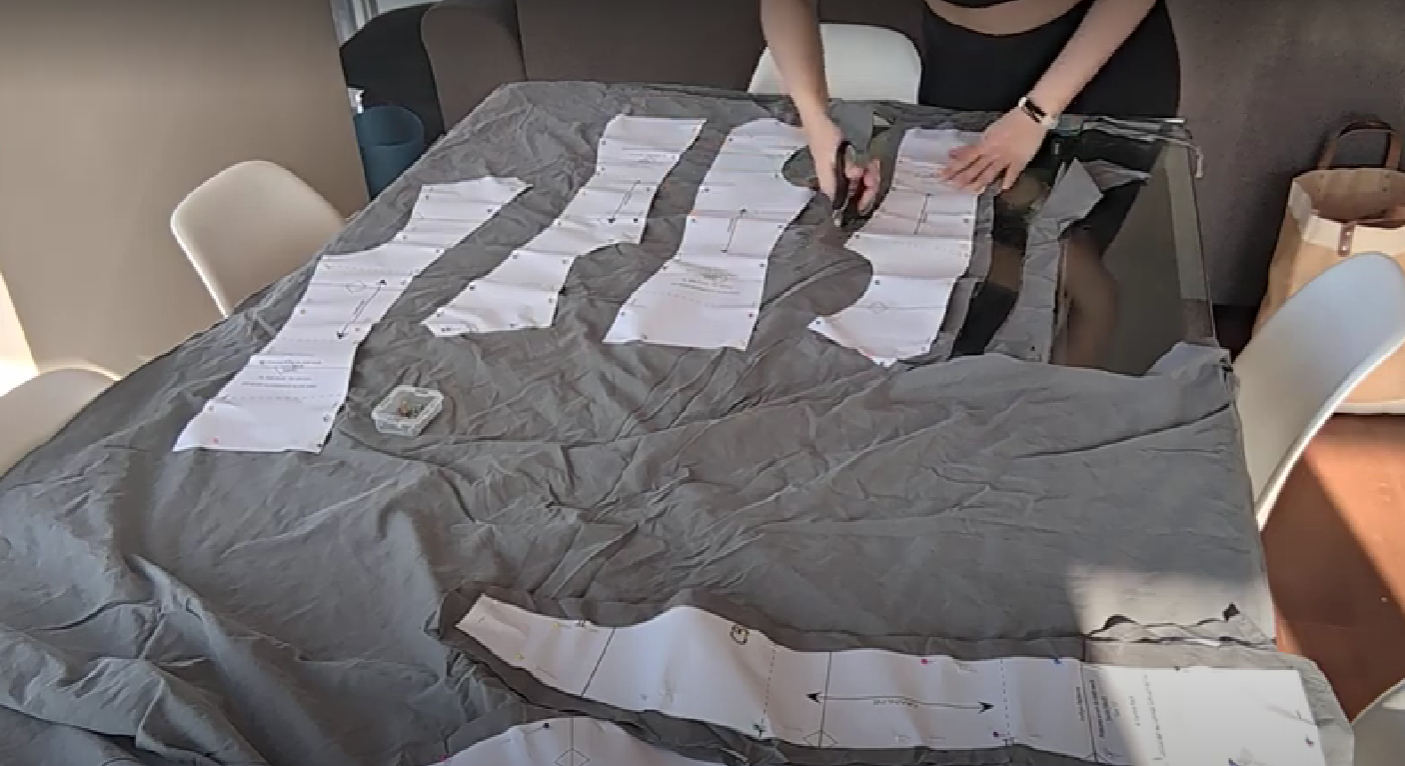
1. Print & cut out the skirt pattern.
I found a “Browsette” dress pattern on Etsy and just used the skirt pattern for Princess Peach instead.

2. Pin pattern to fabric & cut out 2 of each skirt piece.
I suggest using pinking shears on the curved parts because it will make it easier to sew later without bunching.
Also, it’s best to make a mock up first using old sheets. These can easily be found for cheap at thrift stores or your closet. And although this step is optional, I highly, highly recommend it. I made so many mistakes on my mockup. I’m glad I started here (even though it was annoying to make my dress twice) because it prevented me from making the same mistakes on my fancy fabric.

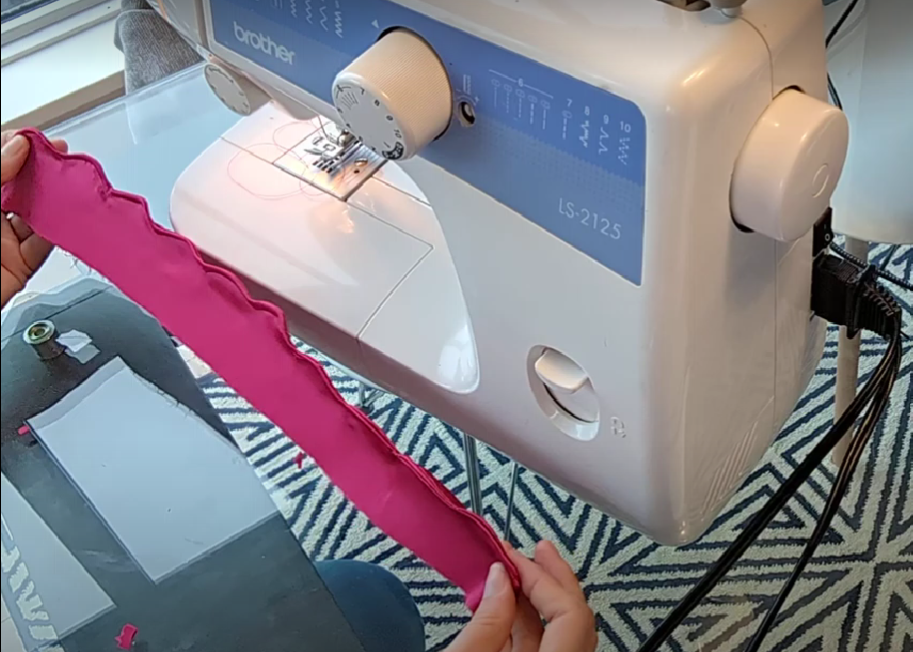
3. Pin pattern to fabric & cut out 2 of each hem piece & hip puff piece.
I suggest using pinking shears on the curved parts because it will make it easier to sew later without bunching.

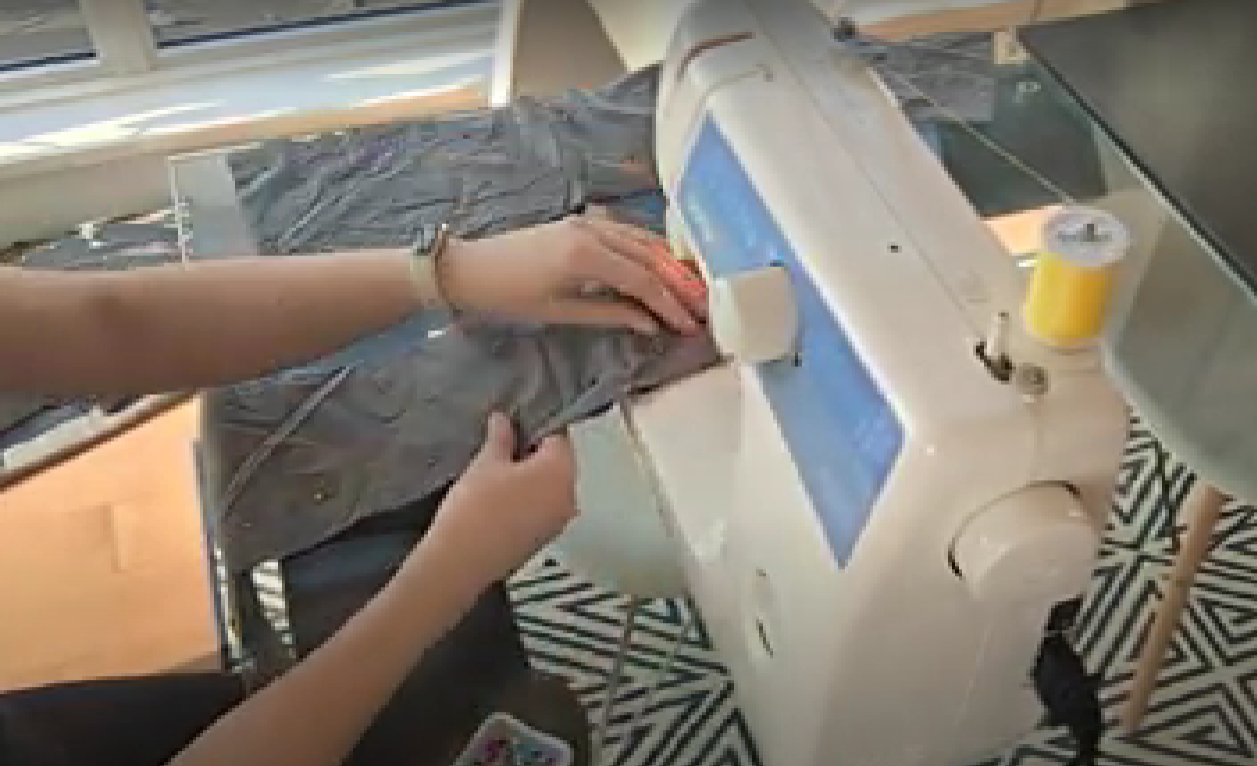
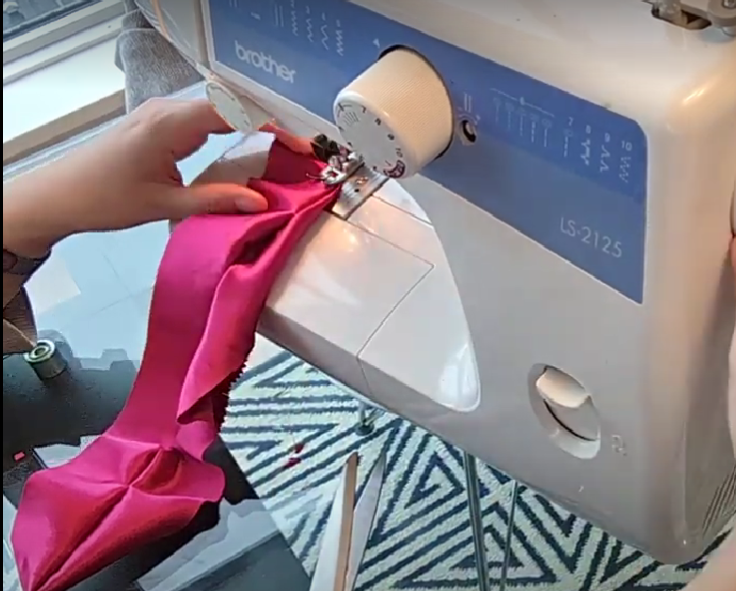
4. Sew hem pieces to skirt pieces individually.

5. Sew all skirt and hem pieces together.

6. Adjust your paper pattern if need be.
If you like the look of the skirt, great! You don’t have to change the pattern.
However, I decided I didn’t want a “V” shape at the waist, so I changed the paper pattern to have the waist be flat across the top.
I also wanted the “hem” pieces to be taller, so I changed that part of the pattern too.

7. Sew your fancy fabric skirt.
Follow the same steps you took with your mockup, only finalize it by hemming the bottom, and adding an elastic to the waist band.
8. Finished Skirt!

Click here to go back to the Tutorial Table of Contents.
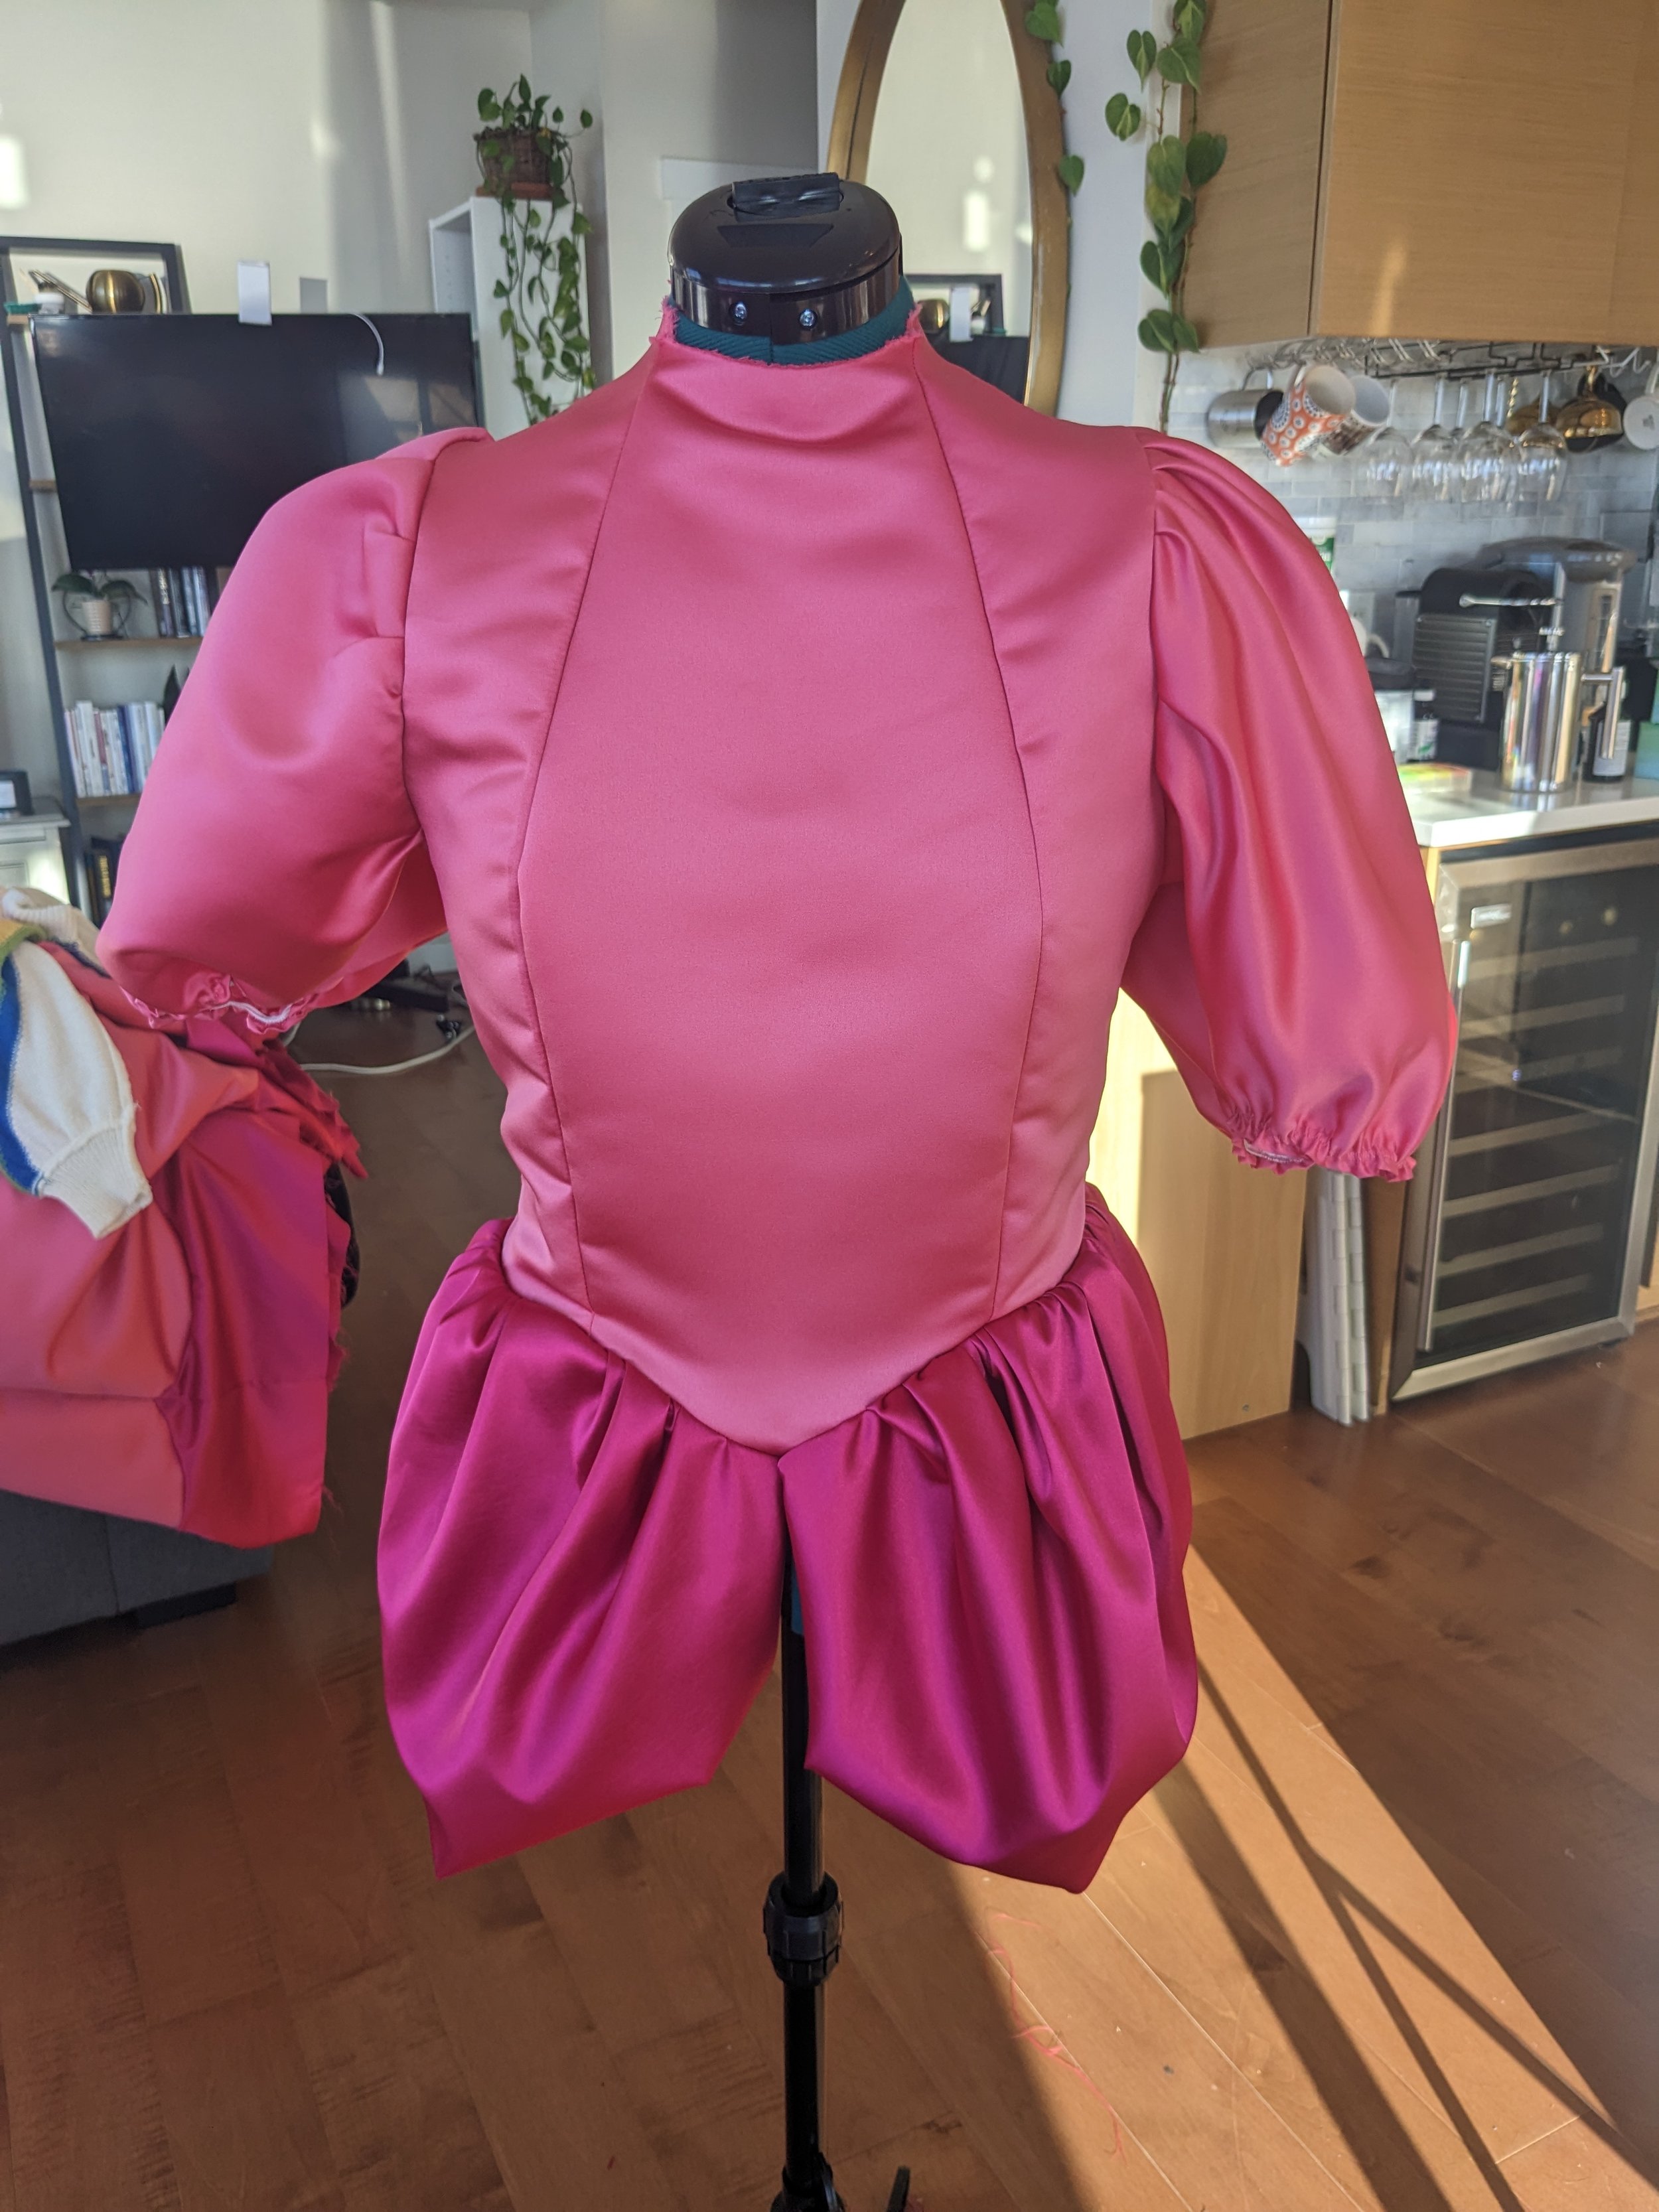
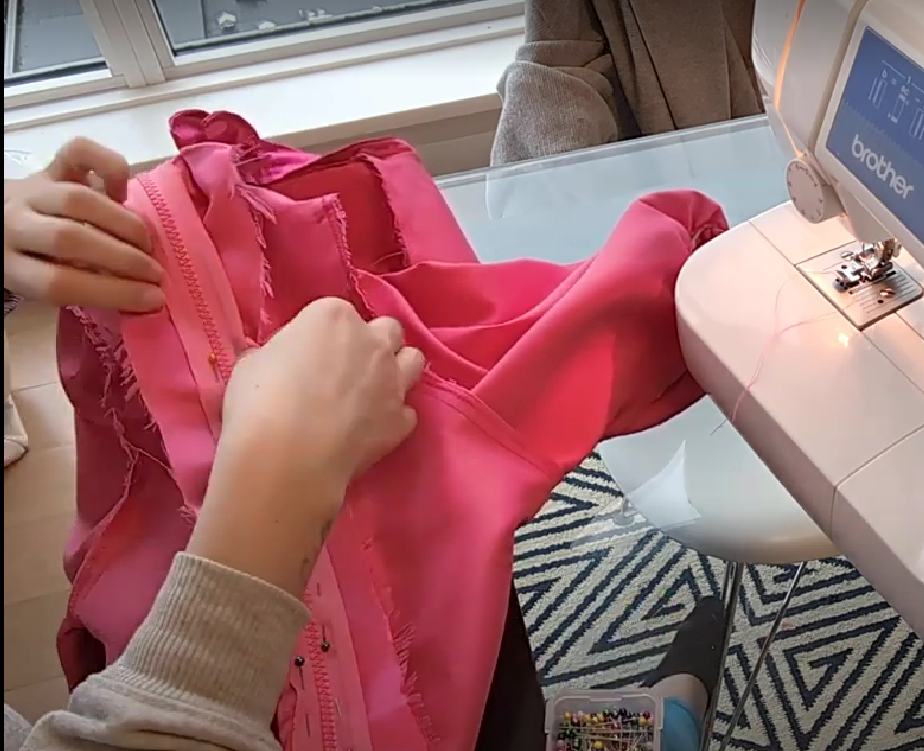
Princess Peach Bodice/Top Tutorial
Supplies:
Old sheets
Thread
Bubblegum pink fabric
Hot fuchsia pink fabric
Bodice pattern
Sleeve pattern
Hip puff pattern from skirt pattern
Scissors
Pinking shears
Elastic for sleeves
Interface for collar
Zipper
Reference Image:

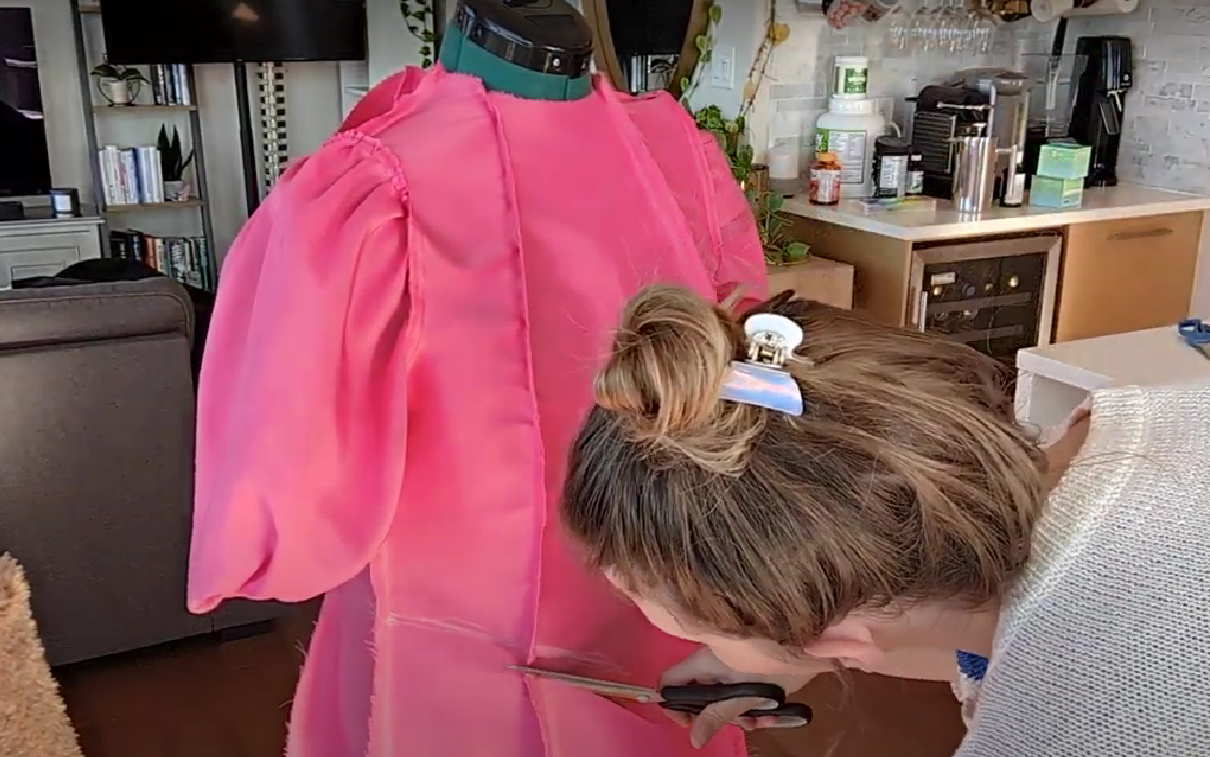
1. Print & cut out the bodice & sleeve patterns.
I found a general “Princess" Seam” bodice pattern for $7 on Etsy and just used the sleeve pattern from a FREE dress pattern found here: www.moodfabrics.com.
I also kept the hip puff pieces that I cut out from the skirt pattern in the skirt tutorial section.

2. Pin pattern to fabric & cut out 2 of each piece.
3. Sew bodice pieces together.
4. Gather sleeves edges.
“Baste stitch” along the top and bottom of the sleeves, then pull one thread to gather it into a bunch.

5. Sew sleeves to bodice.

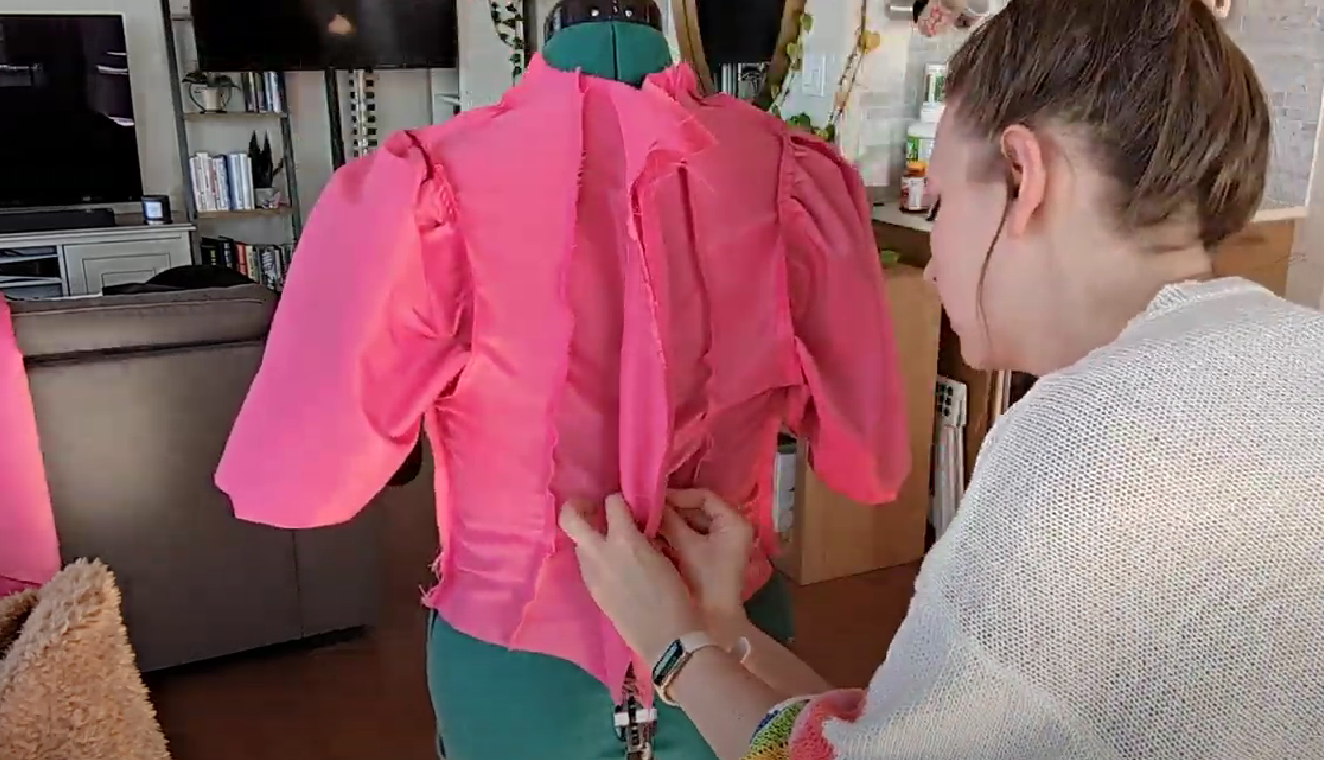
6. Adjust your pattern to fit you best.
From here, you can see if you like the fit. If not, make adjustments to your paper patterns.
Here are some of the adjustments I made to my own pattern:
The sleeves were too far down my shoulders, so I made a note to cute the shoulder in a couple of inches before attaching my sleeves to my fancy fabric.
The neck was too high, so I made it lower and wider.
The back seam didn’t have much seam allowance, so I added an inch to make sure the zipper fit and that it wouldn’t be too small for me.
I cut the bottom hem into a “V” shape so I could attach the hip puffs later.
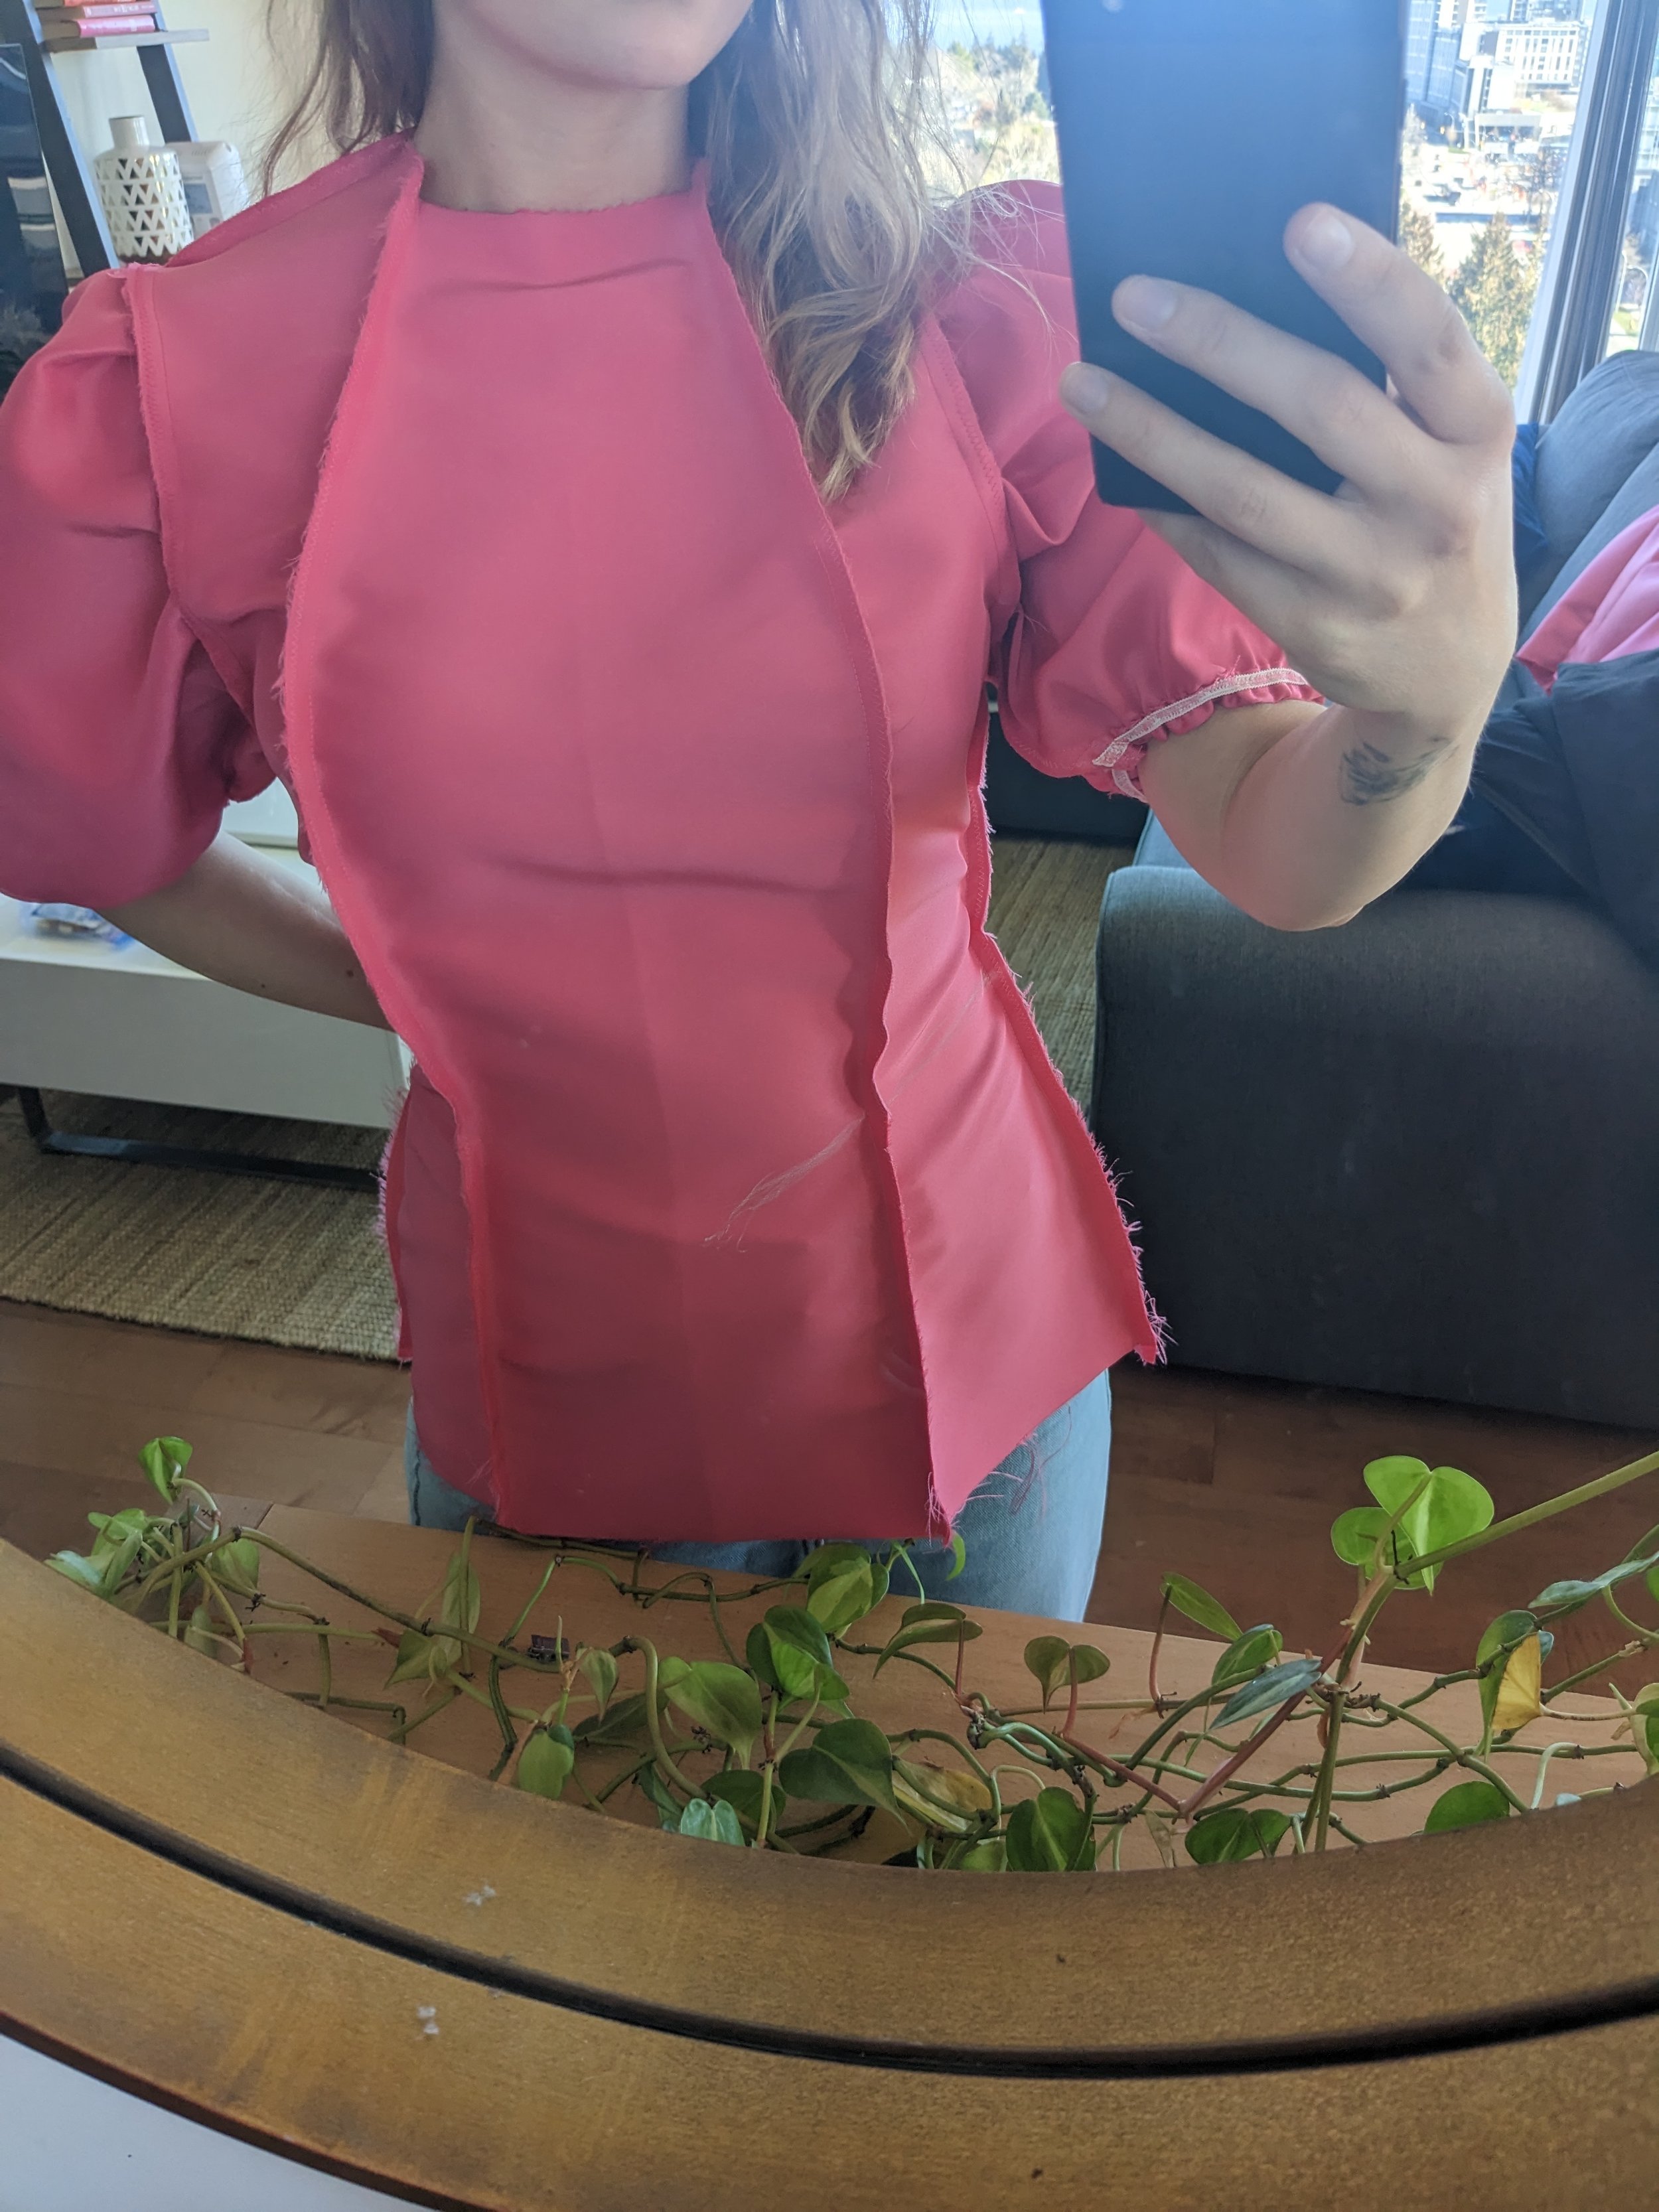
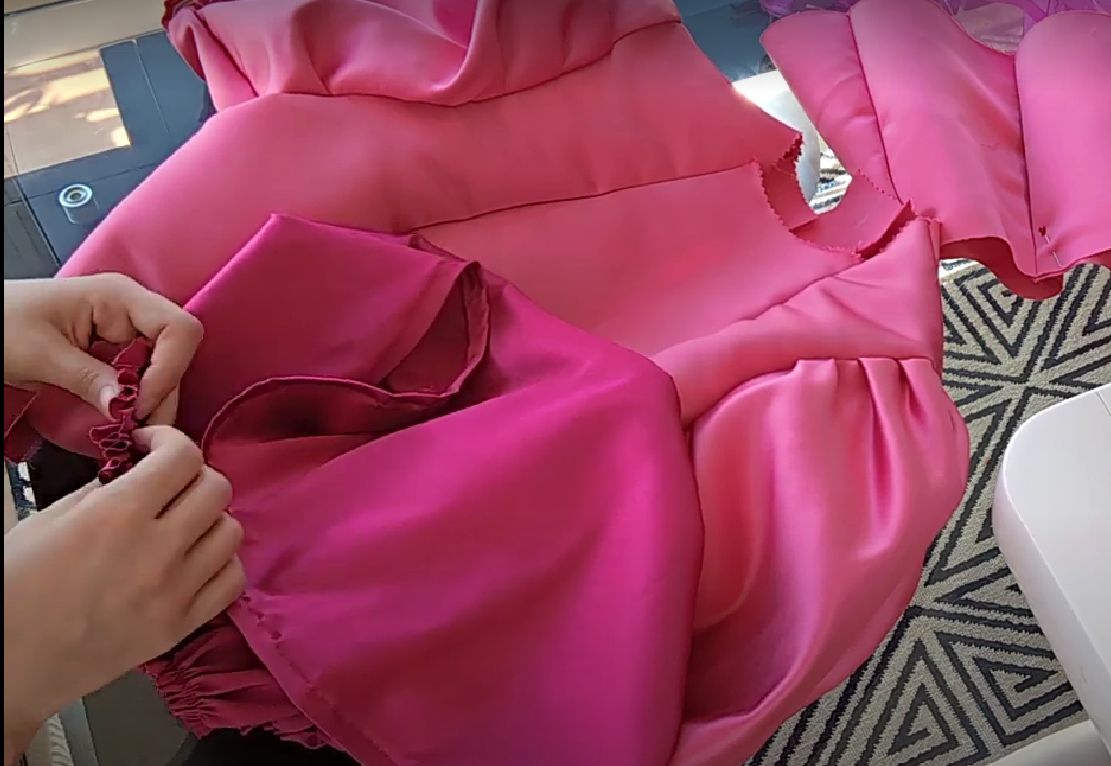
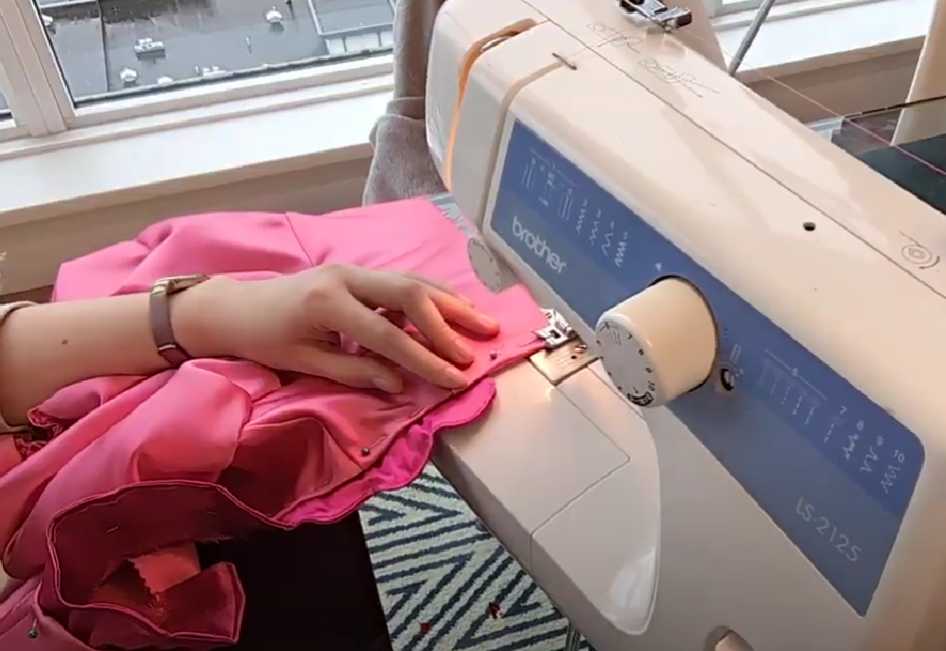
7. Repeat these steps with your fancy fabric.
But this time, add elastic to the bottom sleeve cuffs… there’s no point in doing this step for your mockup.
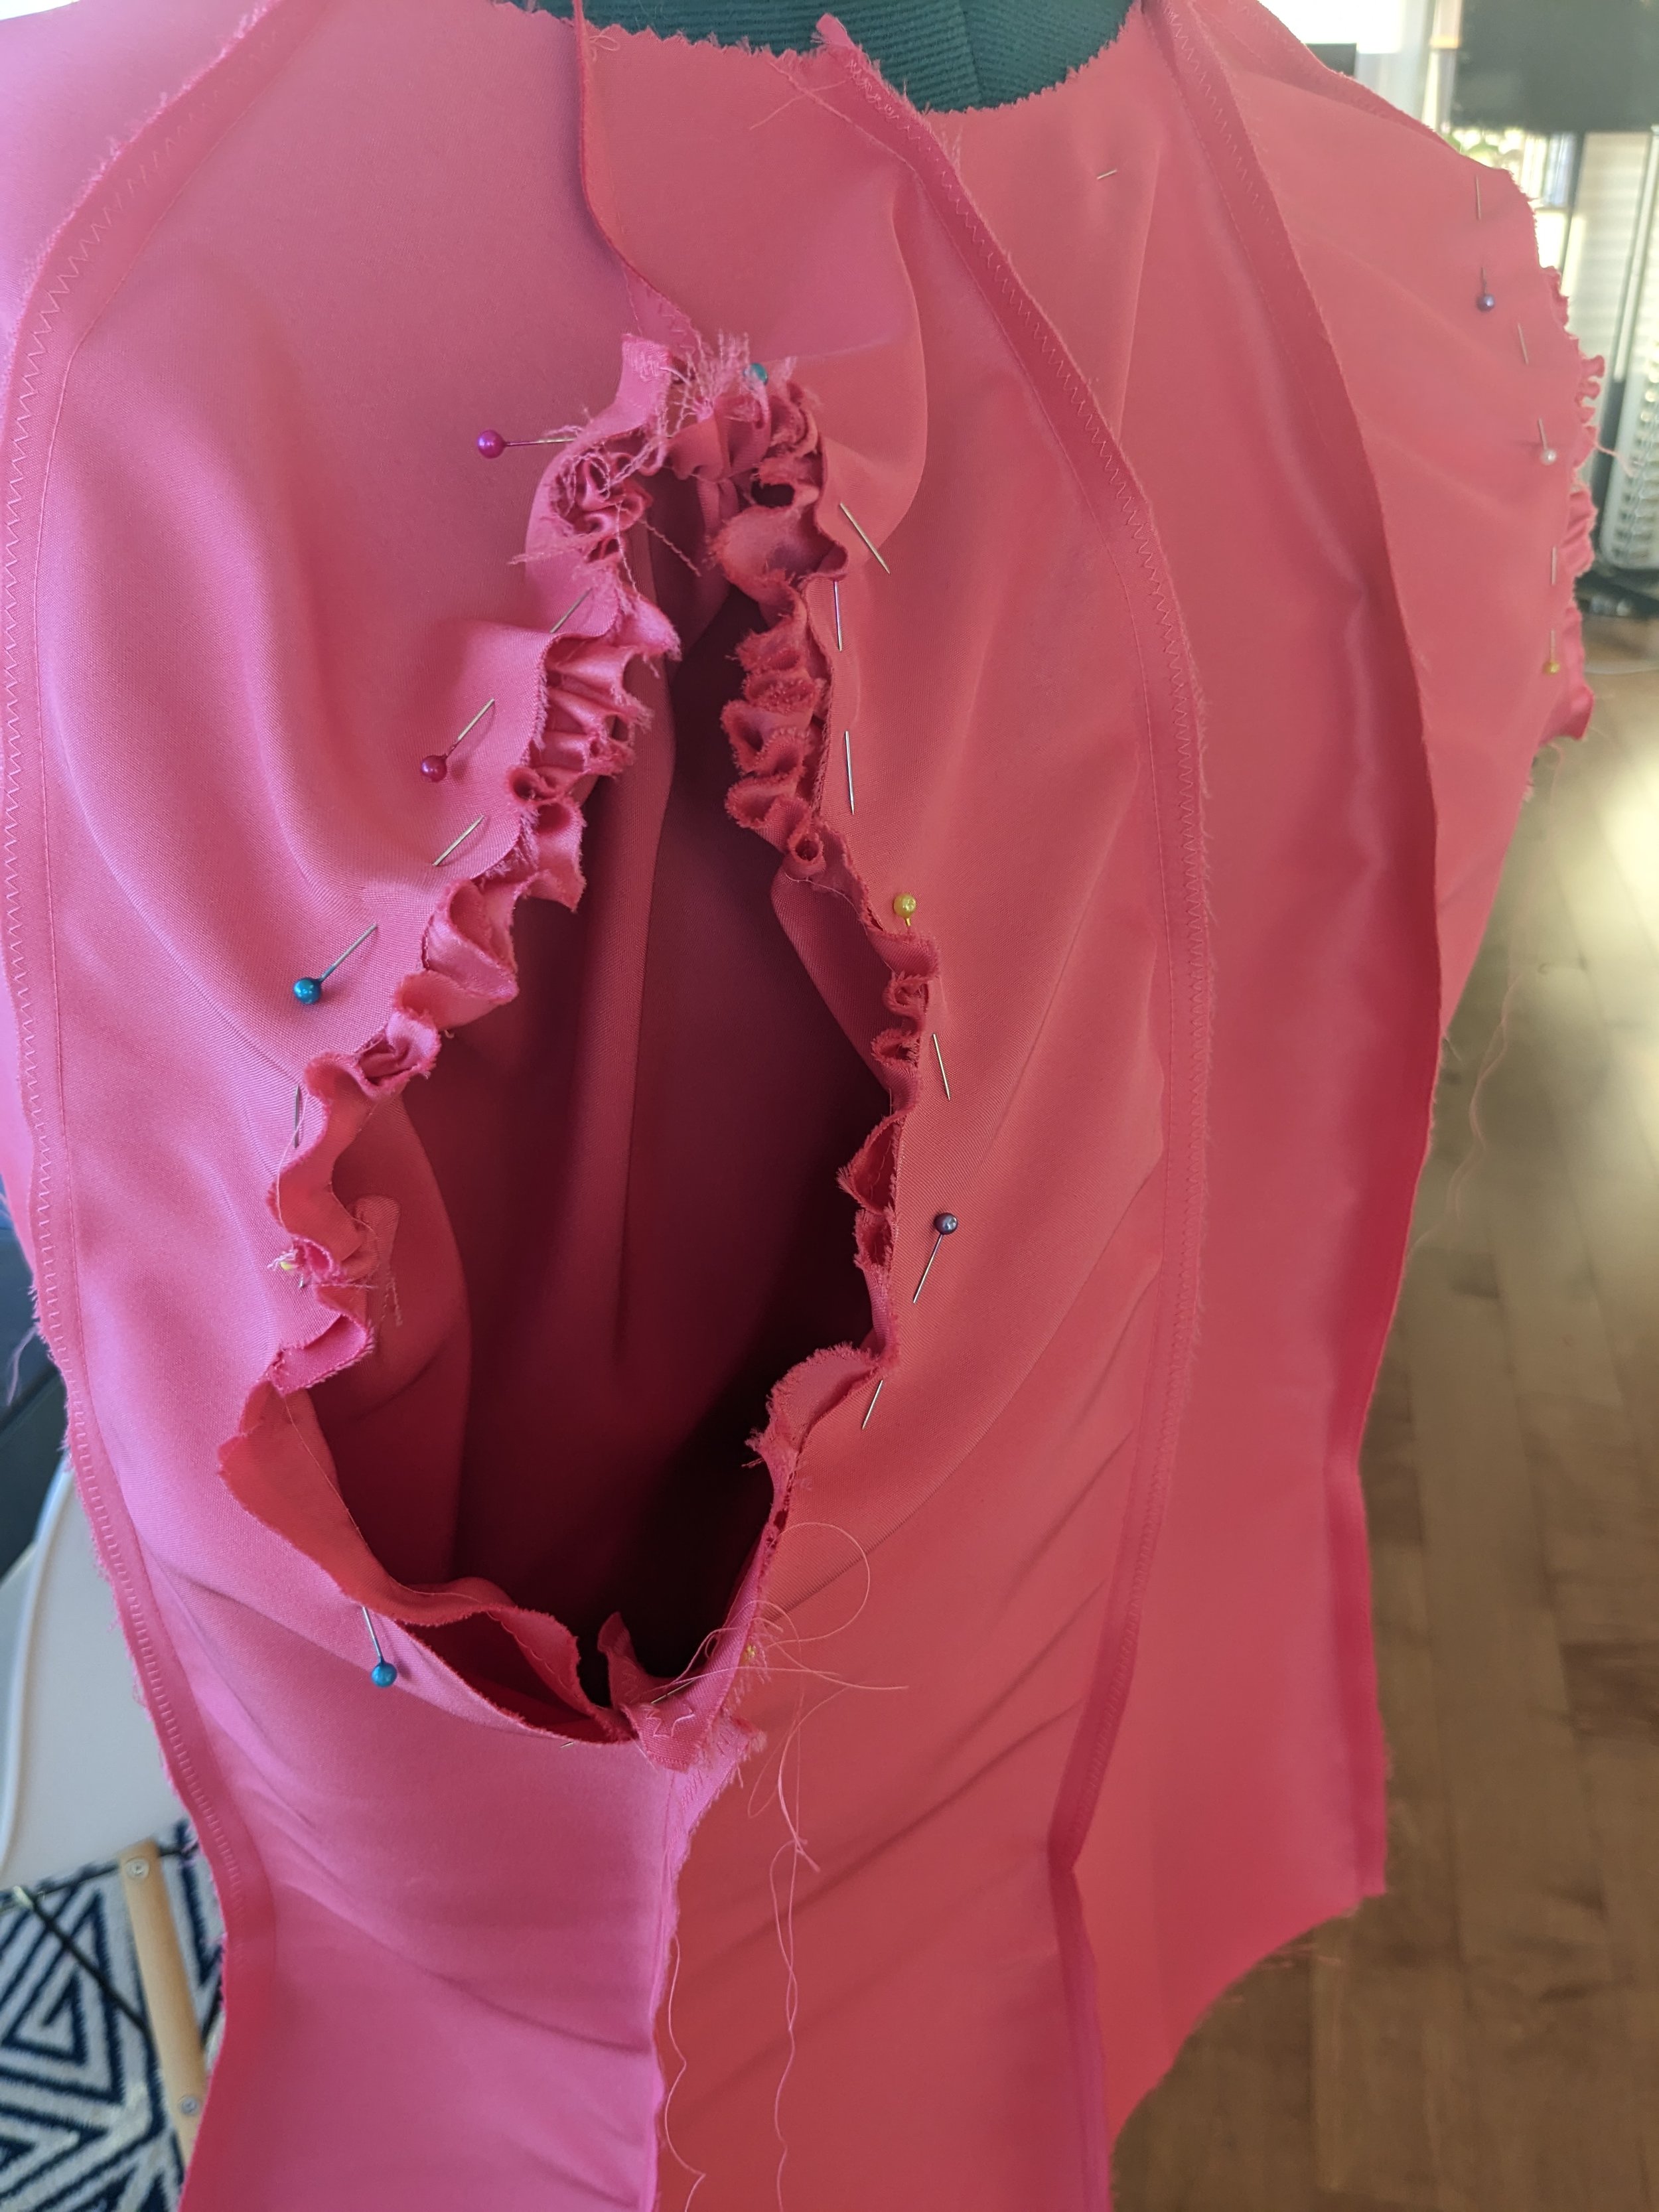
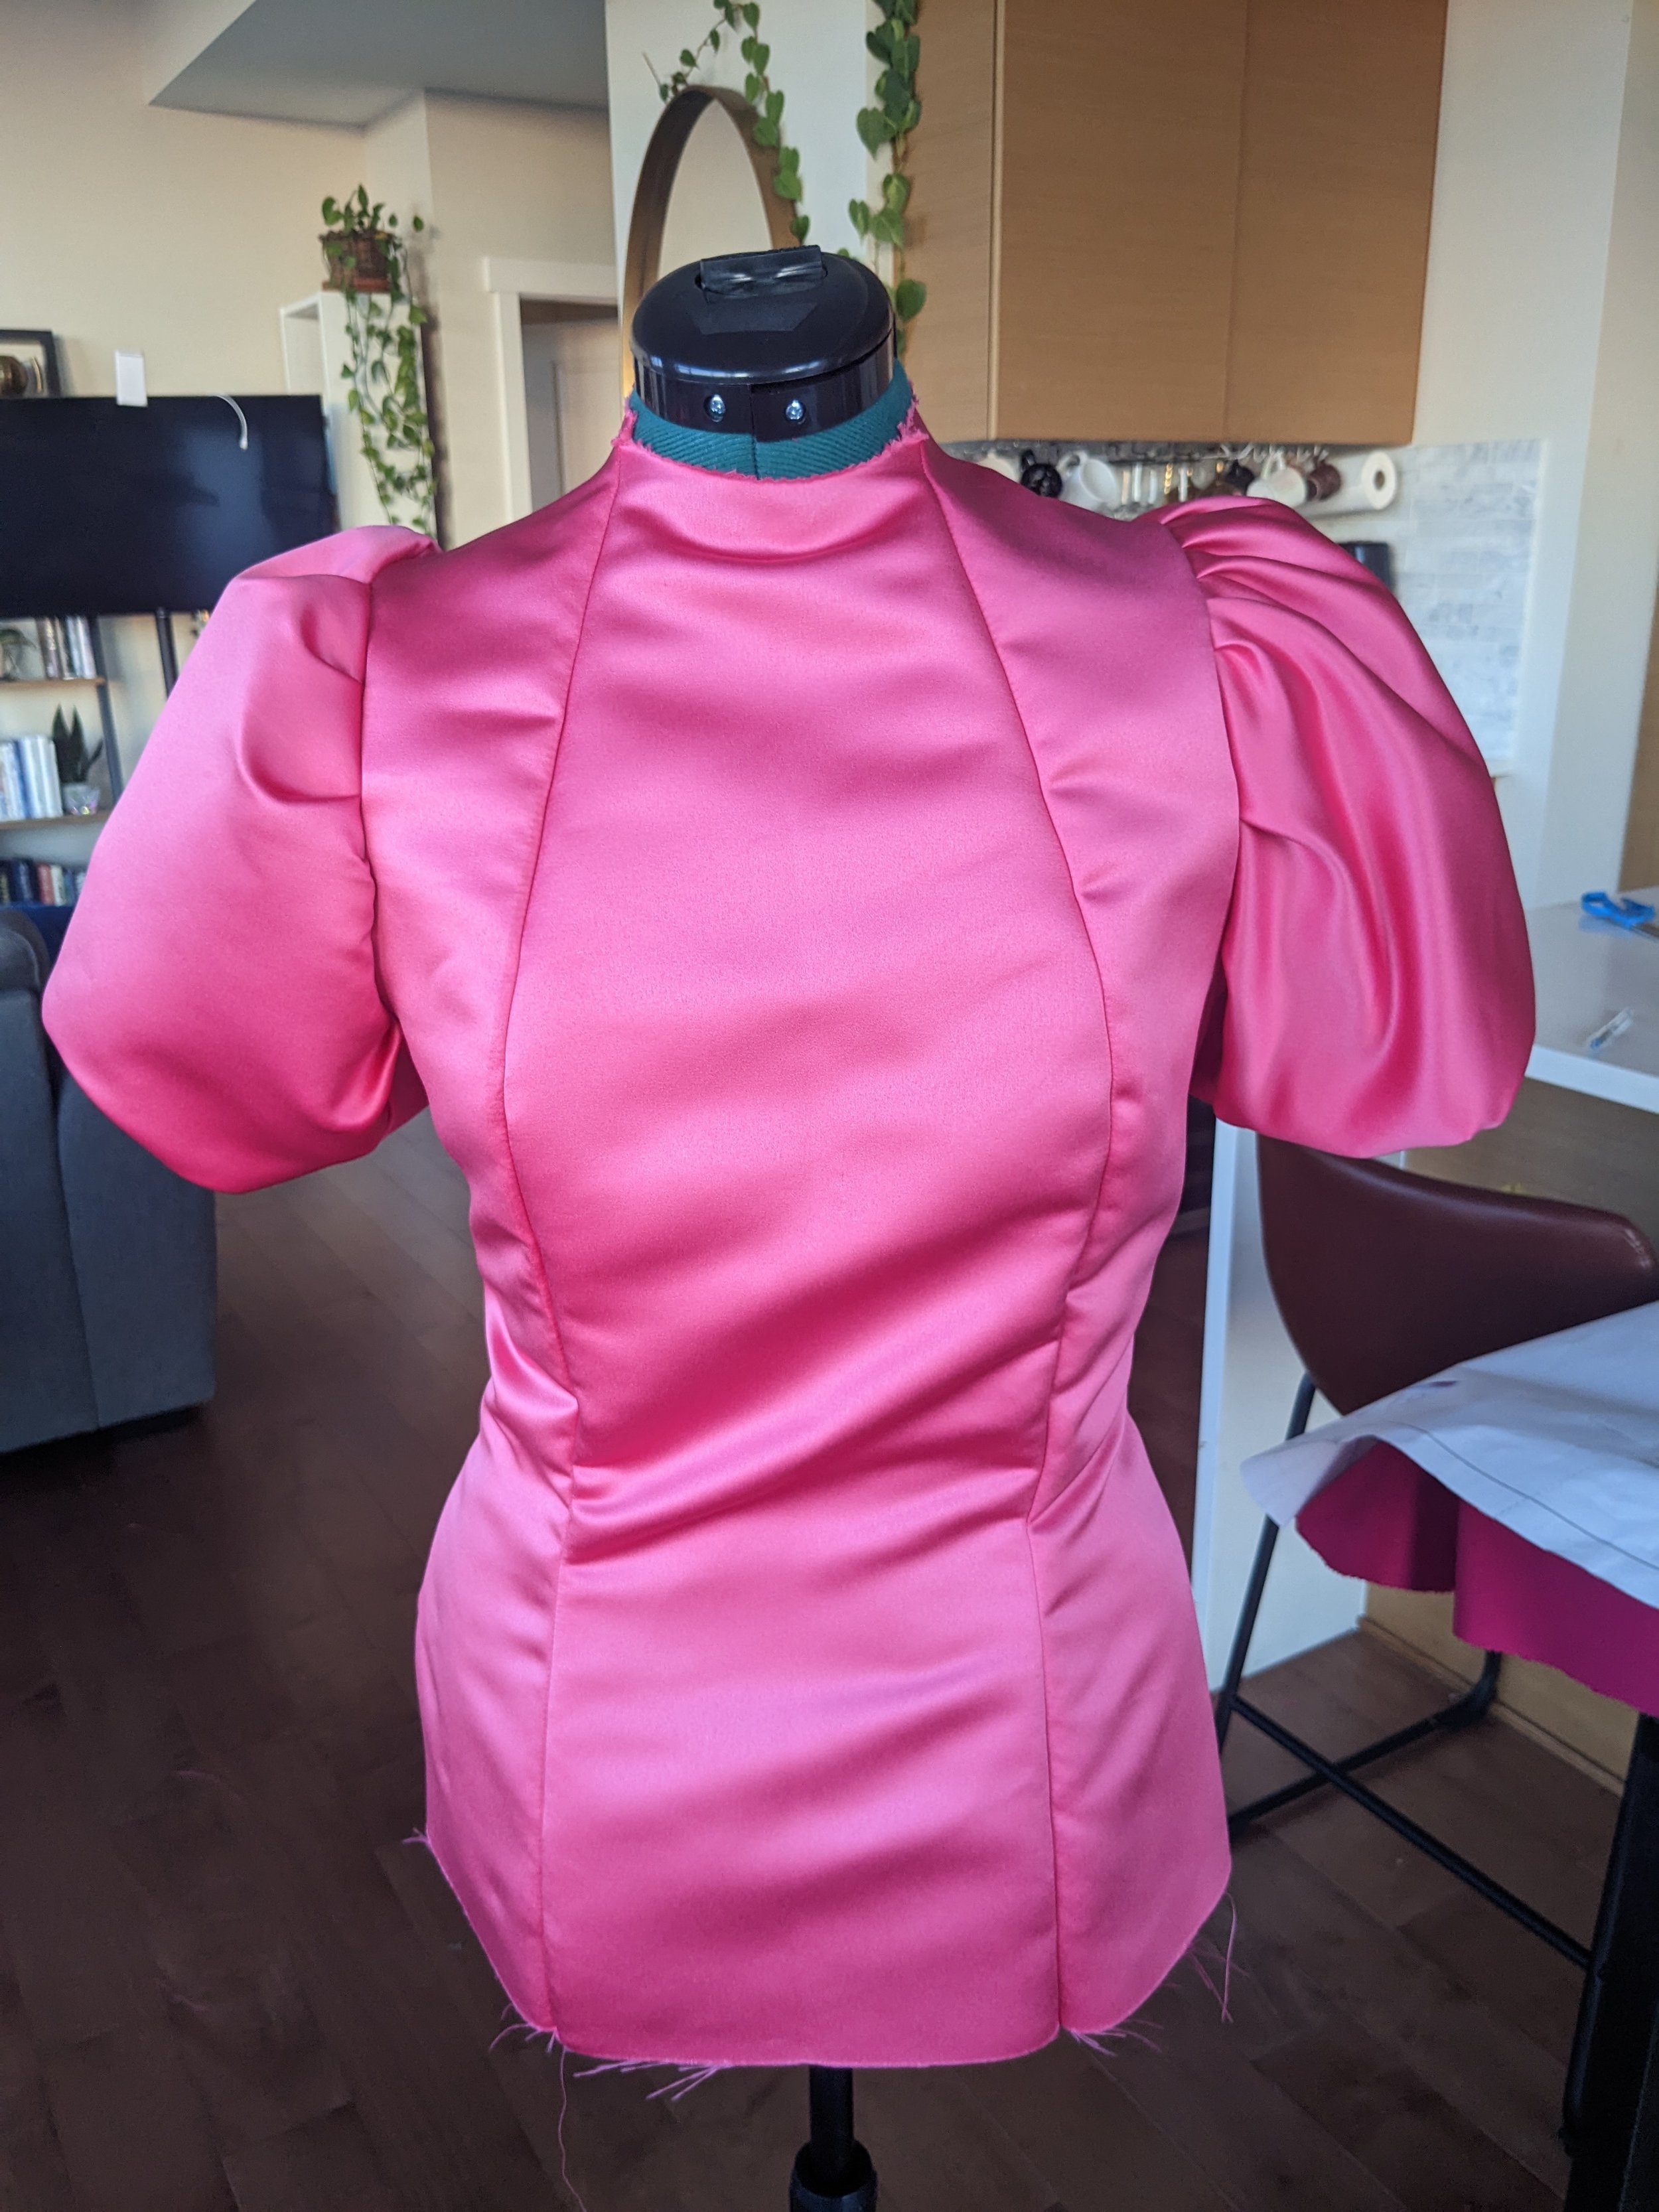
8. Gather & hem hip puffs and attach to the bottom of the bodice.
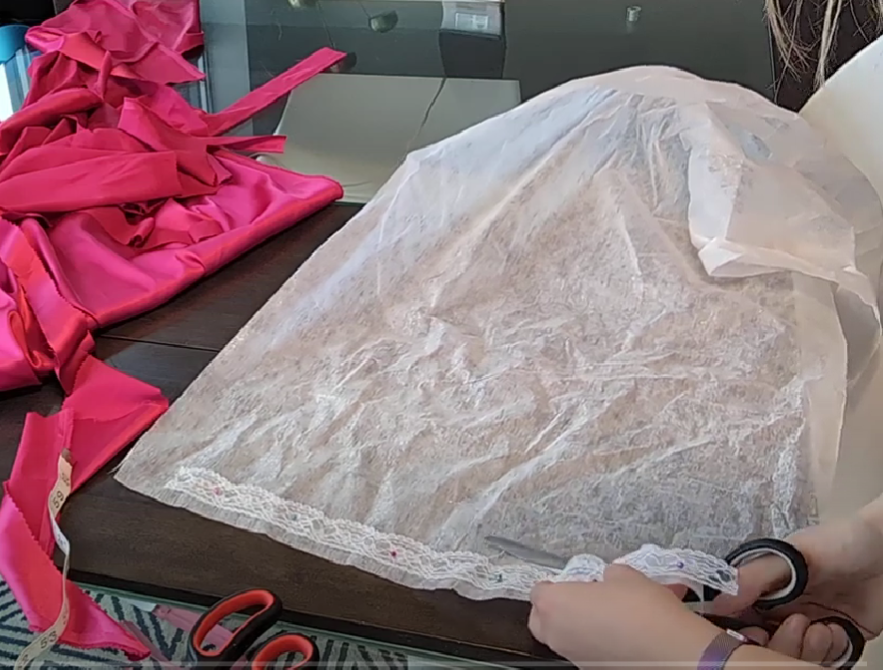
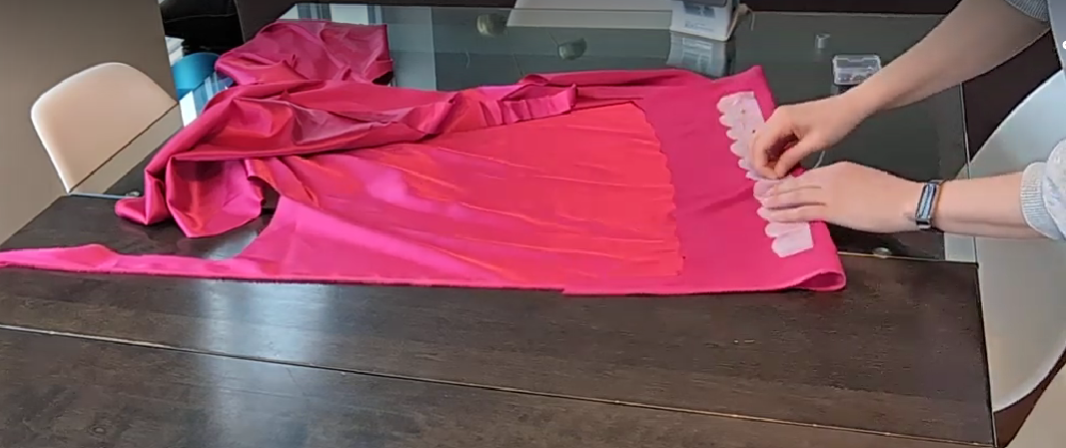
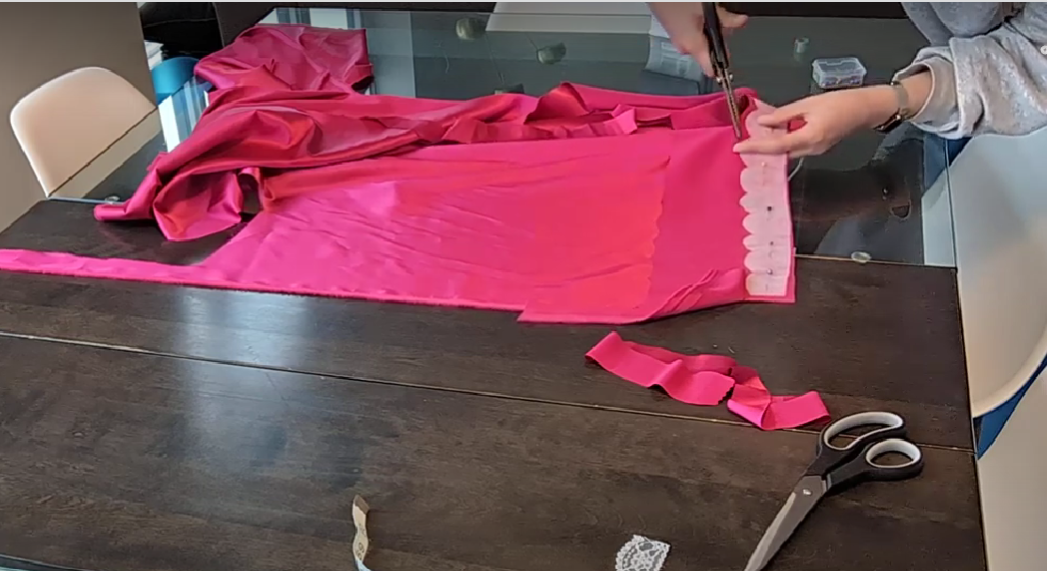
9. Make & attach collar.
Trim neck hole to your preference (leaving a small seam allowance).
Make a “pattern” out of paper or lace (I used lace).
Cut pattern onto interface.
Iron interface onto fancy fabric.
Cut 2 pattern pieces from fancy fabric leaving a small seam allowance around the interface piece.
Sew the pieces together (leaving the bottom open), with the interface facing the top.
Flip the fabric inside out so the interface is now inside.
Sew as close as you can around the edge.
Sew collar to neck of the bodice.

10. Install separating zipper.
11. Finished bodice!
Click here to go back to the Tutorial Table of Contents.
Crown, Brooch, & Earring Tutorial
Supplies:
Princess Peach accessory kit (Amazon)
Metallic blue & red acrylic paints
Paint brushes
Styrofoam balls
Jewel It Glue
Post earrings
Reference Image:
1. Earrings: Paint Styrofoam balls metallic blue.

2. Glue post earring back onto painted balls using “Jewel It” glue.

3. Optional: Paint crown & brooch gems metallic blue & metallic red.
The reason I say this step is optional is because technically the accessory kit I bought already came in the right colours. However, I didn’t like it that the brooch and crown didn’t match the blue on my handmade earrings. So I painted them to tie it all together as a matching set.

4. Finished result!
Attach the brooch to the bodice either with “Jewel it” glue or by hand sewing it with a curved needle.

Click here to go back to the Tutorial Table of Contents.
Princess Peach Gloves Tutorial
Supplies:
Princess Peach accessory kit (Amazon)
Thread
Pins
Hand sewing needle
Nude nylon knee high socks
Reference Image:
1. Cut feet off nylon socks, and hand sew them into the gloves (so they stay up).
Watch this tutorial video here to see how.
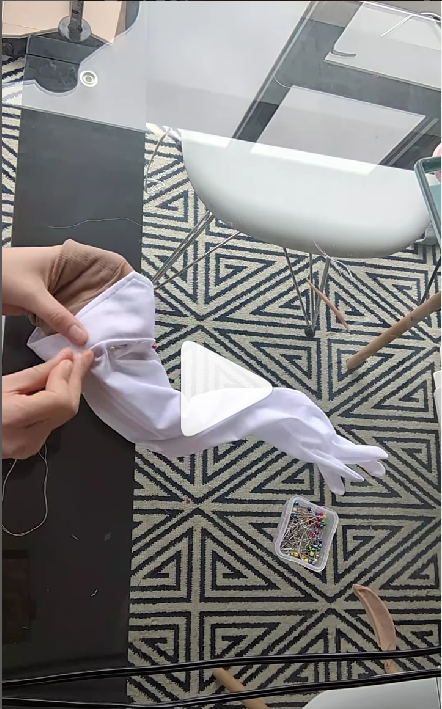
2. Finished result!

Click here to go back to the Tutorial Table of Contents.
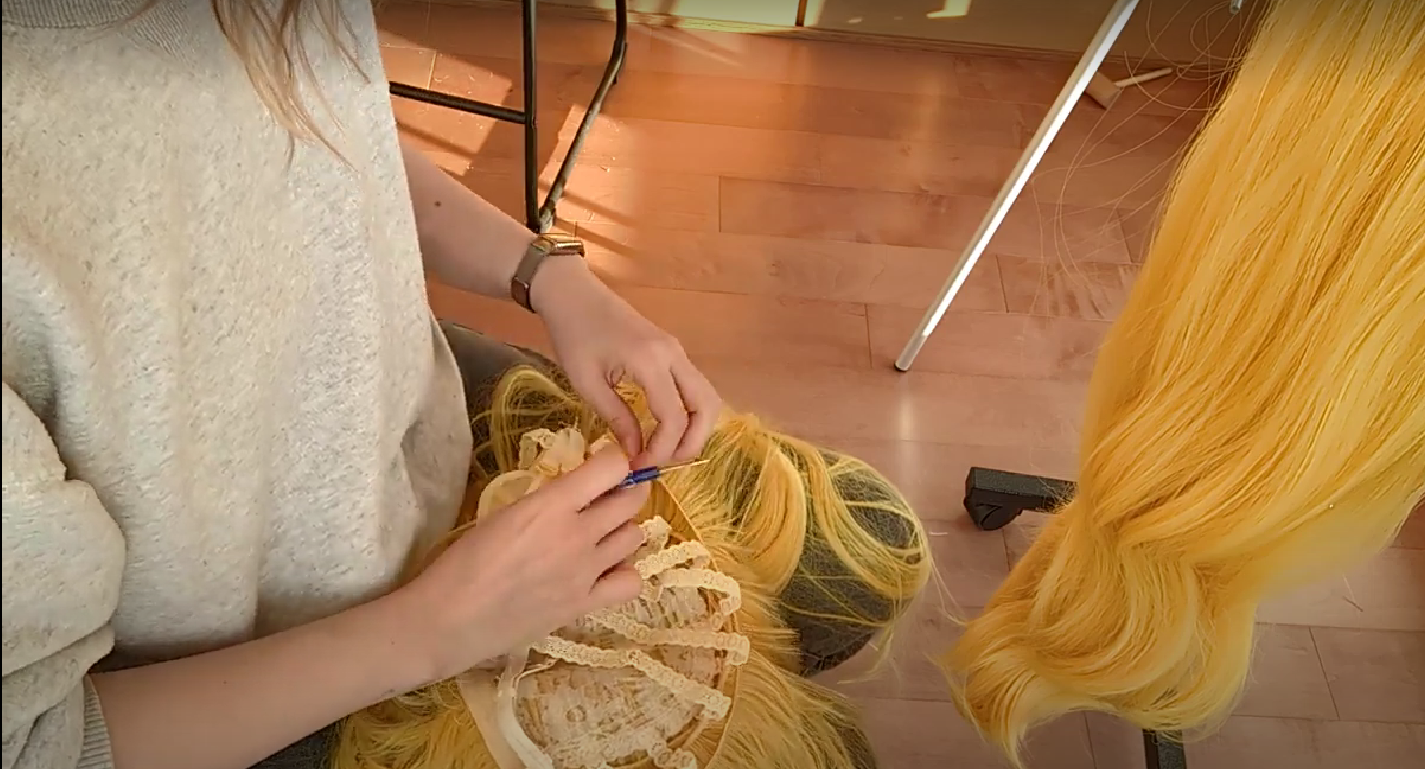
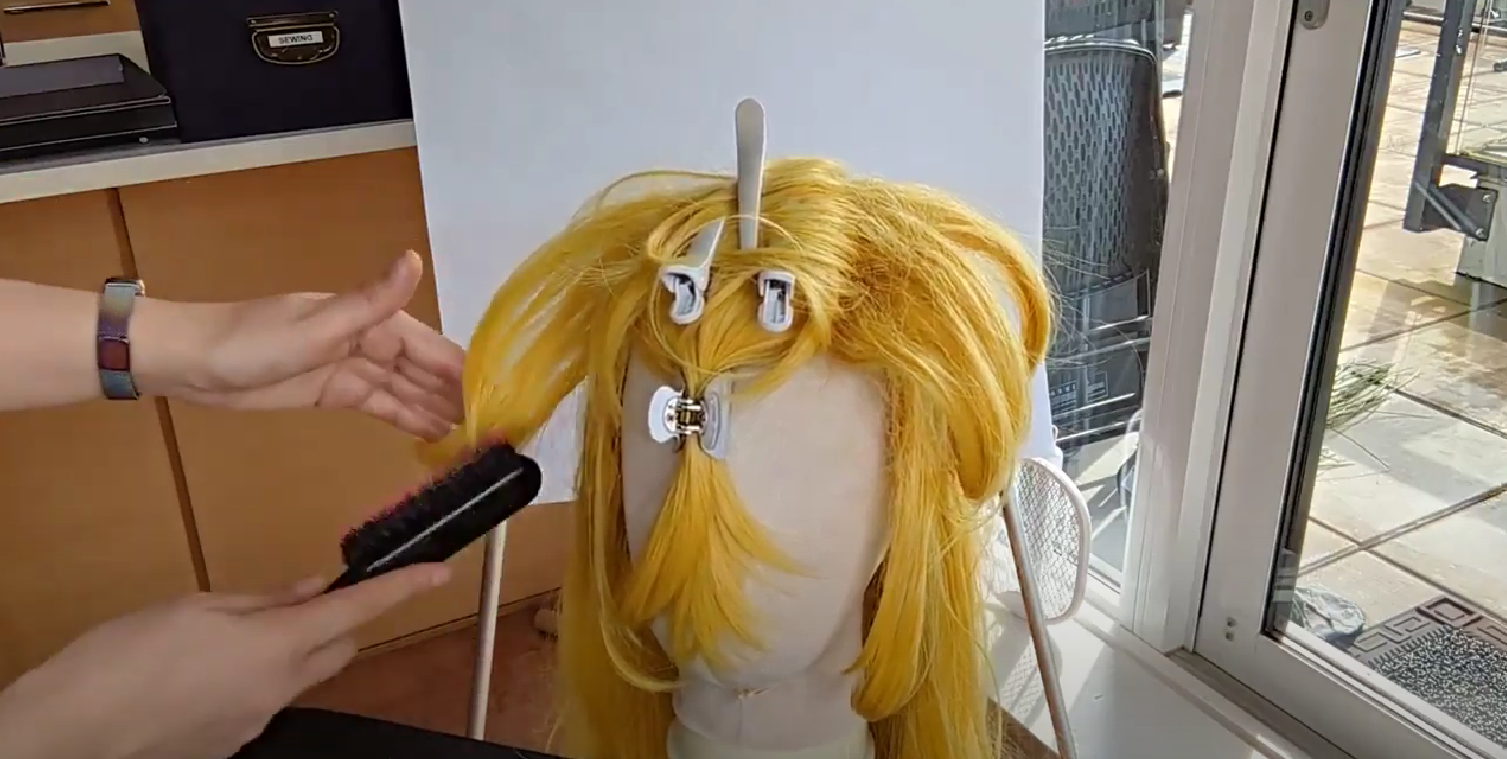
Princess Peach Wig Tutorial
Supplies:
Thread
Hair trimming scissors
2 yellow blonde wigs
Seam ripper
Hair spray: Got2b Freeze Spray
Hair gel: Got2b (Amazon)
Wig mannequin head
Reference Image:
1. Seam rip wig wefts from one wig, and sew them onto the other to create a single wig that is double thickness.
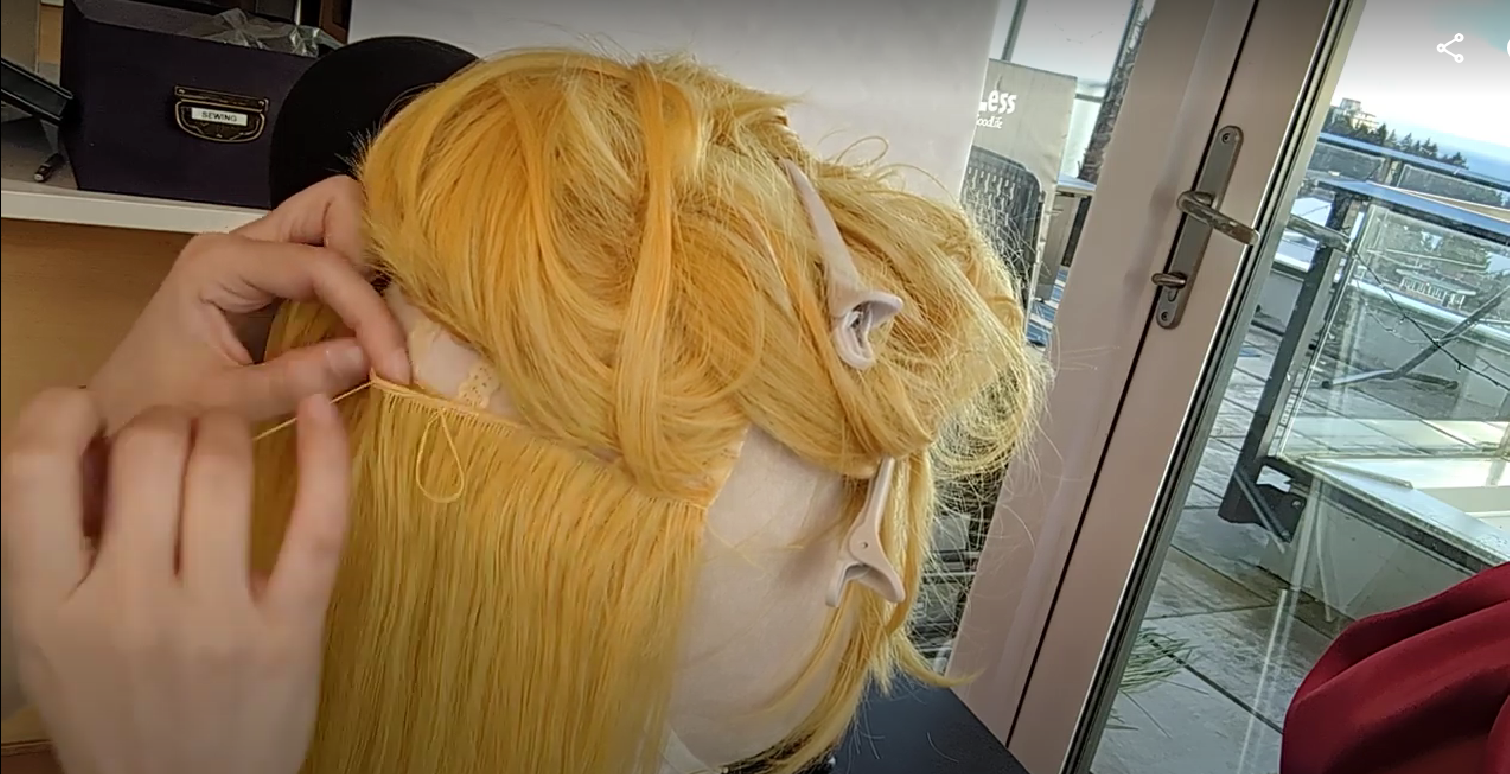
2. Trim front pieces.
Cut ear framing pieces on each side.
Cut medium layer on each side.

3. Add volume & curl to bangs & top layers.
To add volume, be sure to backcomb the sections around her face and head. Leave a top layer of hair unteased so that you can comb it over the backcombed parts and hide the matted texture that happens when you backcomb a lot.
Then, use a handheld steamer to warm the hair and wrap it around a velcro roller (be sure to check if your wig is heat resistant first though… and try to avoid burning your hands).
Leave the curlers in until the hair is completely cool.
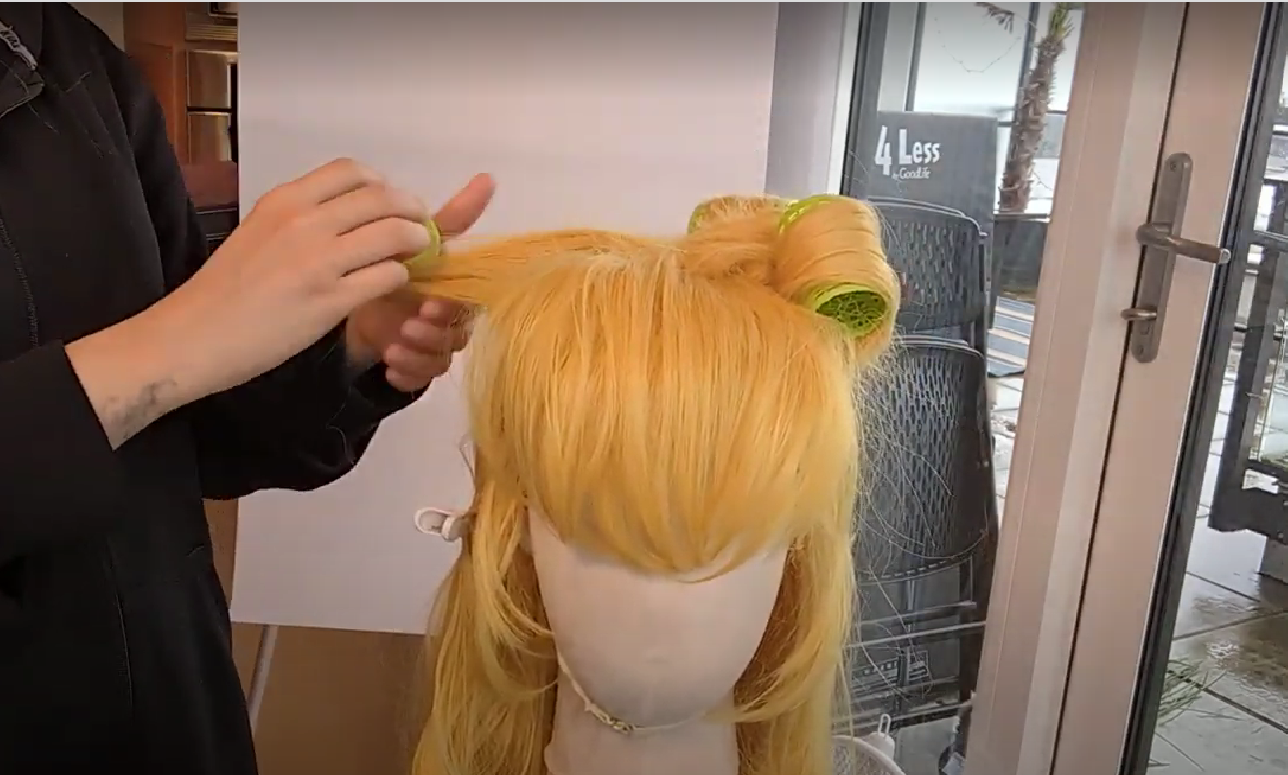
4. Lock in the style with hair spray & gel.
Once the hair is completely cool, take out the curlers and use your hands to mold it into the shape you want, then spray it with hair spray to hold.
Use a little bit of gel on the tips that you want to stay extra pointy (like the peak of her bangs)

5. Sew on crown.
I removed the headband that came with the crown I purchased, and instead chose to hand-sew the crown to the wig using stretchy jewelry thread. I liked this way better because it’s invisible.
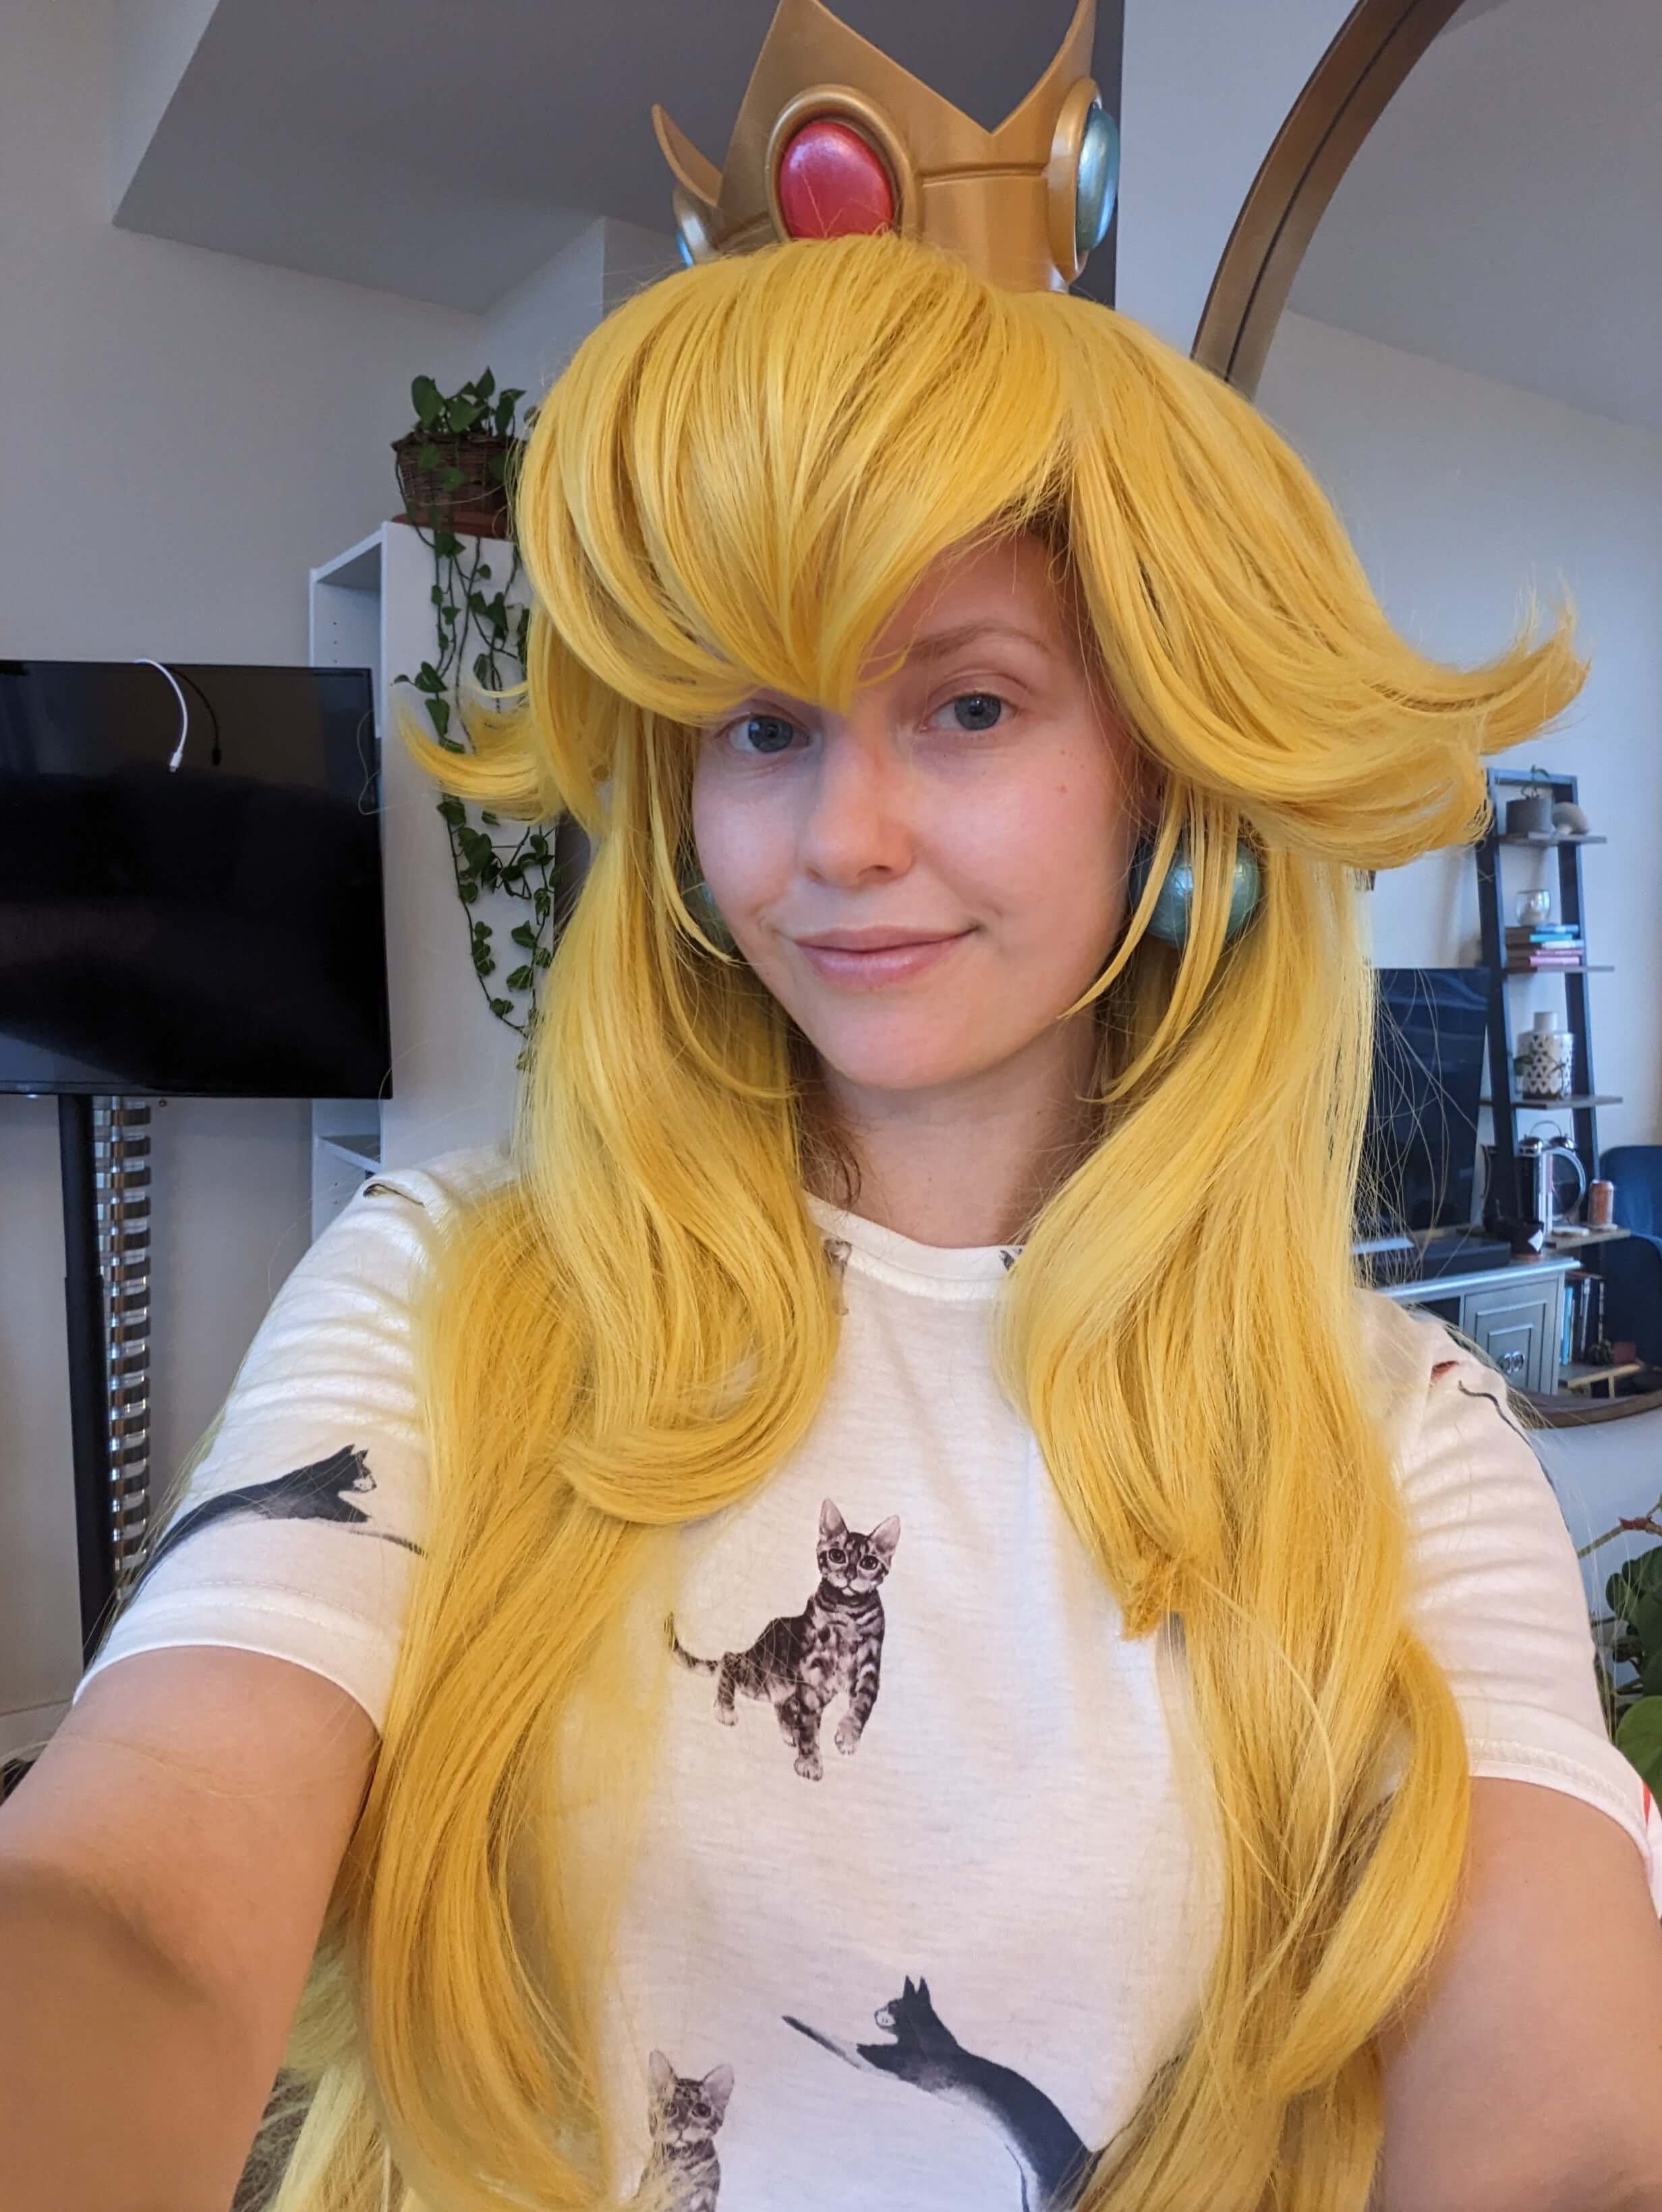
6. Finished Result!
Click here to go back to the Tutorial Table of Contents.
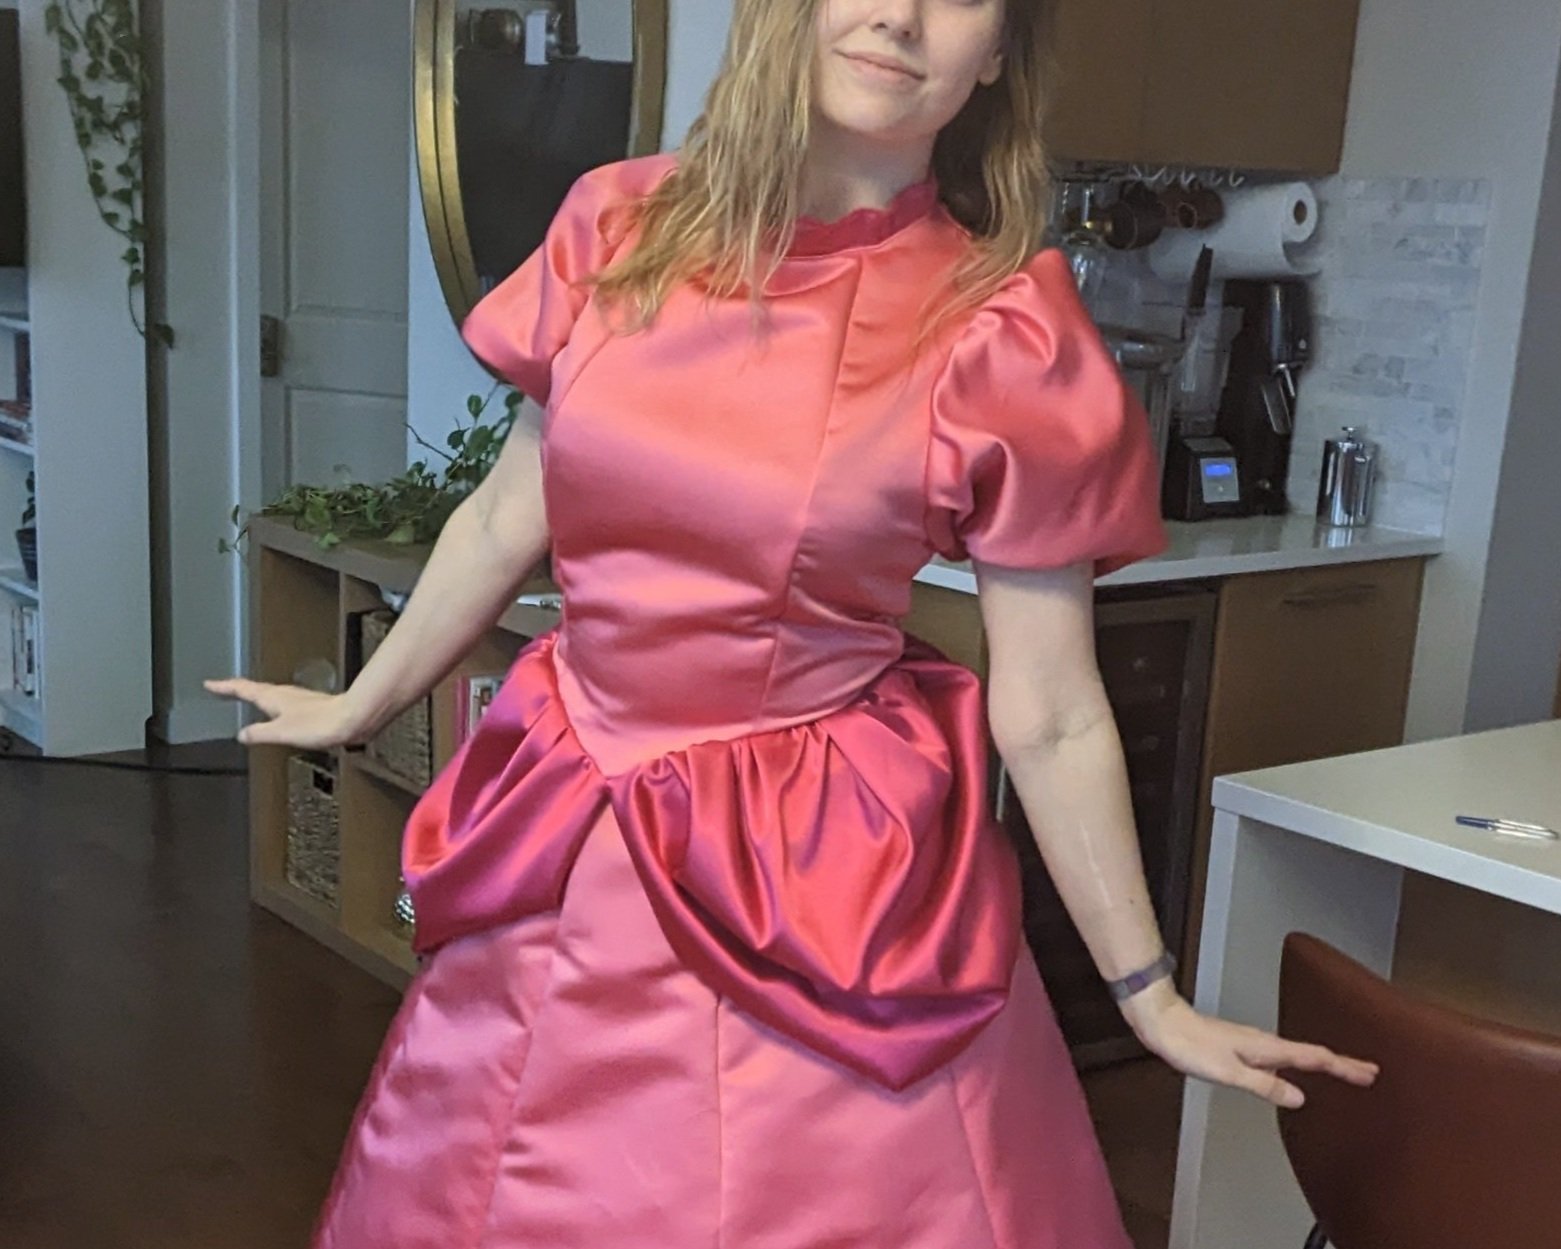
END RESULT:
FINISHED DIY PRINCESS PEACH COSTUME
Once you've got all your pieces together, it's time to put it all together and promenade around in your DIY Princess Peach costume! Here's how mine turned out:

Photographer: Randy Portraits - MDSnapShots Productions
I hope you found this tutorial helpful! Remember, this is just ONE of many ways to make a DIY Princess Peach costume. If you have any questions about my process, drop ‘em in the comments and I’ll try my best to clear things up. 🚀
And don't forget to follow me on social media for all the latest updates and cosplay-related tips!
With love,
Your fellow Royal Mushroom Majesty,

PS. Want to stay up to date on all things Queen Cosplay? Sign up for my newsletter by entered your name and email below to get free cosplay resources, tips, and insider updates delivered straight to your inbox!
Bonus DIY Princess Peach costume resources that I found helpful:
Princess Peach Wig Tutorial by 8Bit Neko
How I do my Famous Princess Peach Makeup by DinoBunny Cosplay
The Cosplay Book of Ballgowns: Create the Masterpiece of Your Dreams! by Cowbutt Crunchies